Images

Carrot Cake

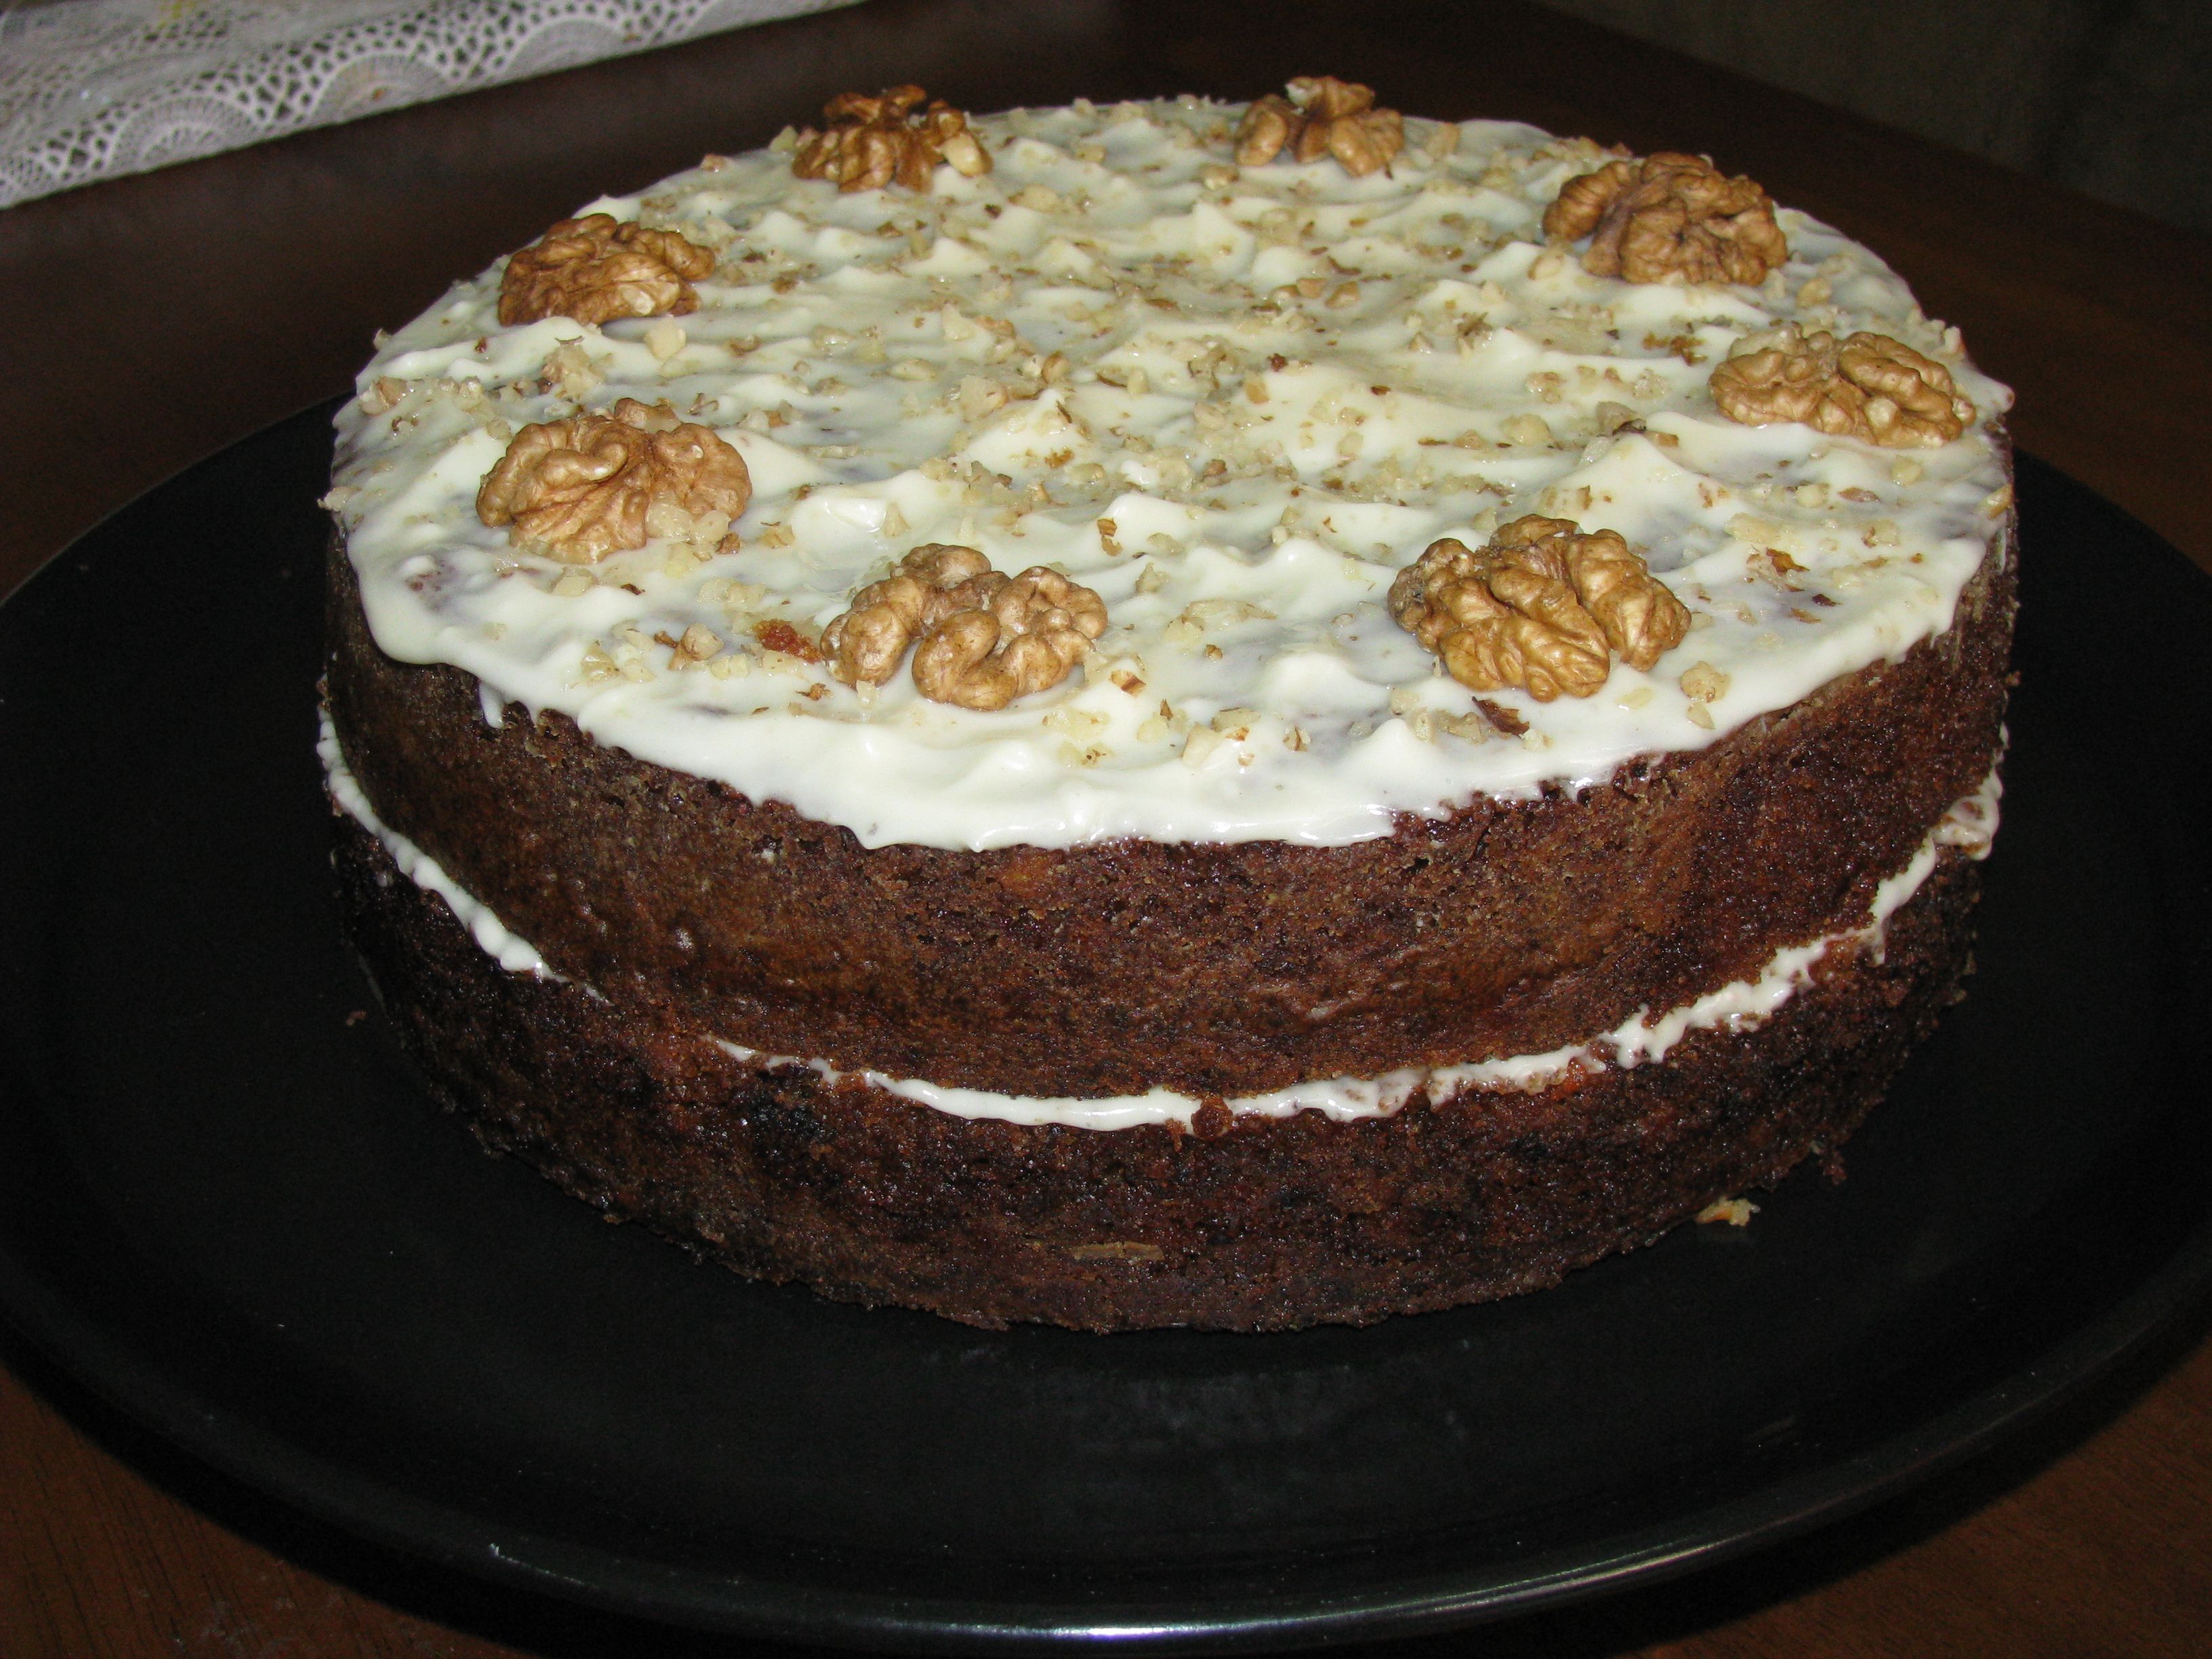
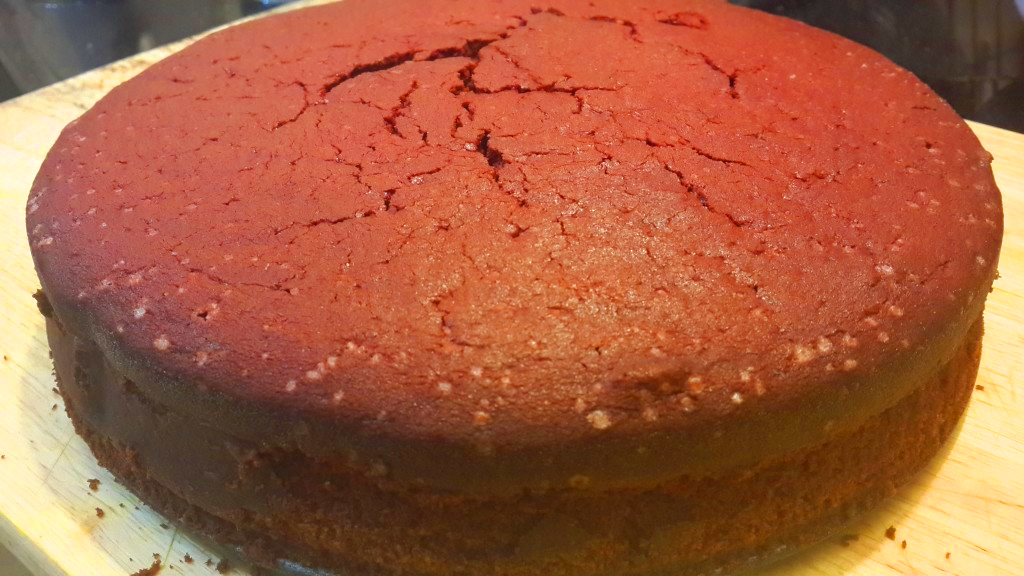
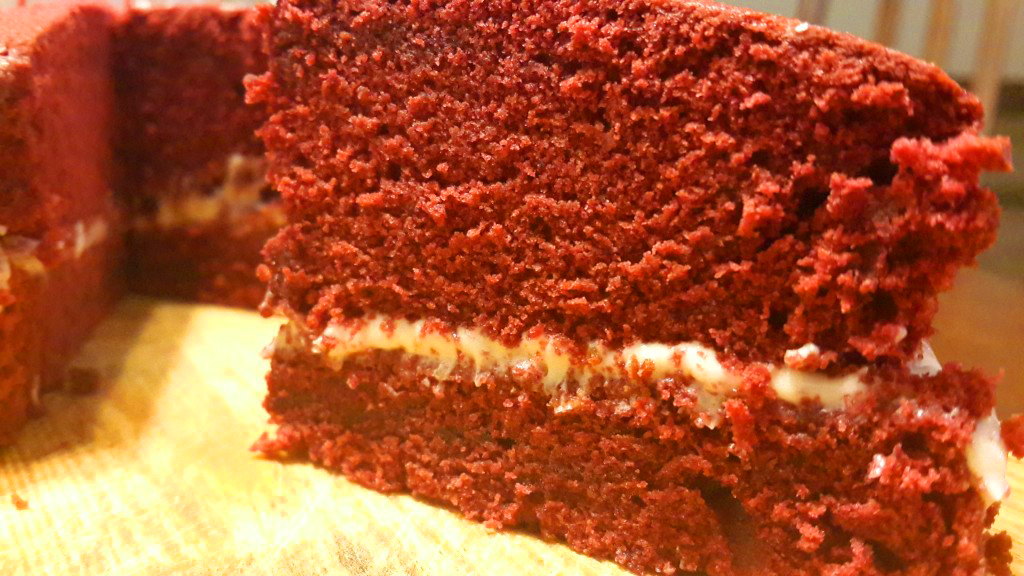
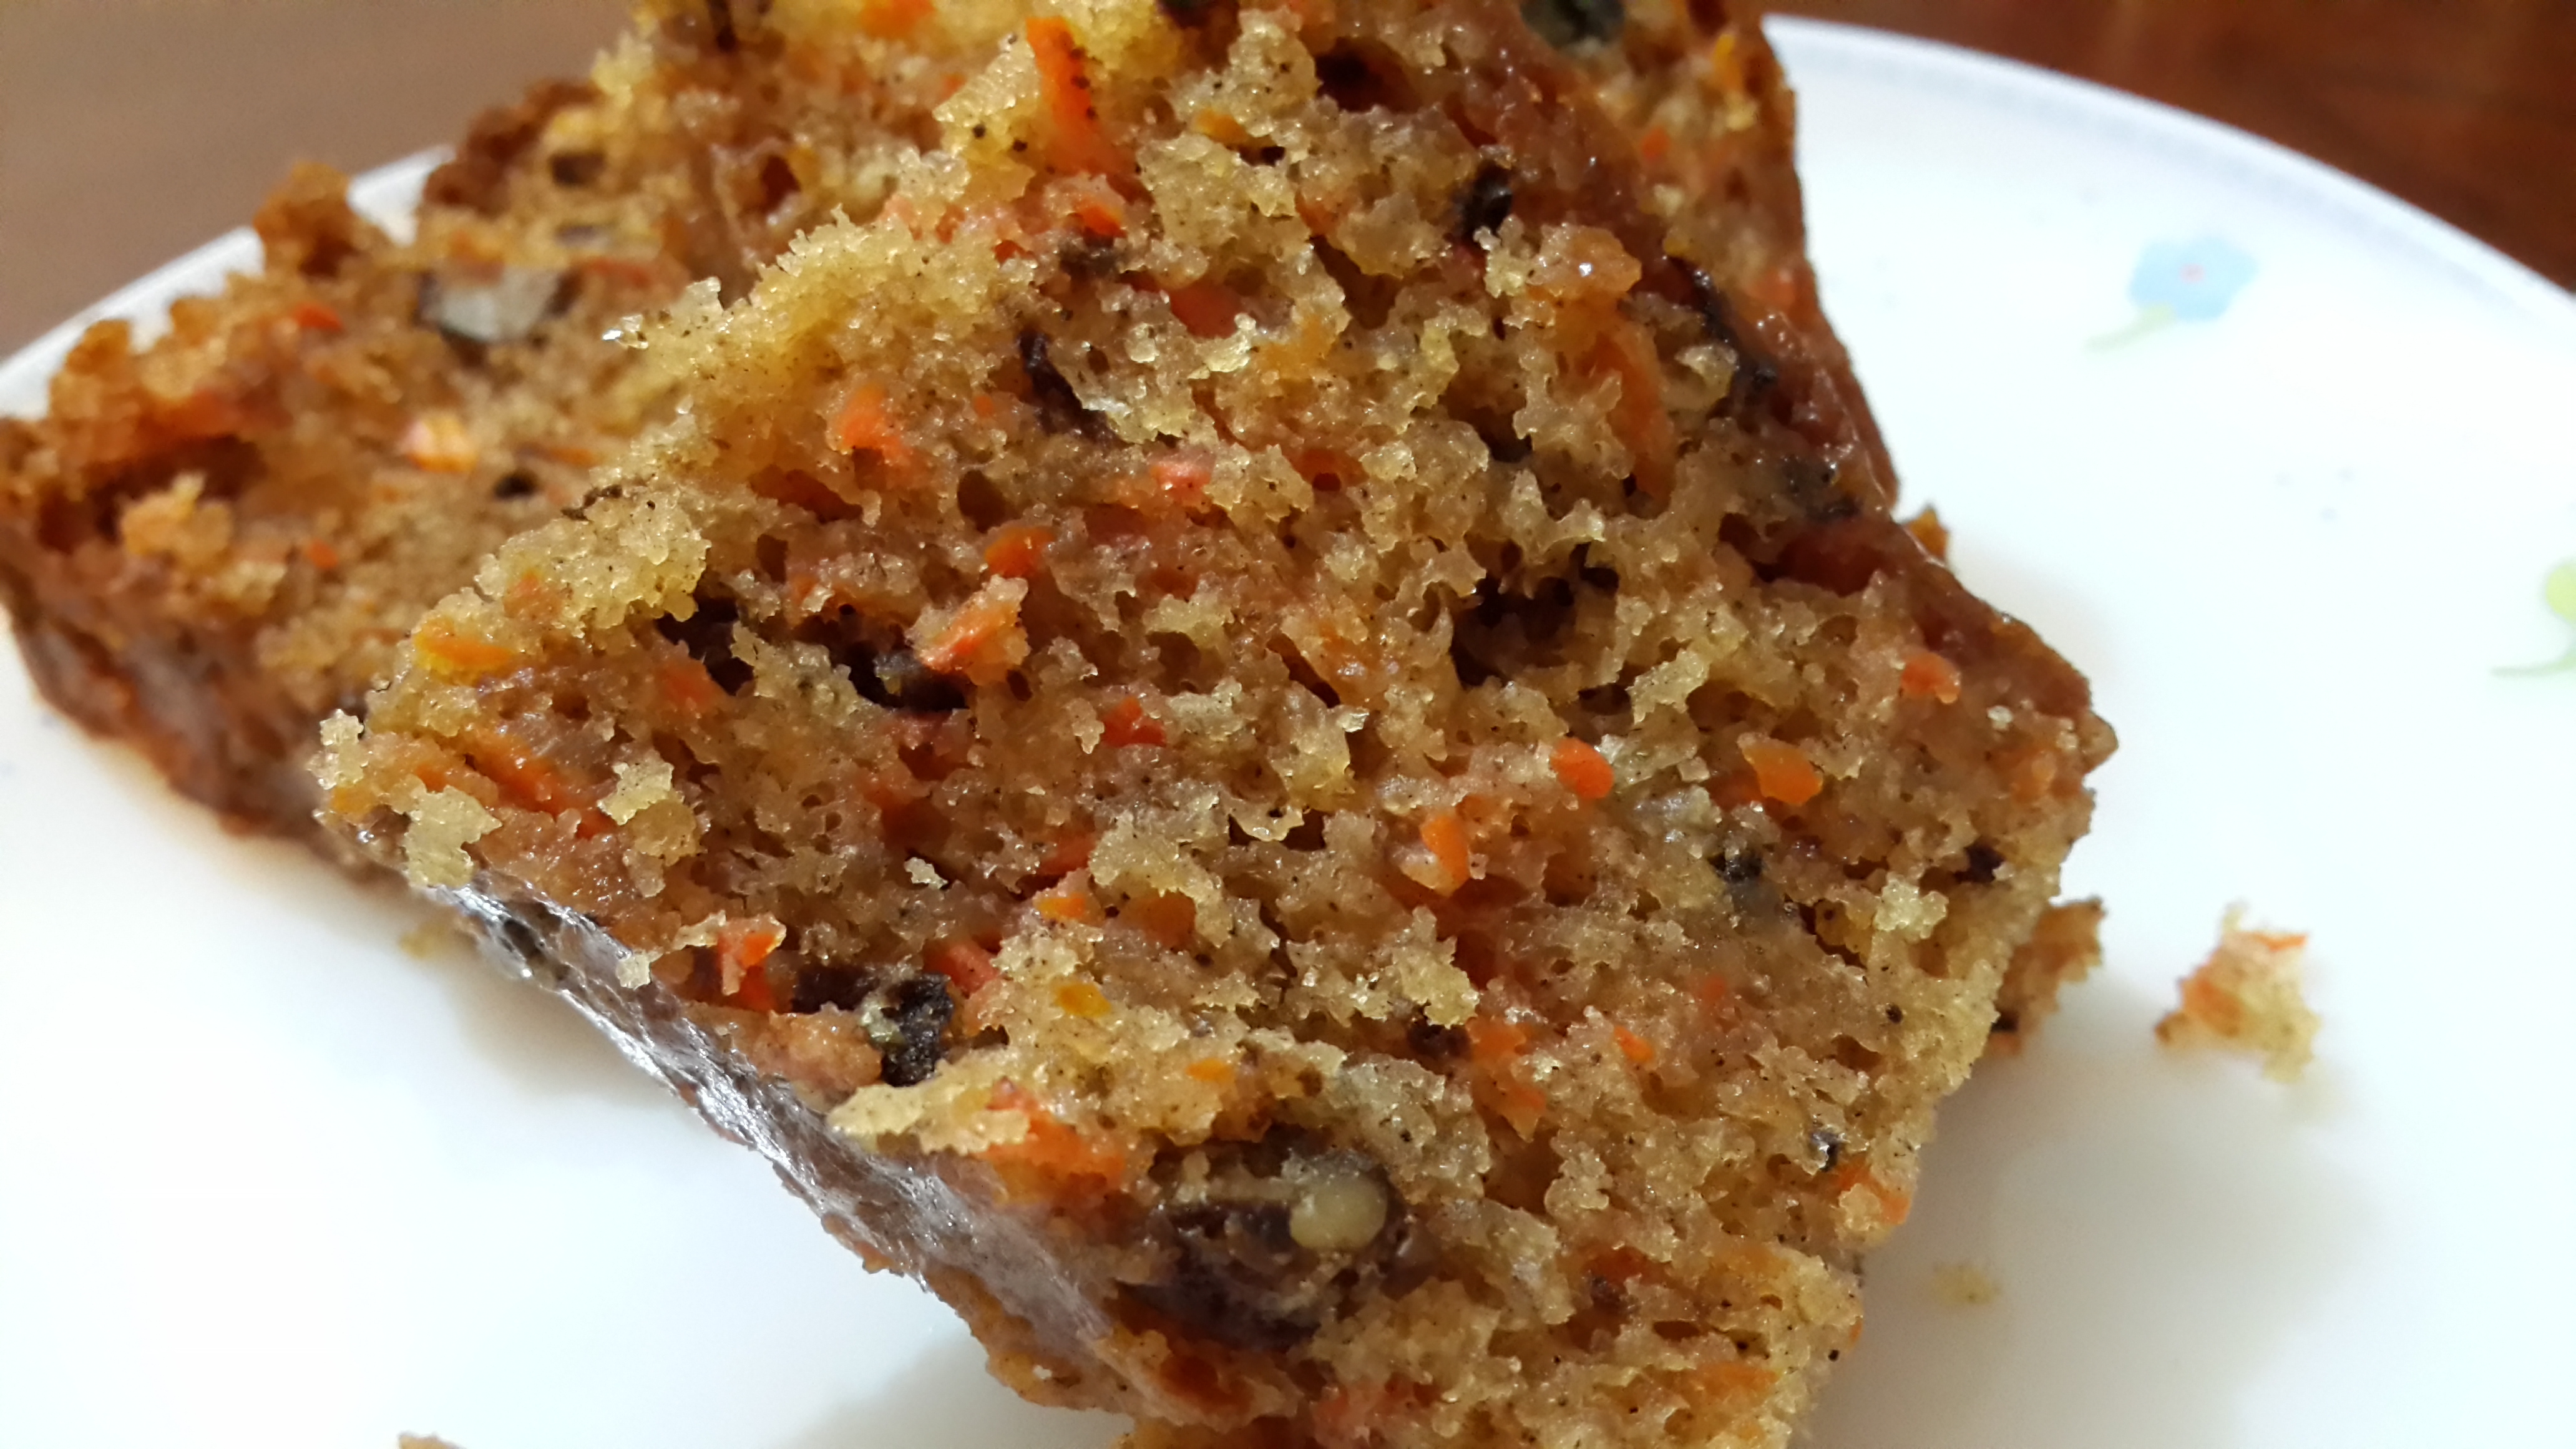
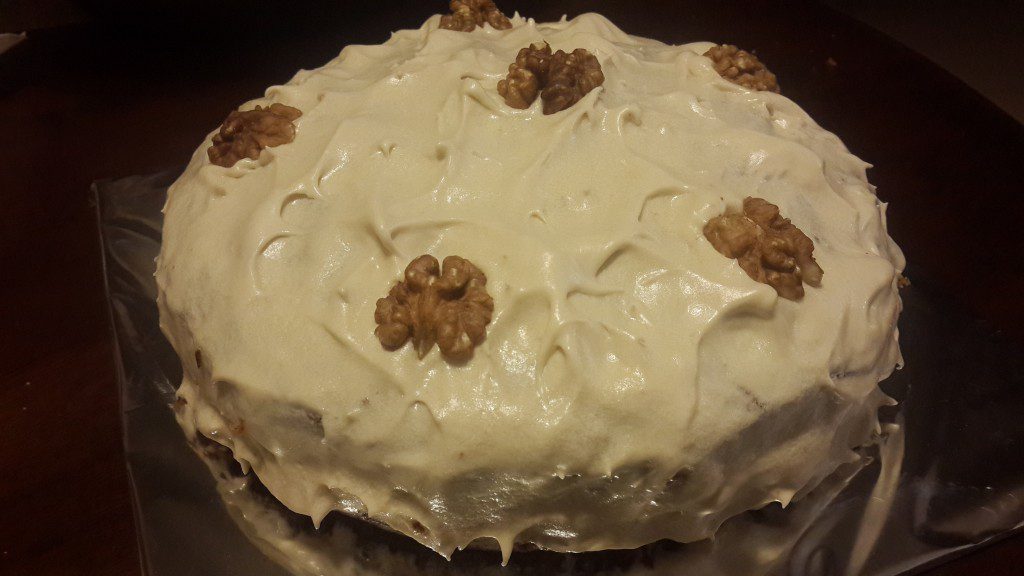
My all-time favourite cake!  It’s best eaten warm in any weather. It’s rich, moist, full or flavour, and is the prettiest cake I’ve ever seen!


“If carrots got you drunk, rabbits would be pretty messed up.” – Mitch Hedberg
The Fact: During World War II, due to food scarcity (except that of carrots and potatoes), the Government resorted to an oversupply of carrots and suggested, through propaganda, that the Royal Air Force’s exceptional night-flying success was due to eating high carotene-content carrots. The ruse sharply increased carrot consumption and took the pressure off other food supplies.
The Inspiration: Our family has always been very enthusiastic about baking cakes for birthdays rather than ordering ready-made ones from the famous Baker’s Basket or Copper Chocs. It all began with mum, who, since we were born, baked us our favourite pink or green cakes (the green, creepy in hindsight) without a whisk or cake beater. I still remember my brother, sister, and I gathered around her in our kitchen as she mixed the cake batter with her bare hands and transformed a then, boring whitish batter into a fascinating pink or green. And ever since, the tradition has continued, though now, with slightly upgraded equipment and with the responsibility having shifted from mum to me.
As I sat thinking about what cake to bake for my 24th birthday, rather bored by the myriad chocolate versions, and certainly considering healthier options, I stumbled across the Carrot Cake recipe on one of my favourite baking websites, Joy of Baking. And ever since, this comforting, moist, pretty (the orange flecks are simply adorable), spice cake has been my all time favourite and will never go out of fashion in my home!
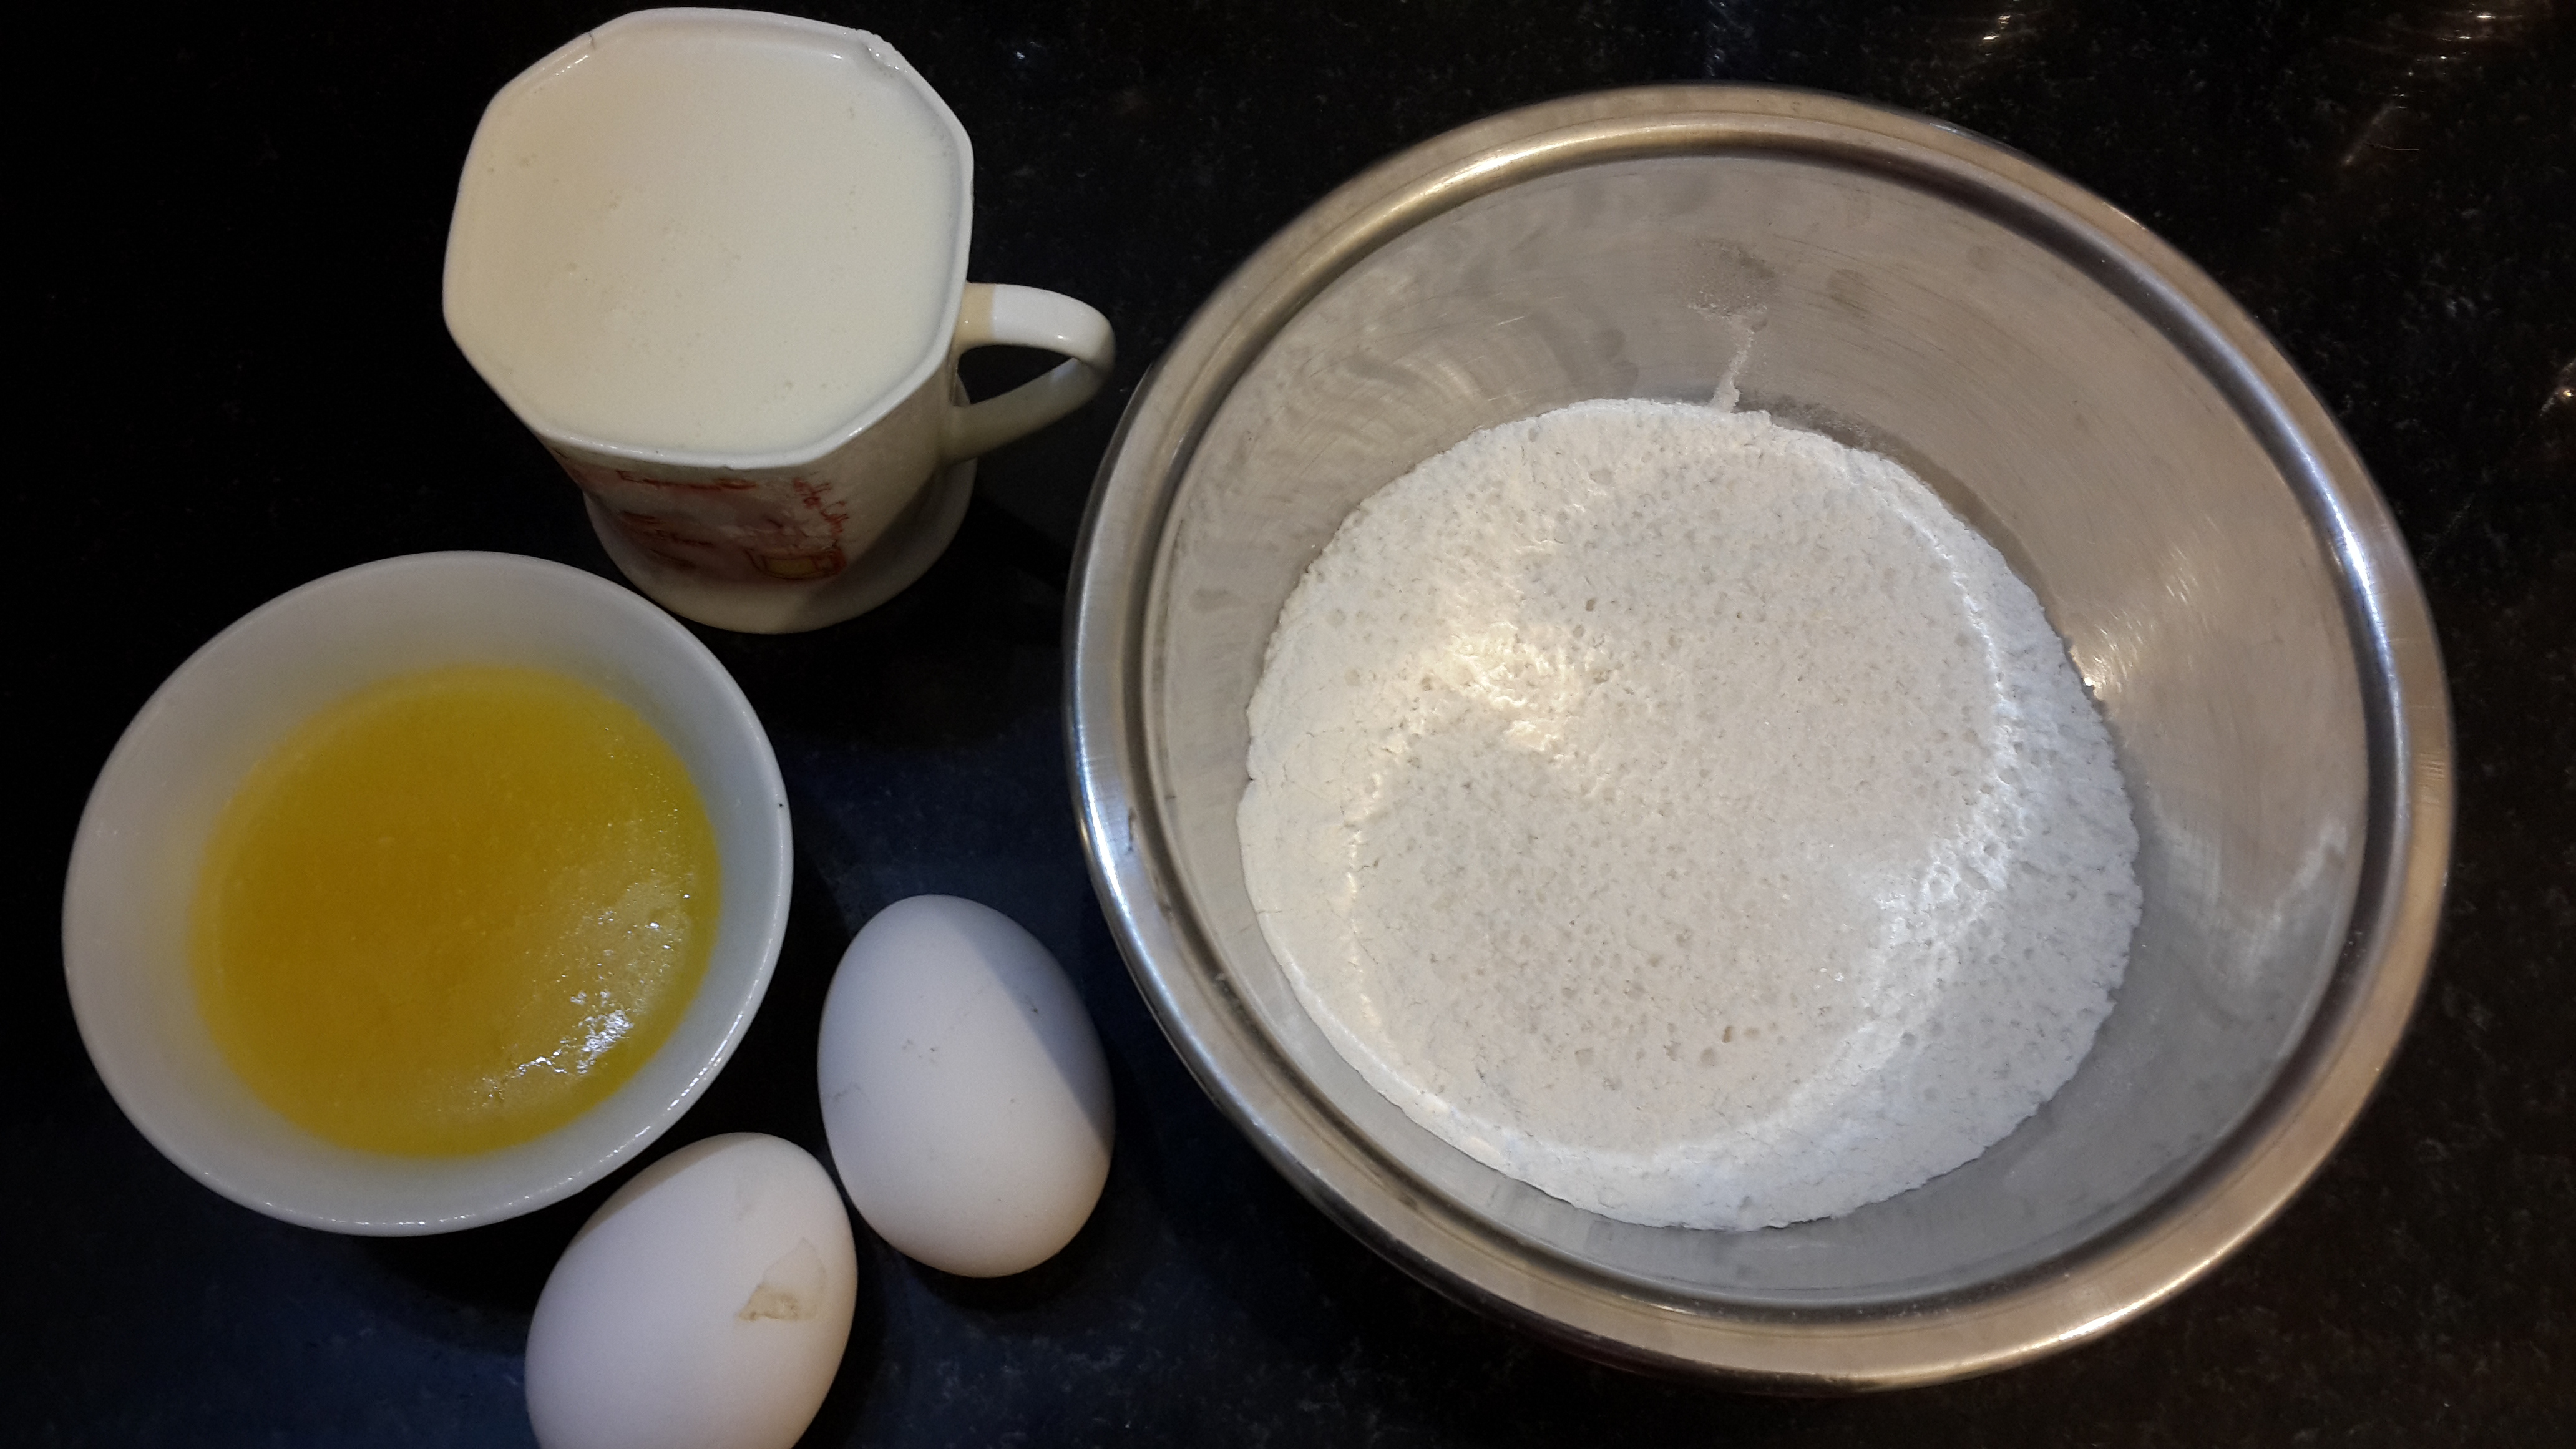
The Ingredients

This cake serves approx. 15–20 people.
 

Dry ingredients

  • 250gms/2 cups flour (for a healthier cake, use wheat flour, but note that the batter will turn out denser and a little dry)
  • 250gms granulated sugar (if you’re using really sweet carrots, reduce the sugar by about 100 grams and then, gradually increase by tasting)
  • 100gms roughly chopped and lightly toasted walnuts (for a more nutty cake, throw in some more; you could toast them on a pan/in a microwave/ in the oven)
  • 2 tsp freshly ground cinnamon powder (throw in an extra teaspoon for a stronger flavour; I do for the taste and aroma)
  • 1 tsp baking soda
  • 1.5 tsp baking powder
  • 1 tsp salt

Wet ingredients

  • 350gms/2.5 cups not-too-finely grated carrots (carrots should be sweet; also remember to measure the carrots after grating – so start with half a kg of carrots)
  • 4 large or 5 small eggs
  • 240ml unflavoured oil (such as vegetable or canola oil)
  • 2 tsp vanilla extract (preferably pure, if not, don’t worry about it)
  • Optional:  3 – 4 tbsp/half a cup pineapple syrup (although optional, the syrup adds a glorious taste – remember to lower your sugar quantity if you add more syrup  vary the quantity until you can lightly taste the pineapple flavour)

The Method

  • Preheat the oven to 180C or 350F.
  • Prepare your cake tin (standard 9 x 2 inch) by spraying it with grease or lightly greasing it with butter.
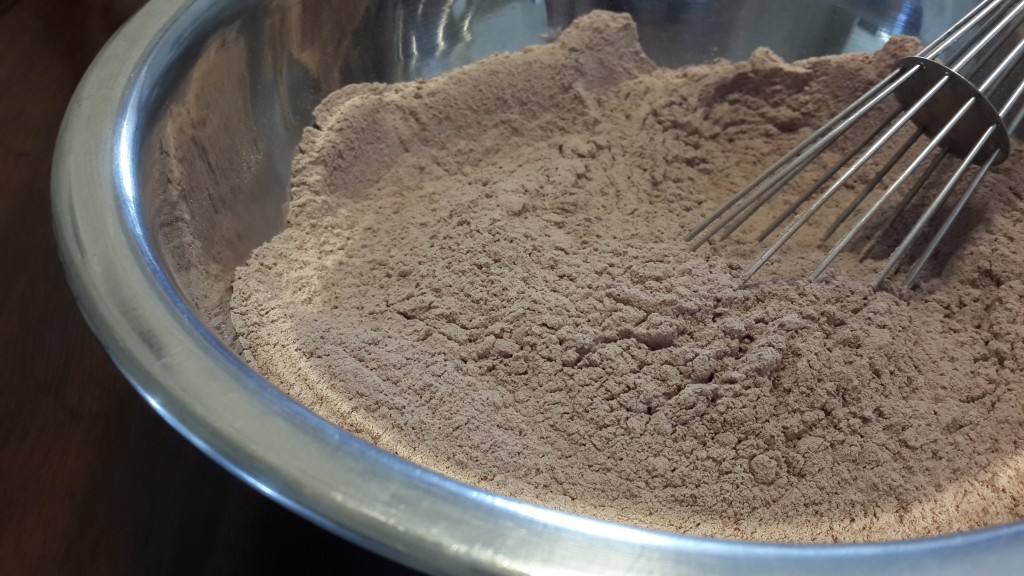
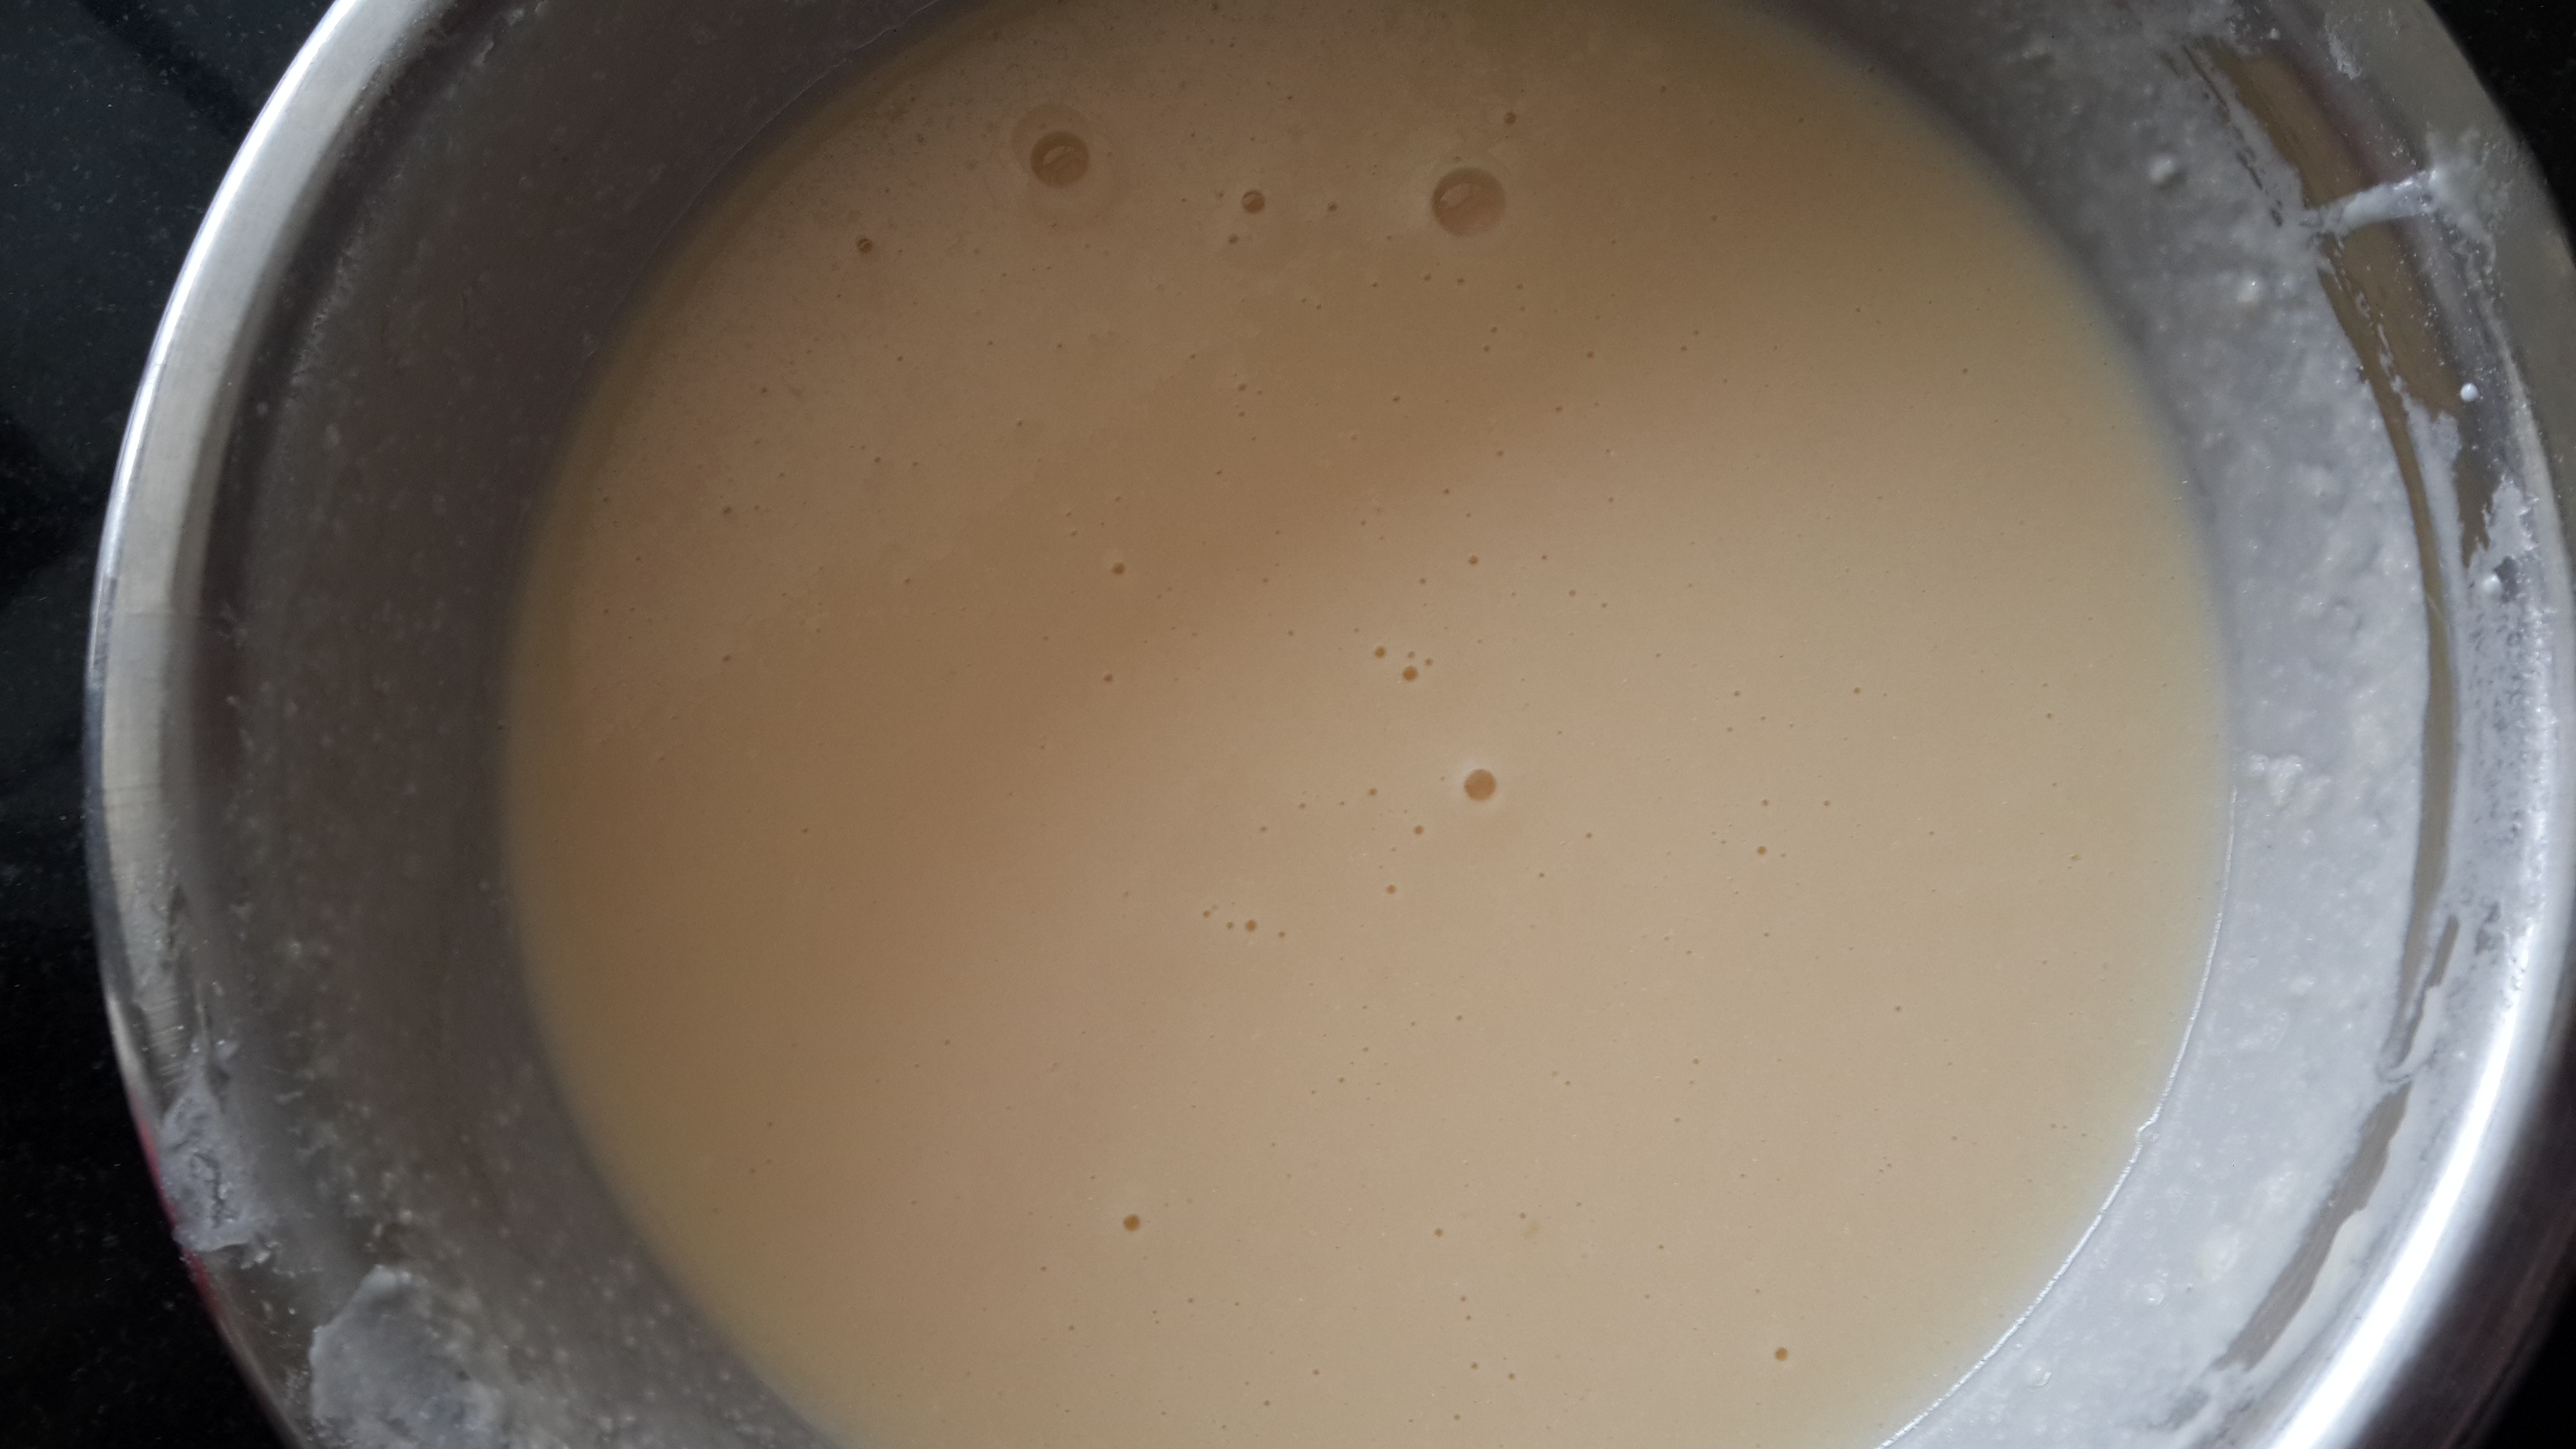
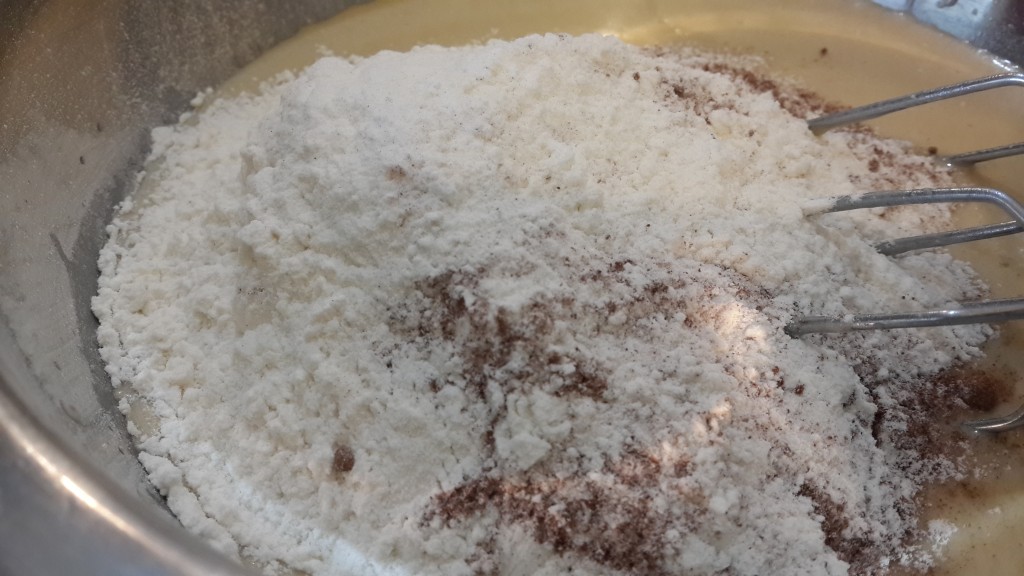
  • Whisk together the flour, baking soda, baking powder, salt and cinnamon powder.
  • In a separate bowl whisk the eggs for about a minute until frothy.
    Eggs whisked until frothy
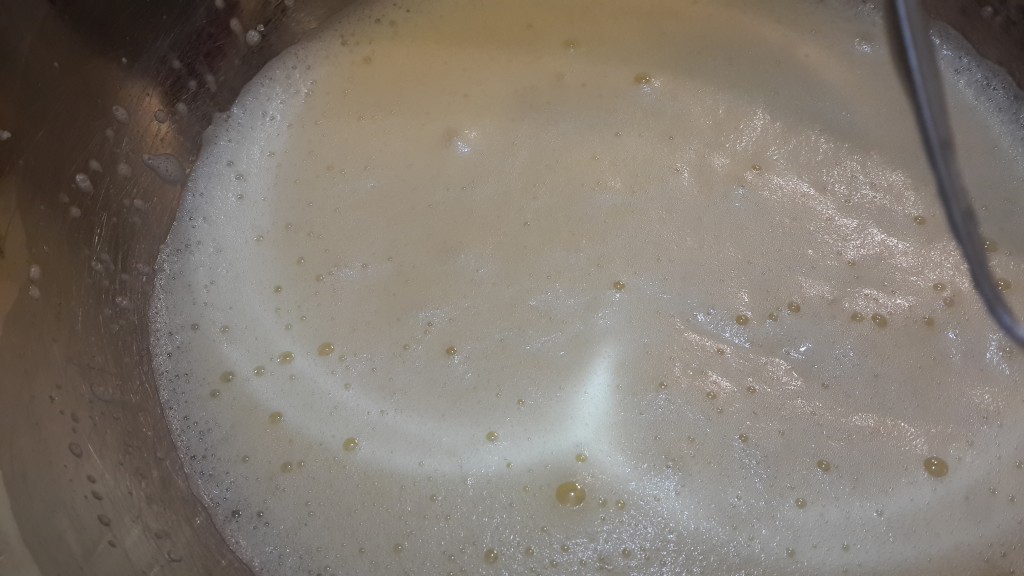
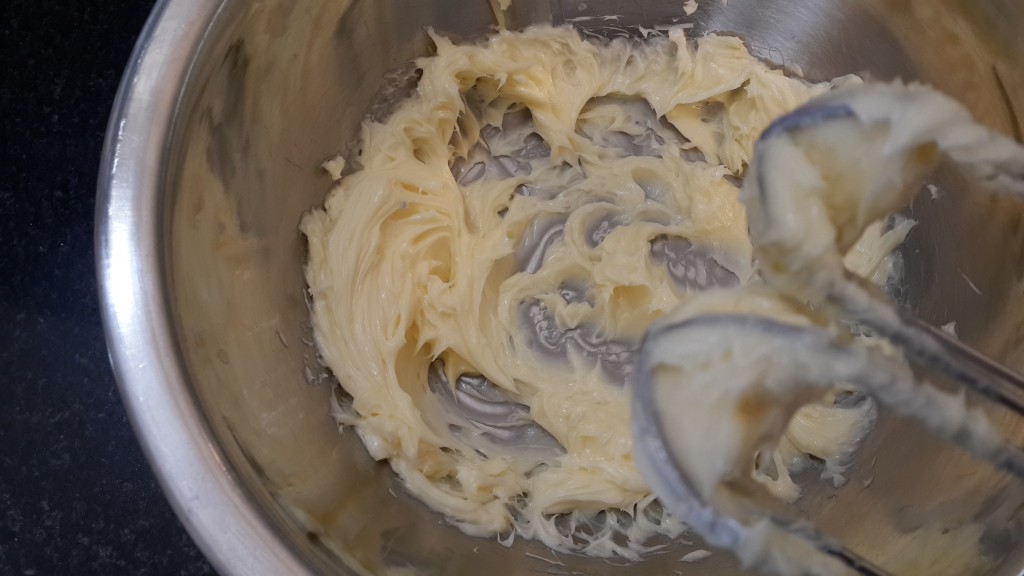
  • Add the sugar to the eggs and whisk until the mixture is slightly stiff and almost whitish (and has lost most of the yellow tinge). Note that the sugar should have more or less dissolved by now.
  • Gently pour in the oil in a steady stream and beat until incorporated (do not over beat the mixture; it might incorporate too much air).
  • Add the vanilla extract and whisk in.
    Eggs, sugar, oil and vanilla whisked together
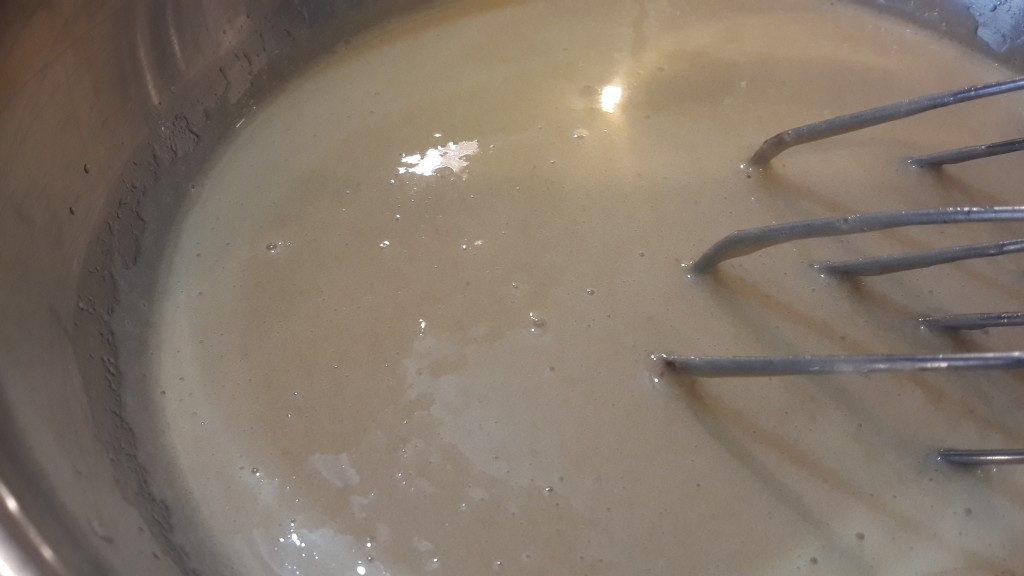
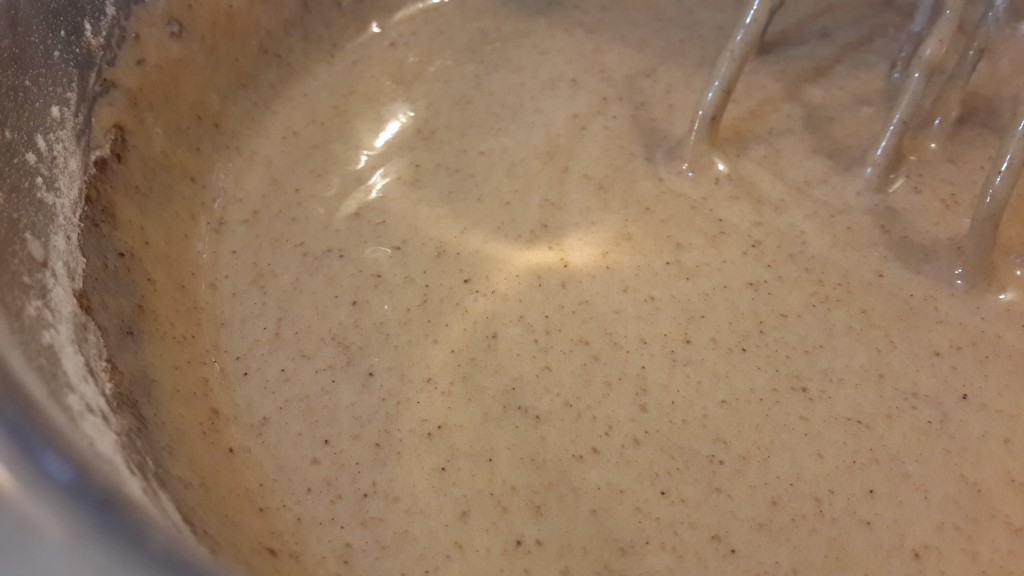
  • Now, whisk in the flour mixture, just until incorporated (again, do not over beat).
    Adding the flour, cinnamon powder and baking powder to the wet ingredients

    Carrot cake batter in progress

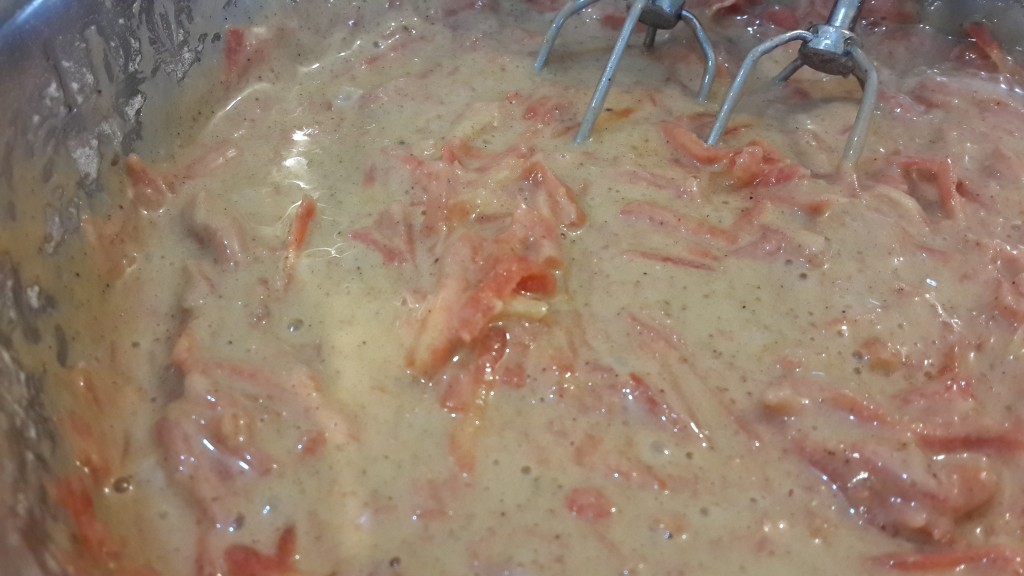
  • Gently, fold in the grated carrots and the walnuts (fold in by making an ‘8’ motion with your spatula; do not beat this in).
    Adding grated carrots to the carrot cake batter

    Adding walnuts to the carrot cake batter

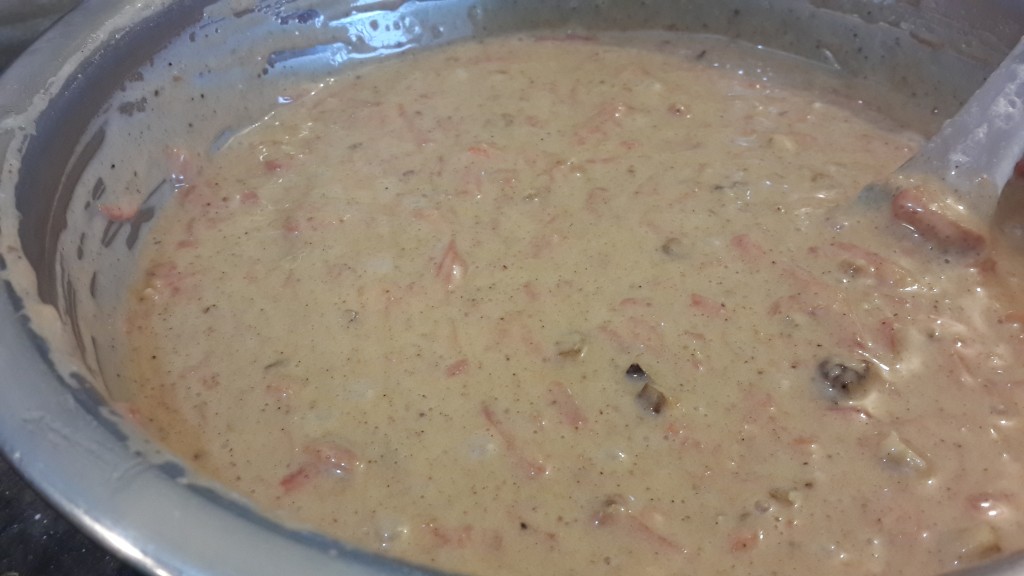
  • Add pineapple syrup. (Taste the batter and adjust sweetness by adding sugar or pineapple syrup. You should be able to taste the pineapple flavour. Of course, don’t overdo it or the cake will be too sweet.)
    Carrot cake batter
  • Pour mixture into the prepared cake tin(s) and put it into the oven.
  • Bake for about 40 minutes or until a toothpick inserted into the centre of the cake comes out clean. (This might take longer for larger quantities or if your batter is very dense. In such situations, keep the cake in for another 10-15 minutes and check again.)
  • Remove cake from the oven and cool on a wire rack

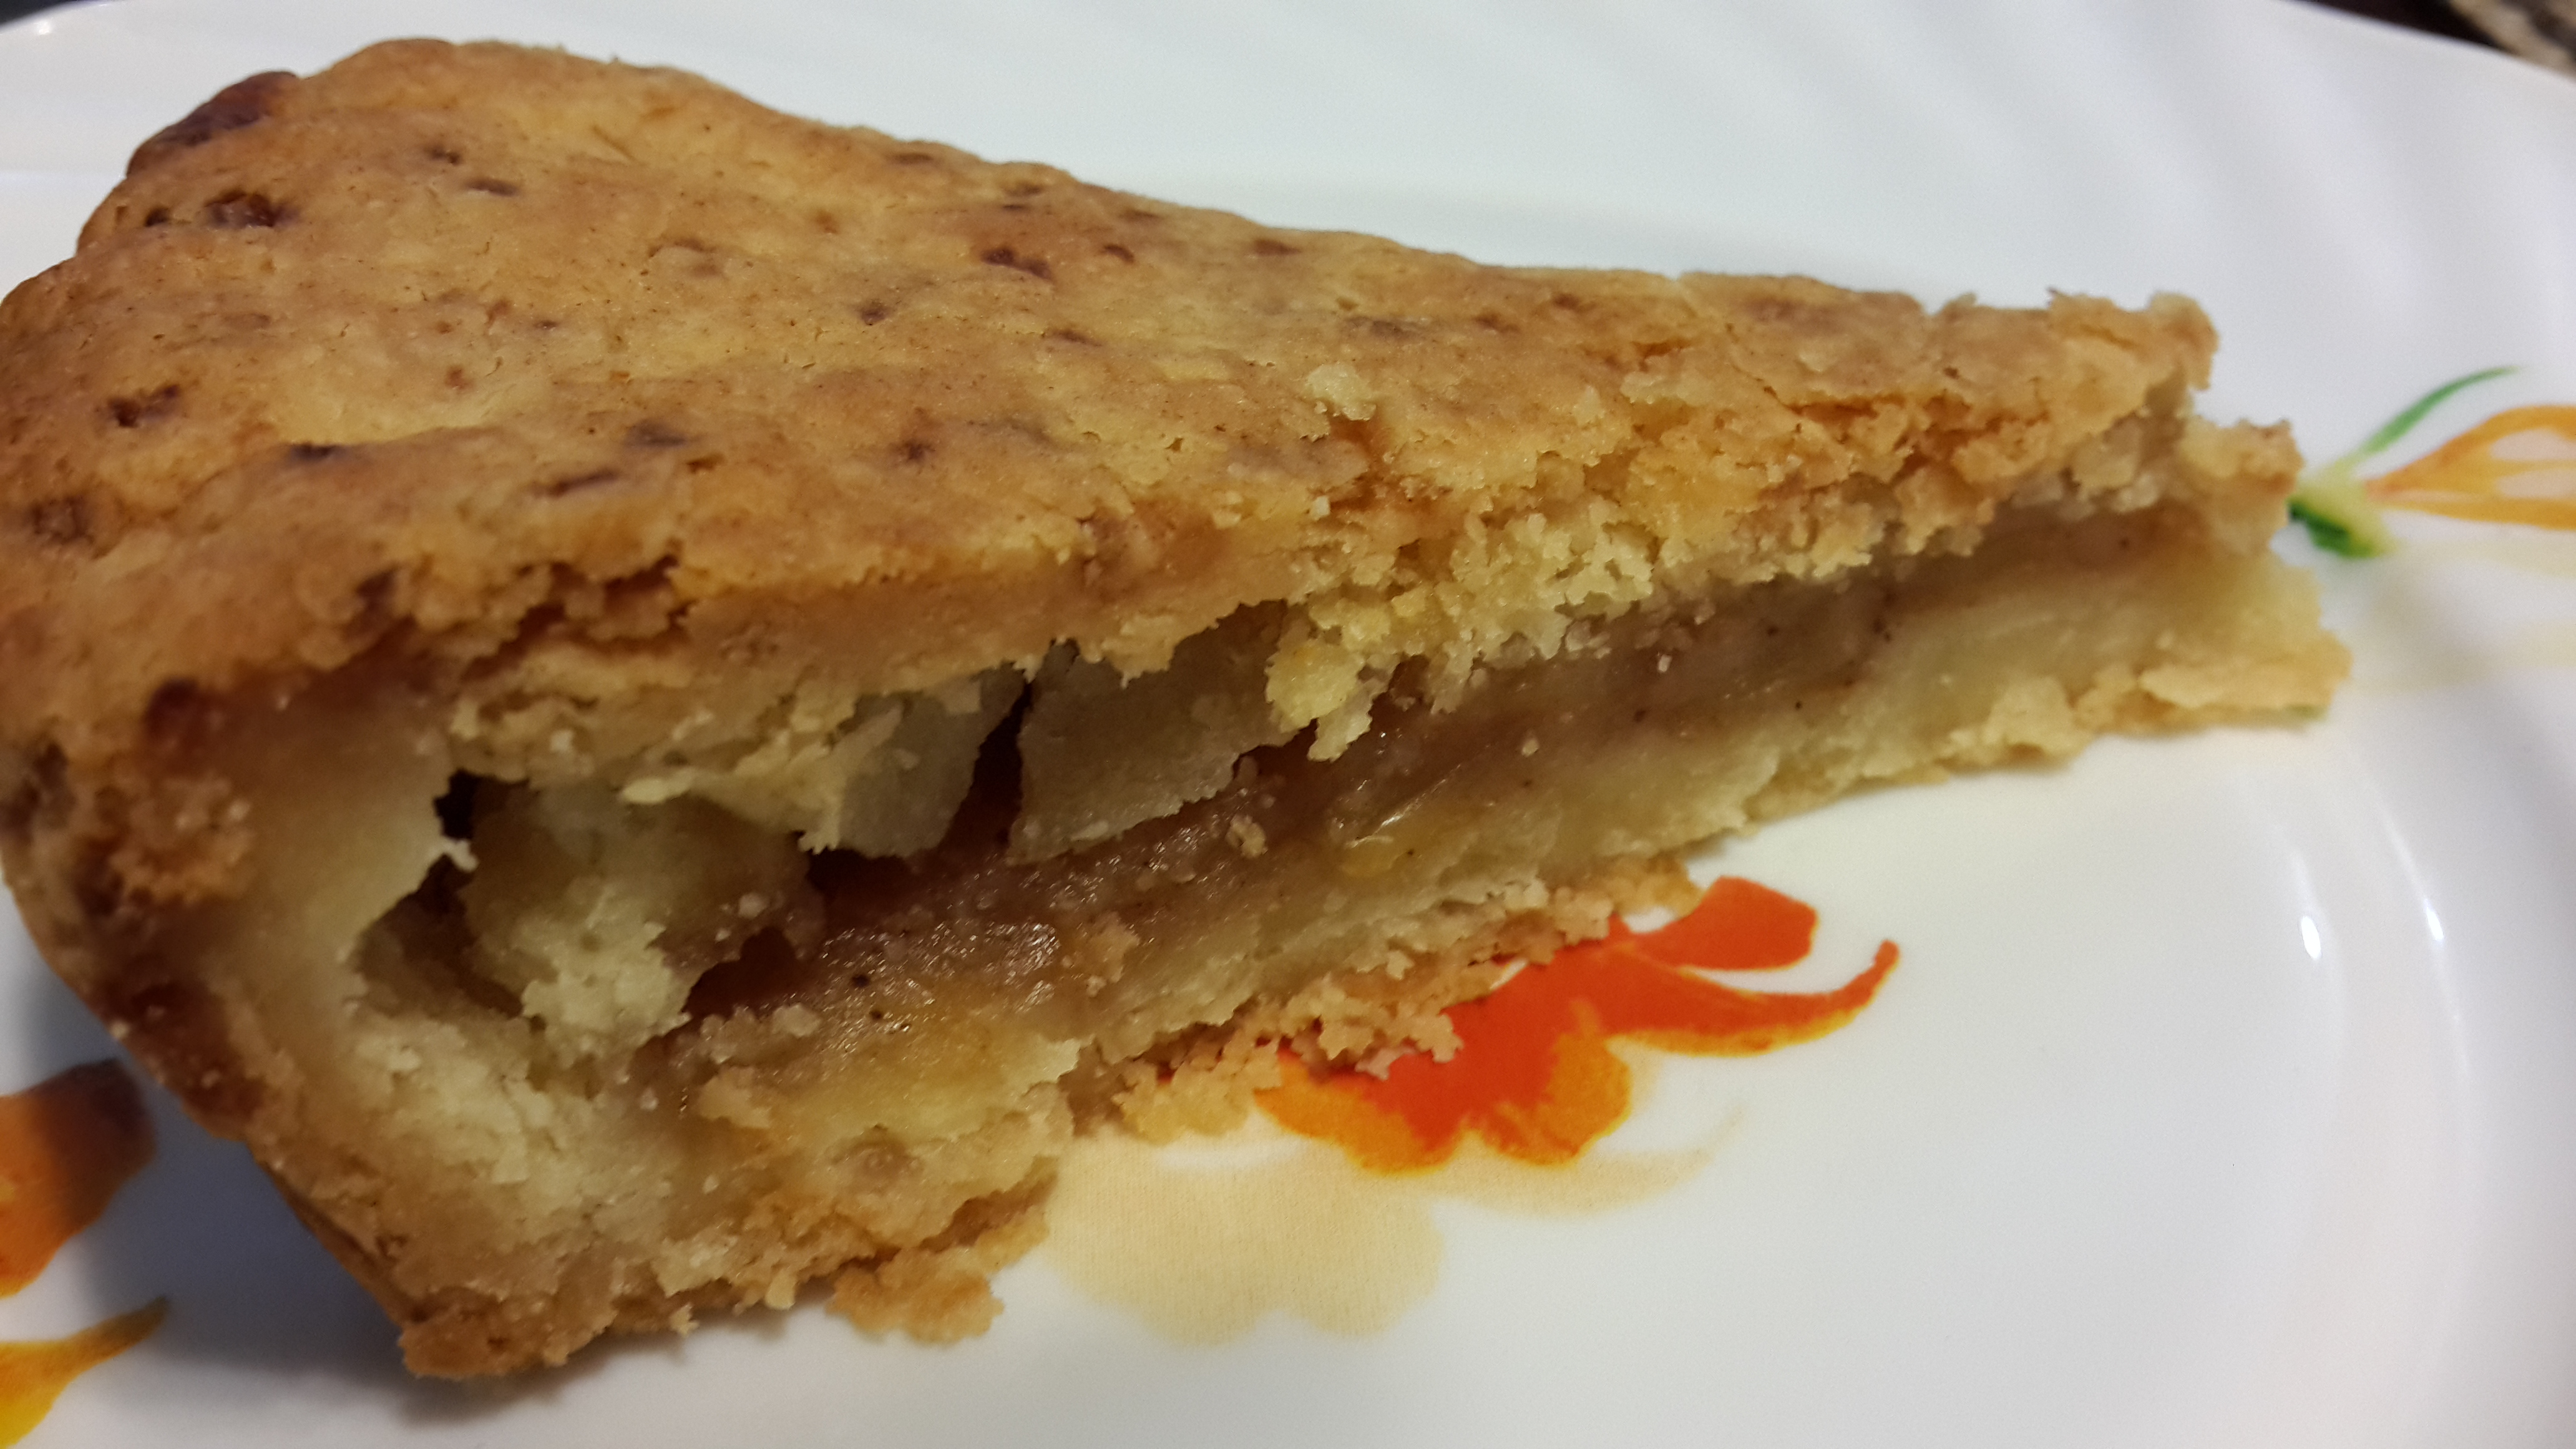
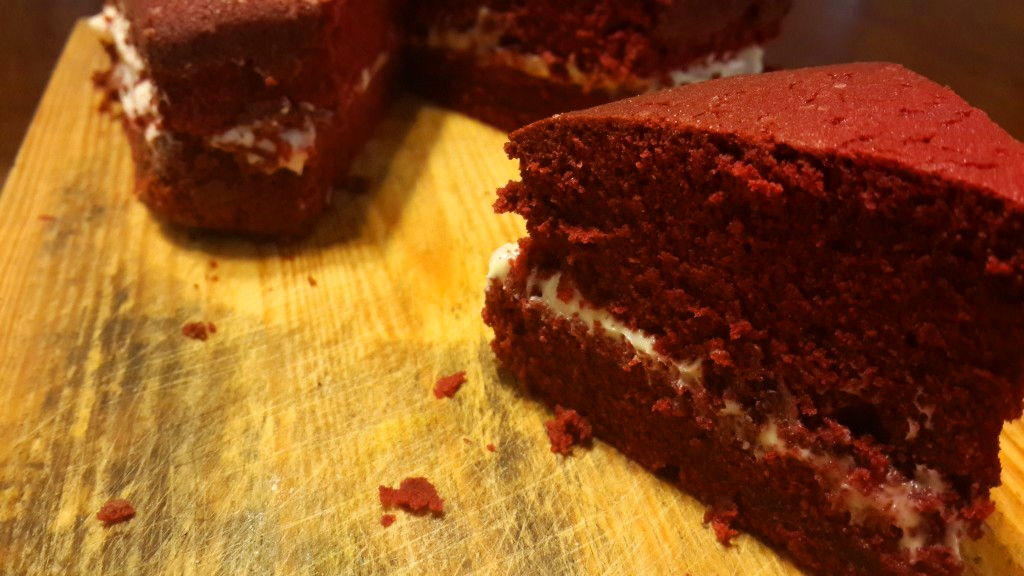
You’re done 🙂 This cake is best served warm. Cut a slice to look at your beautiful, orange-speckled cake! Bon appetit!

This cake can be kept for a few days without refrigeration. In warmer climates, refrigerate within 2 – 3 days.

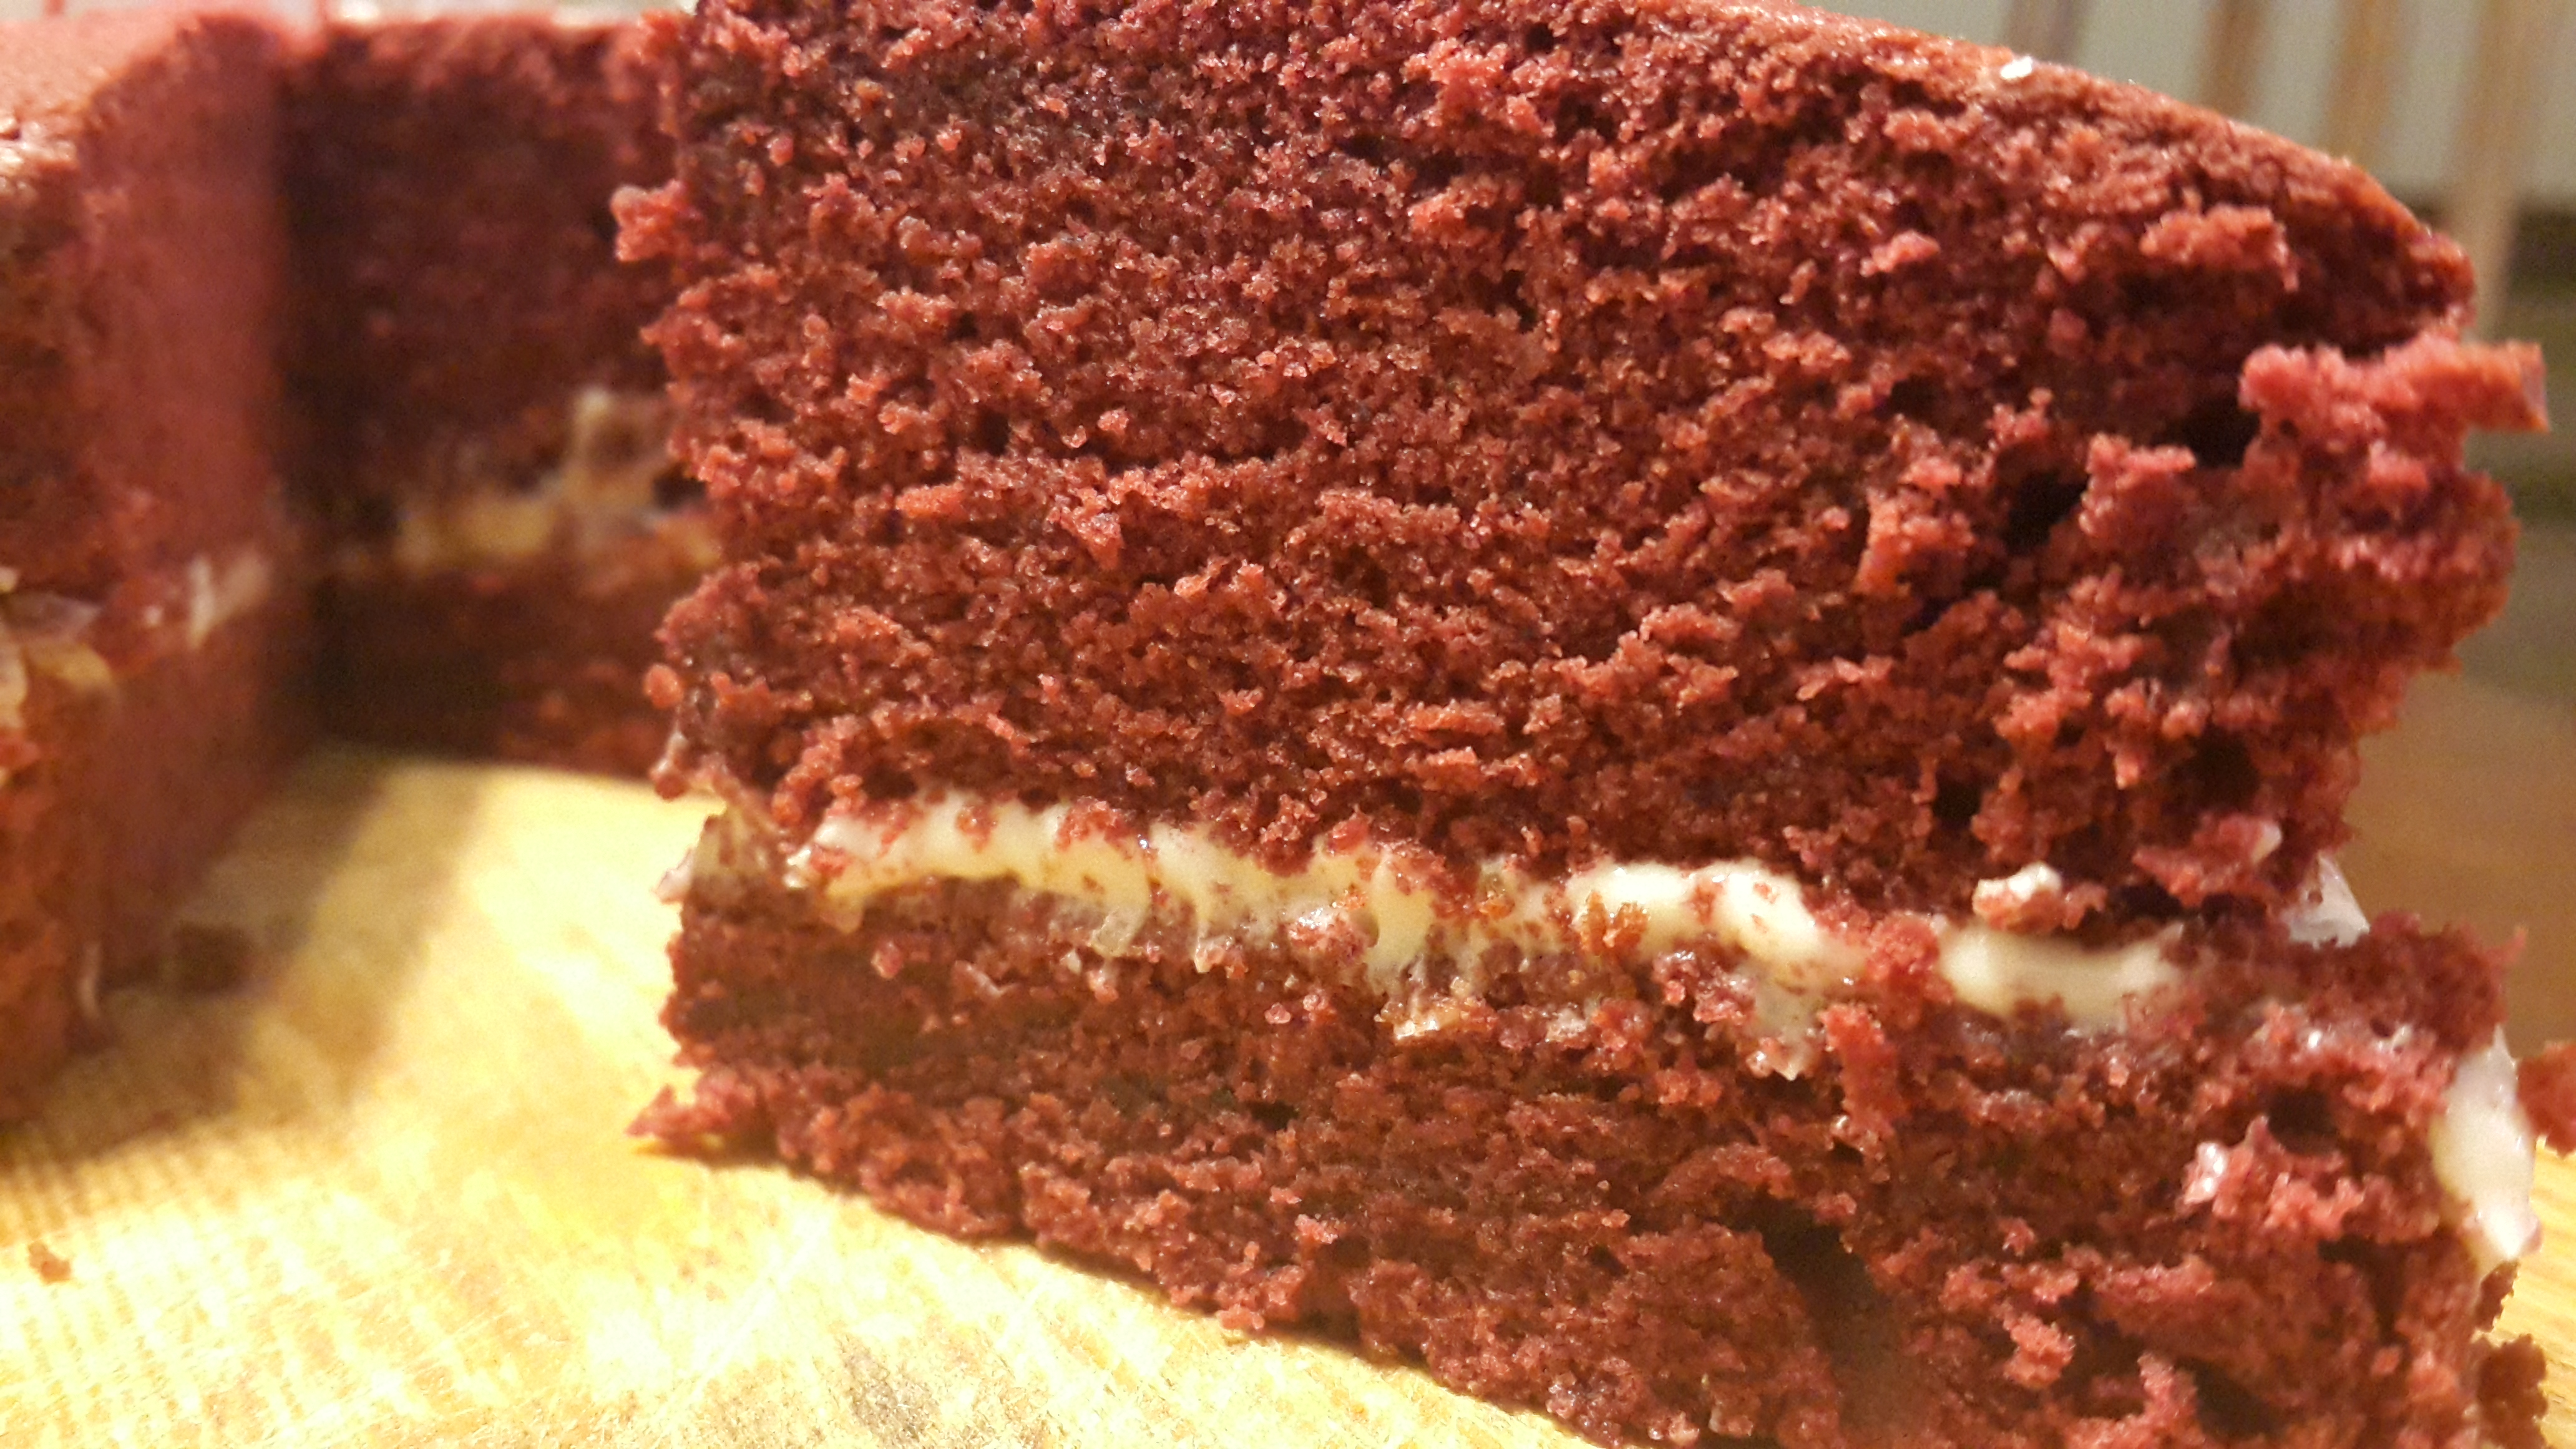
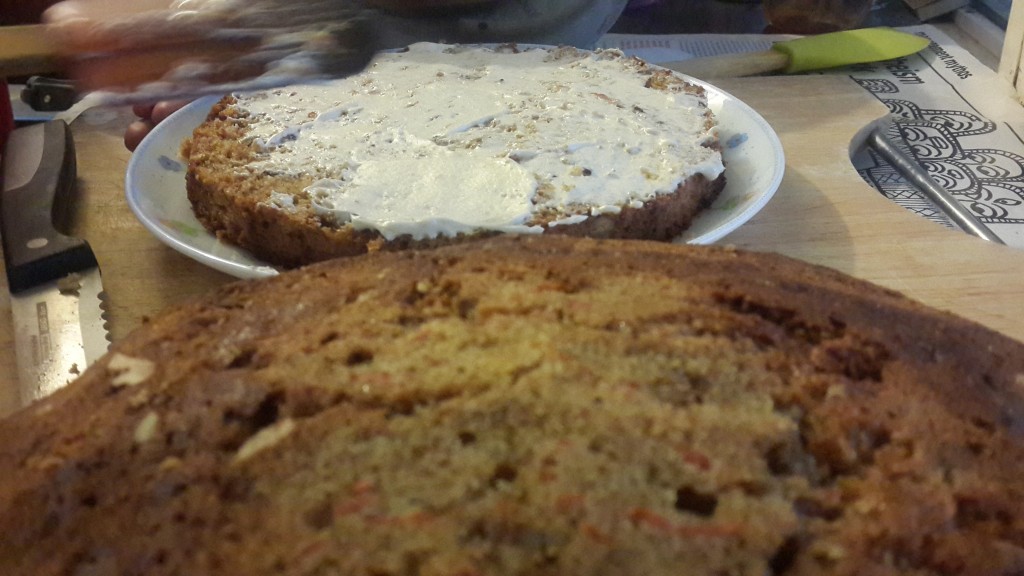
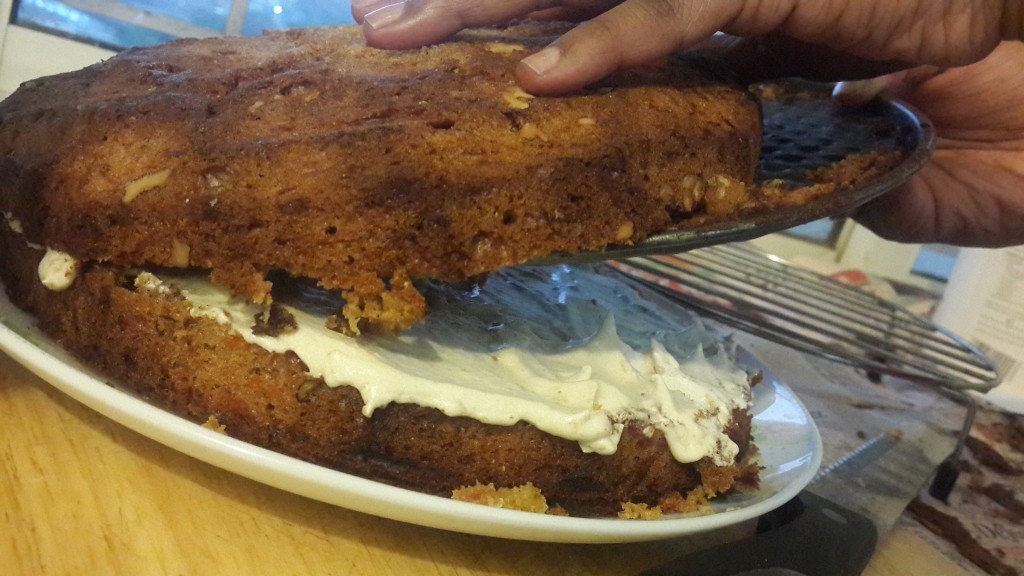
If you’d like to frost this cake since it does make pretty pictures, try my cream cheese frosting recipe. You can layer the cake and cover the layered stack for prettier presentation.

Halved carrot cake

Frosting in the middle

Frosting in the middle

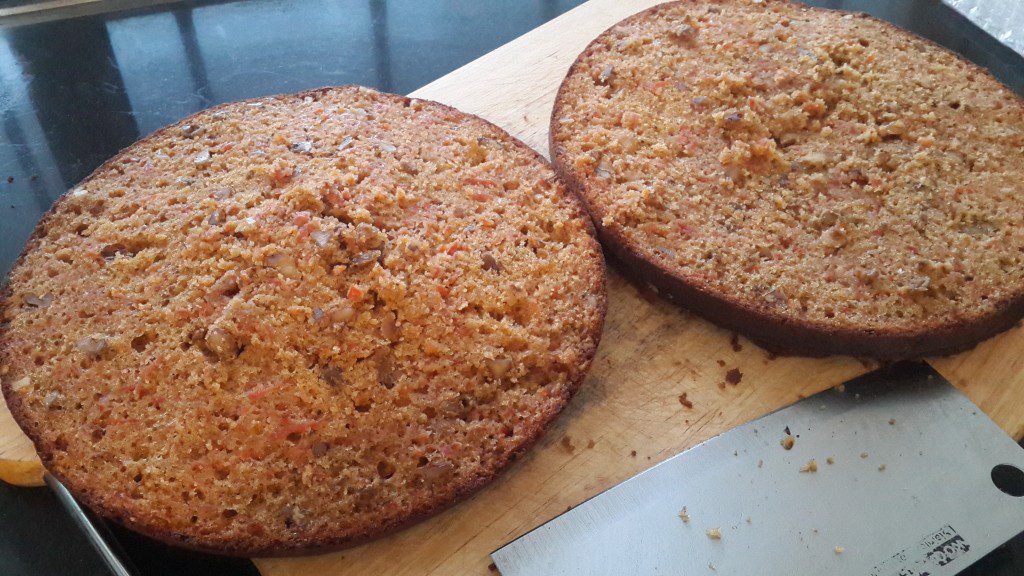
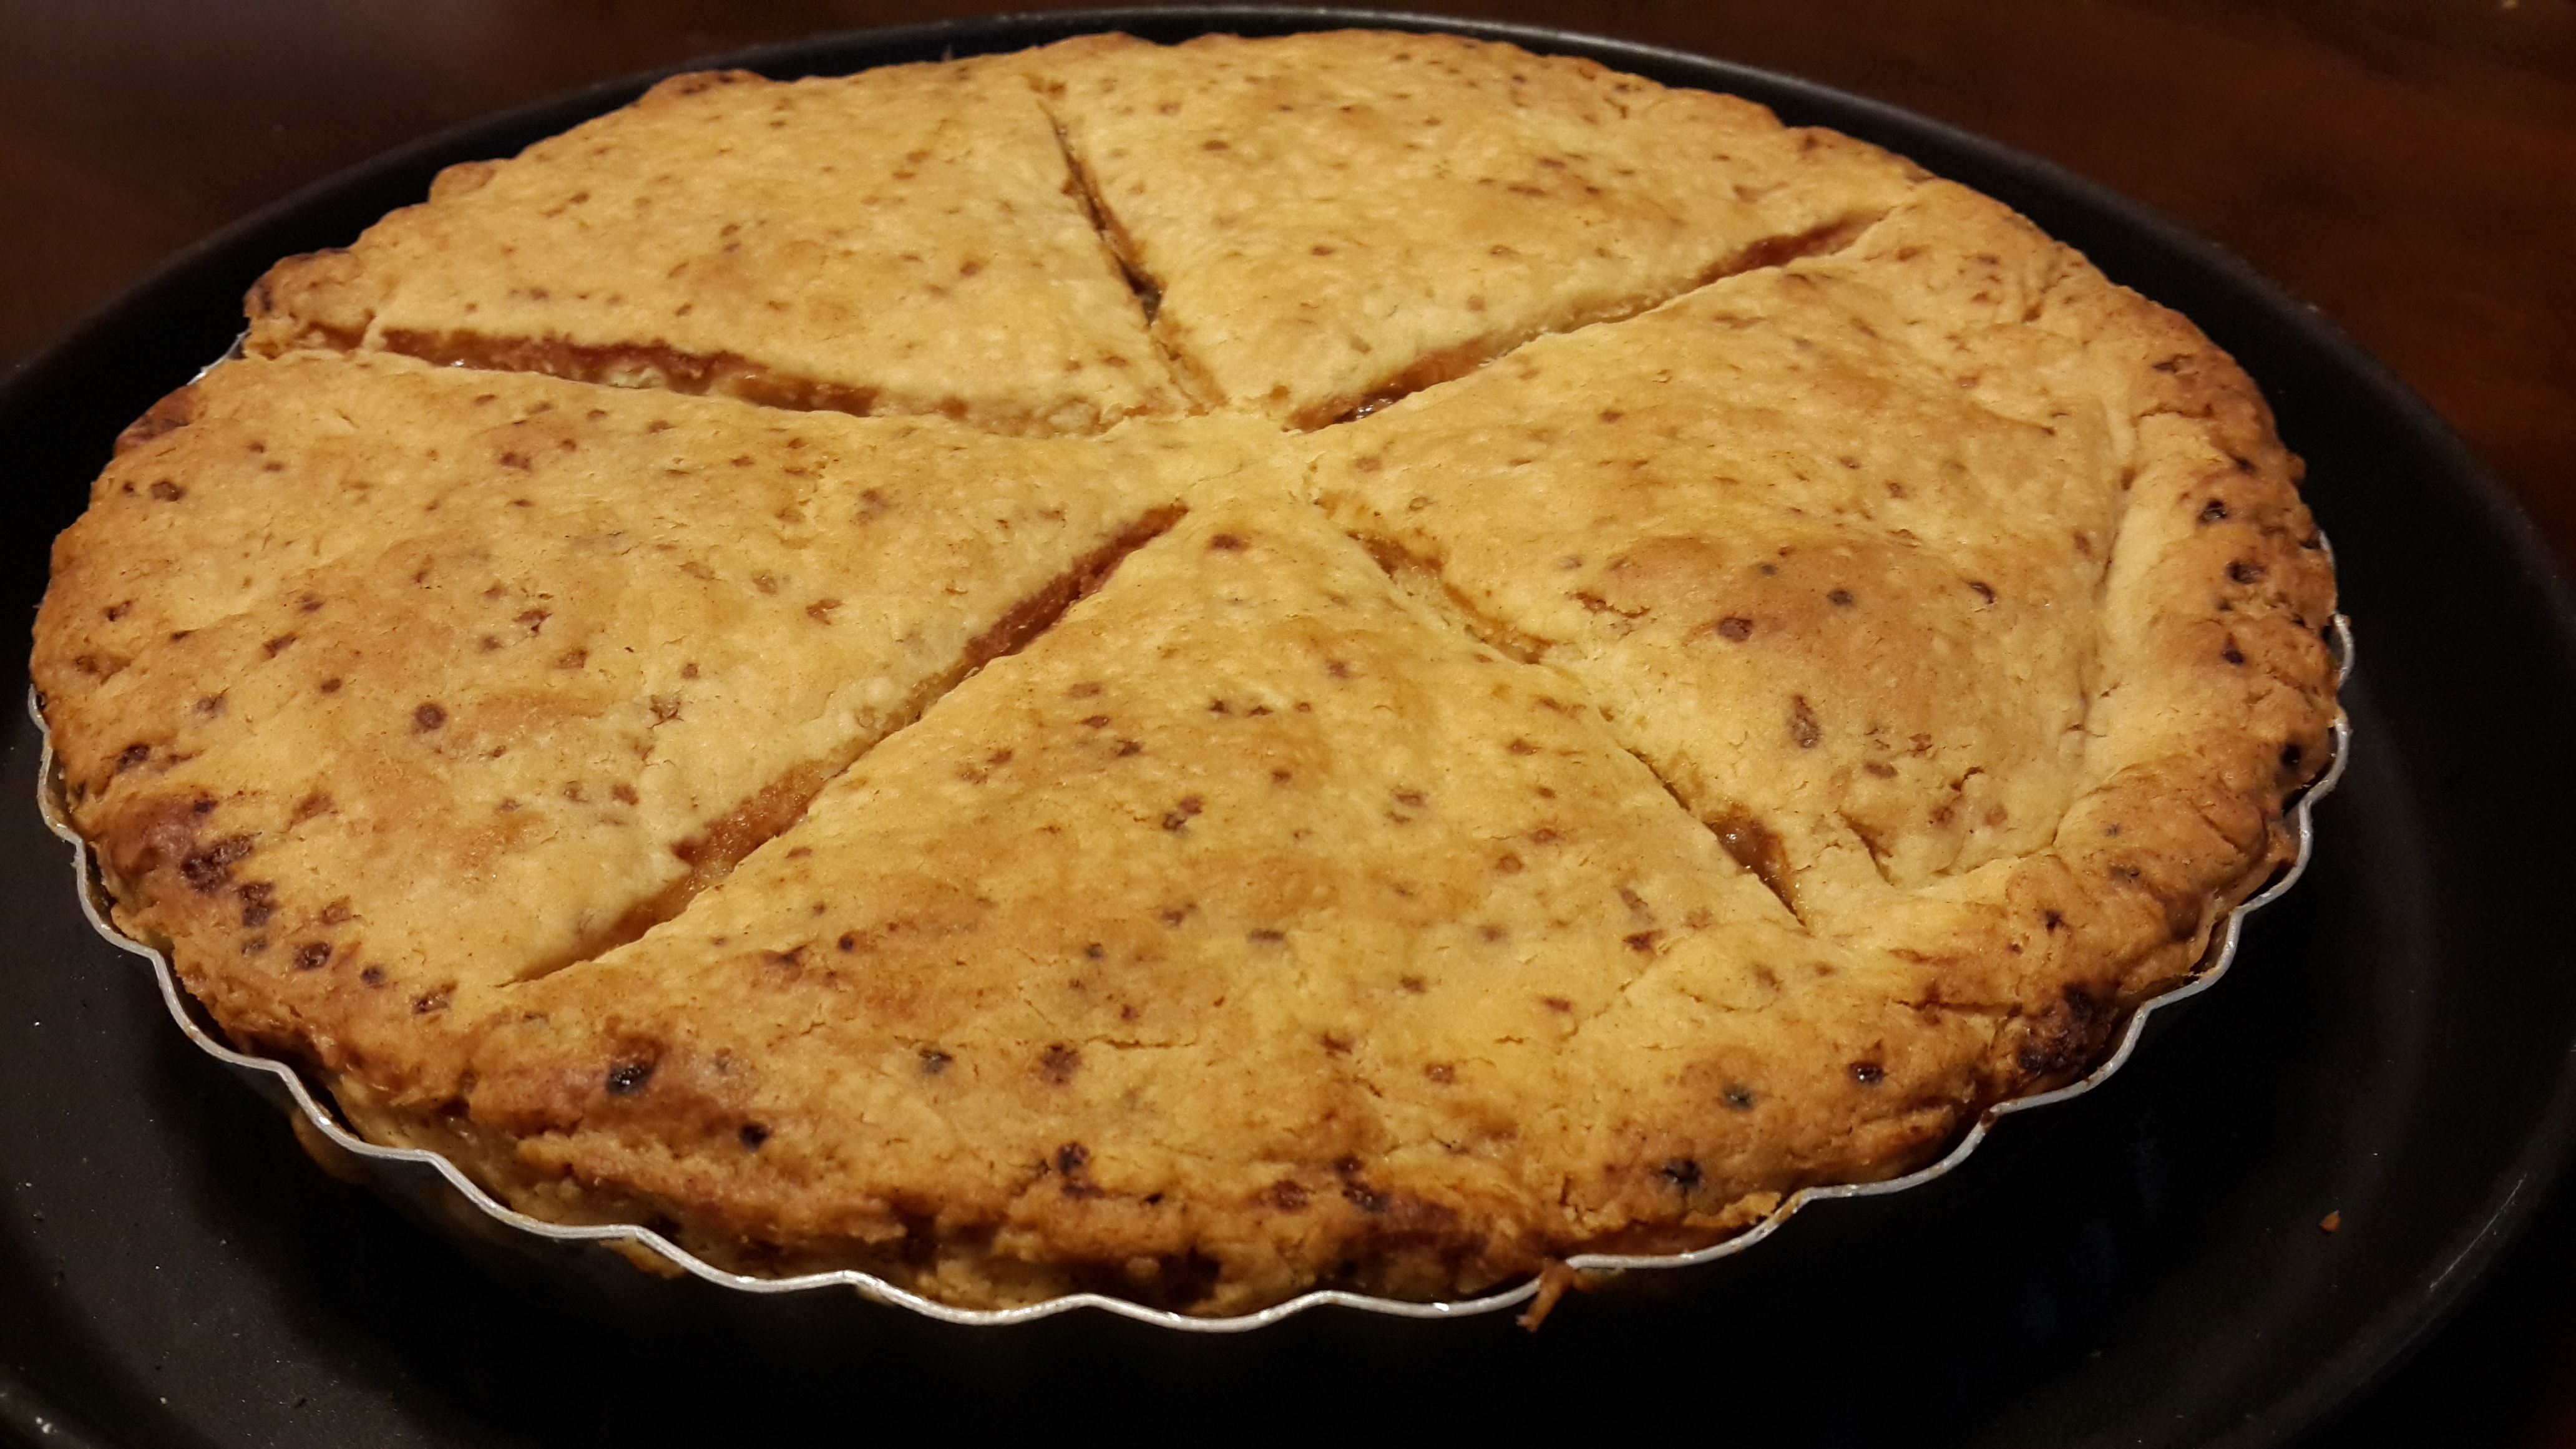
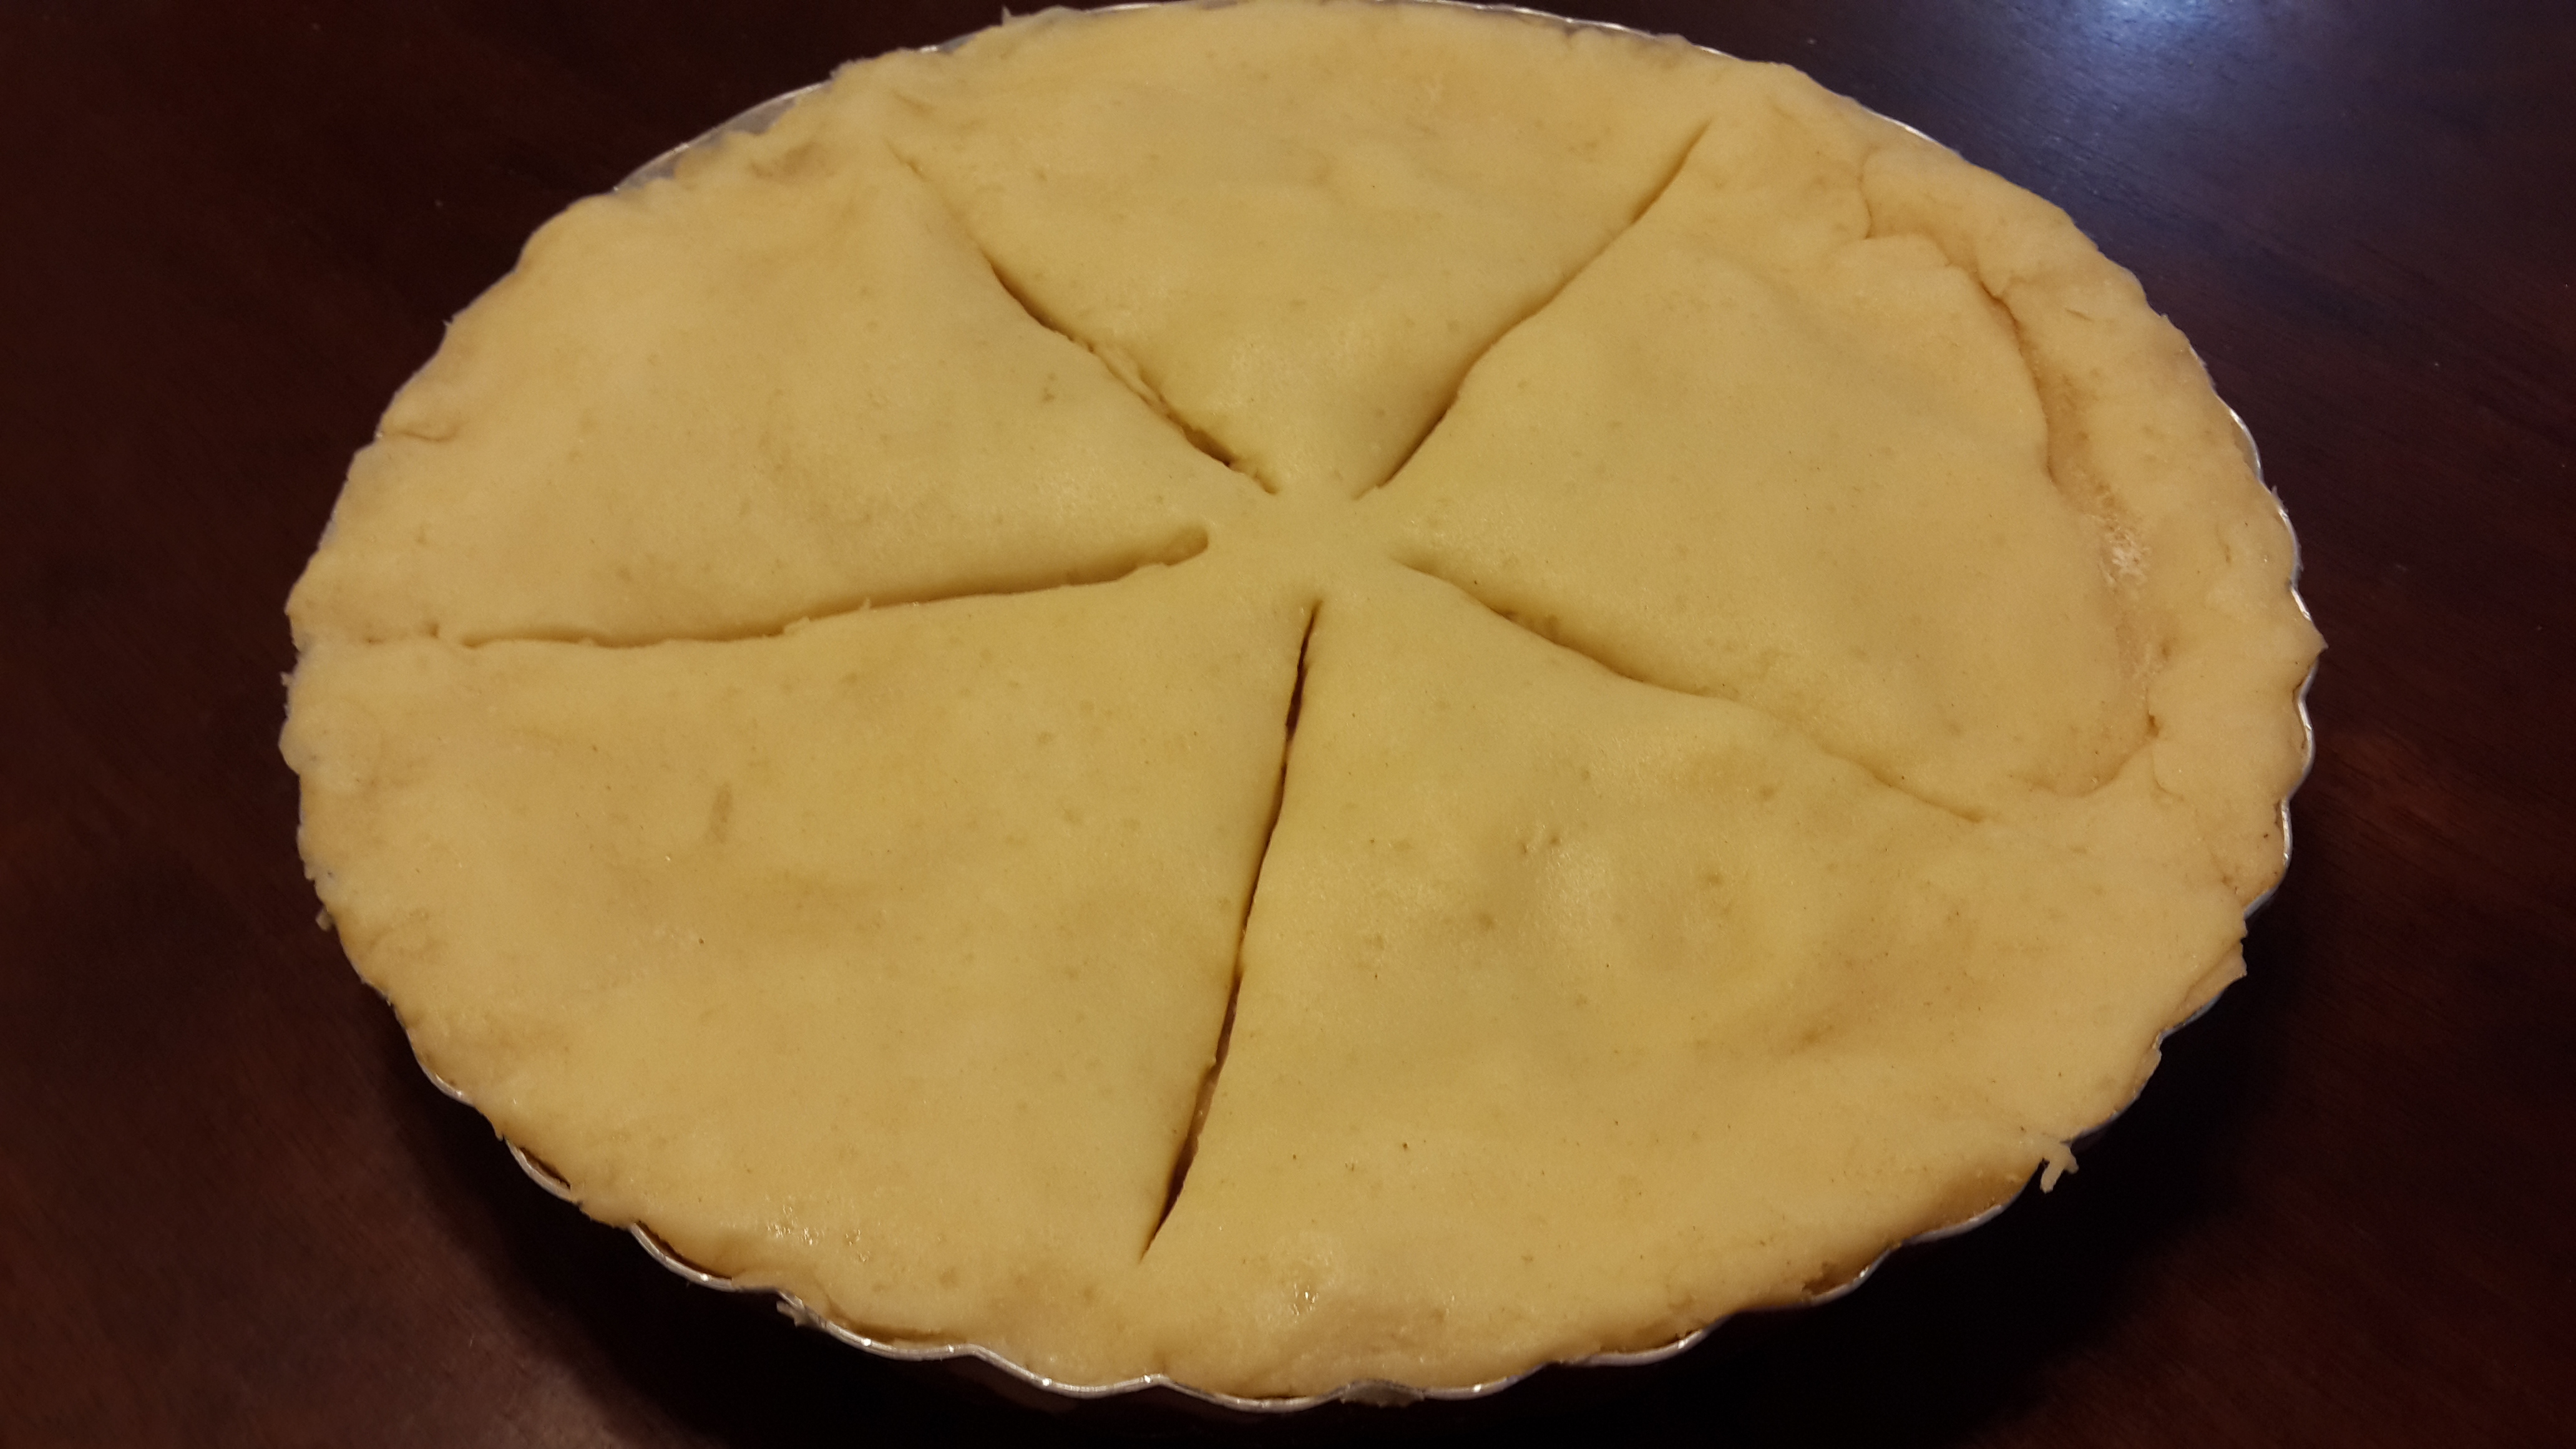
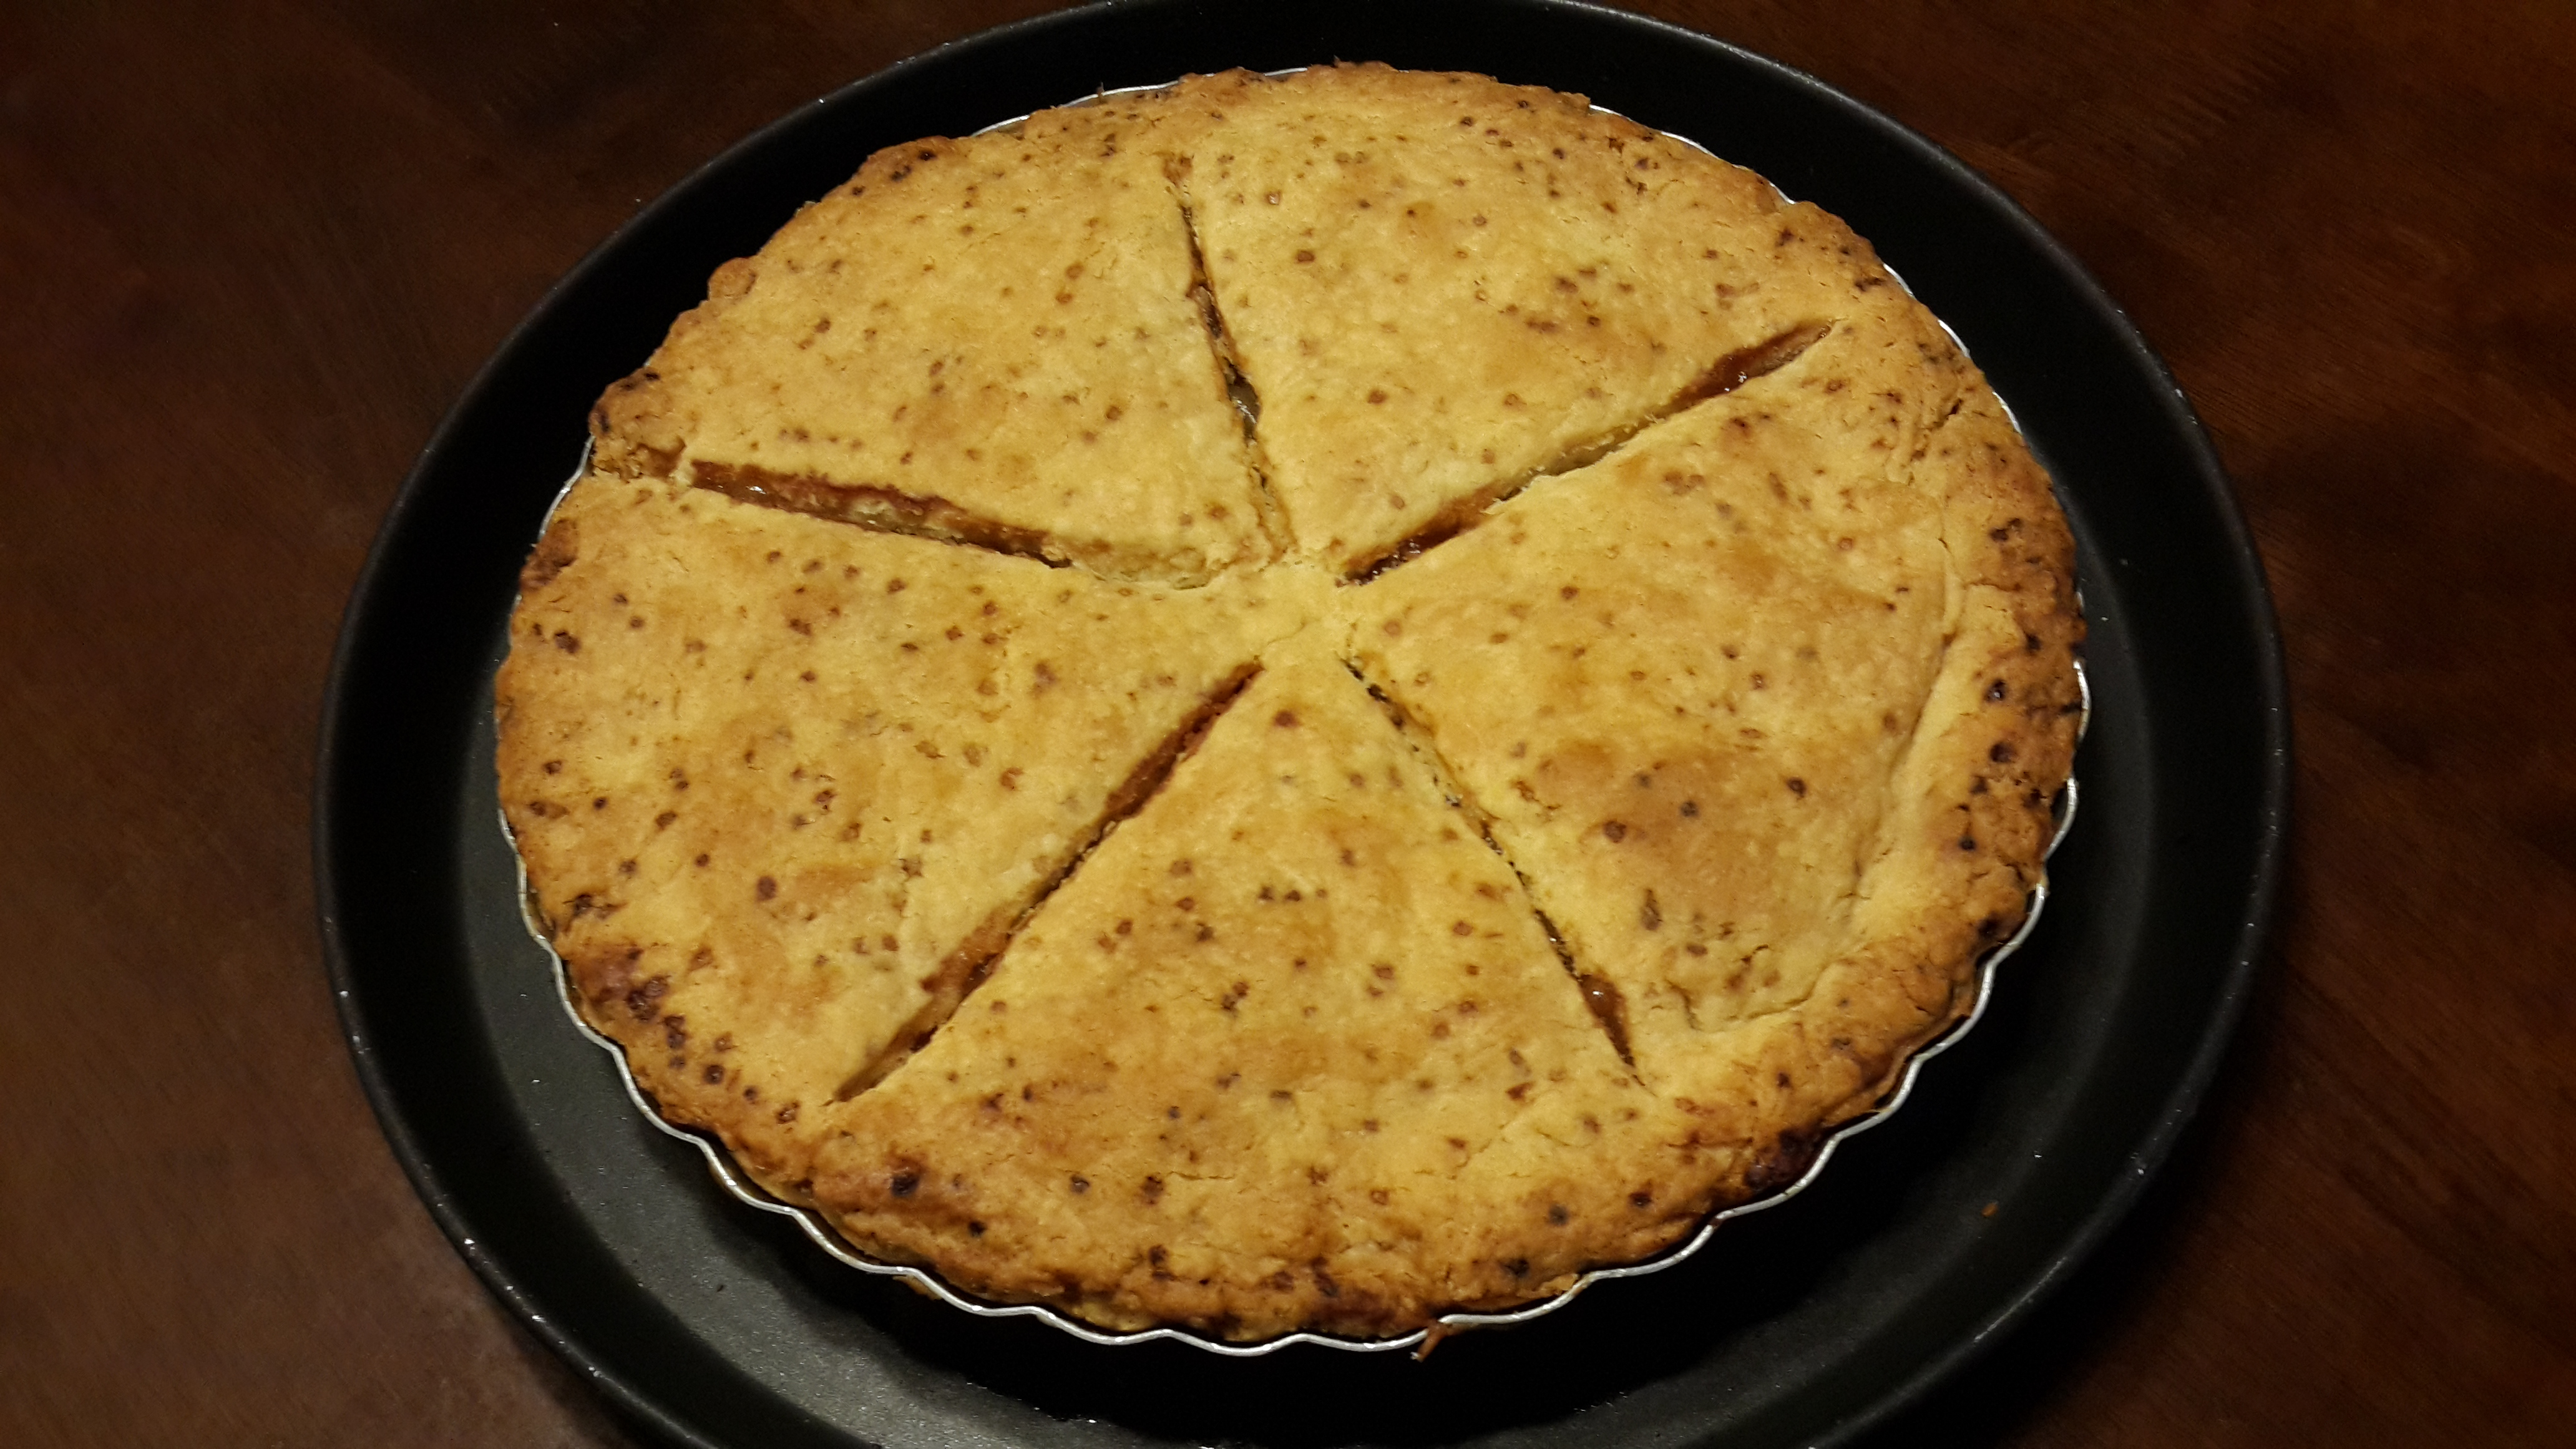
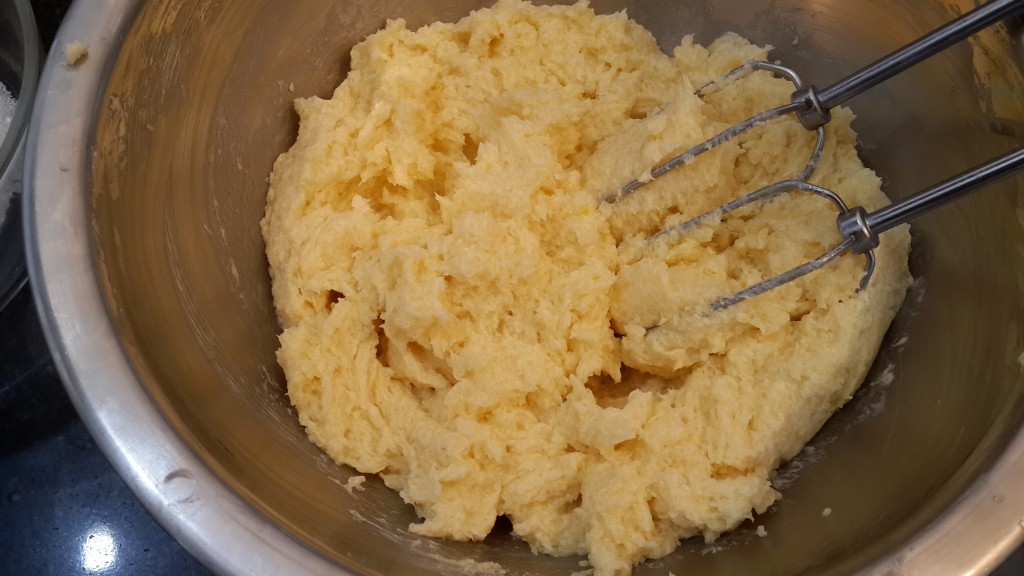
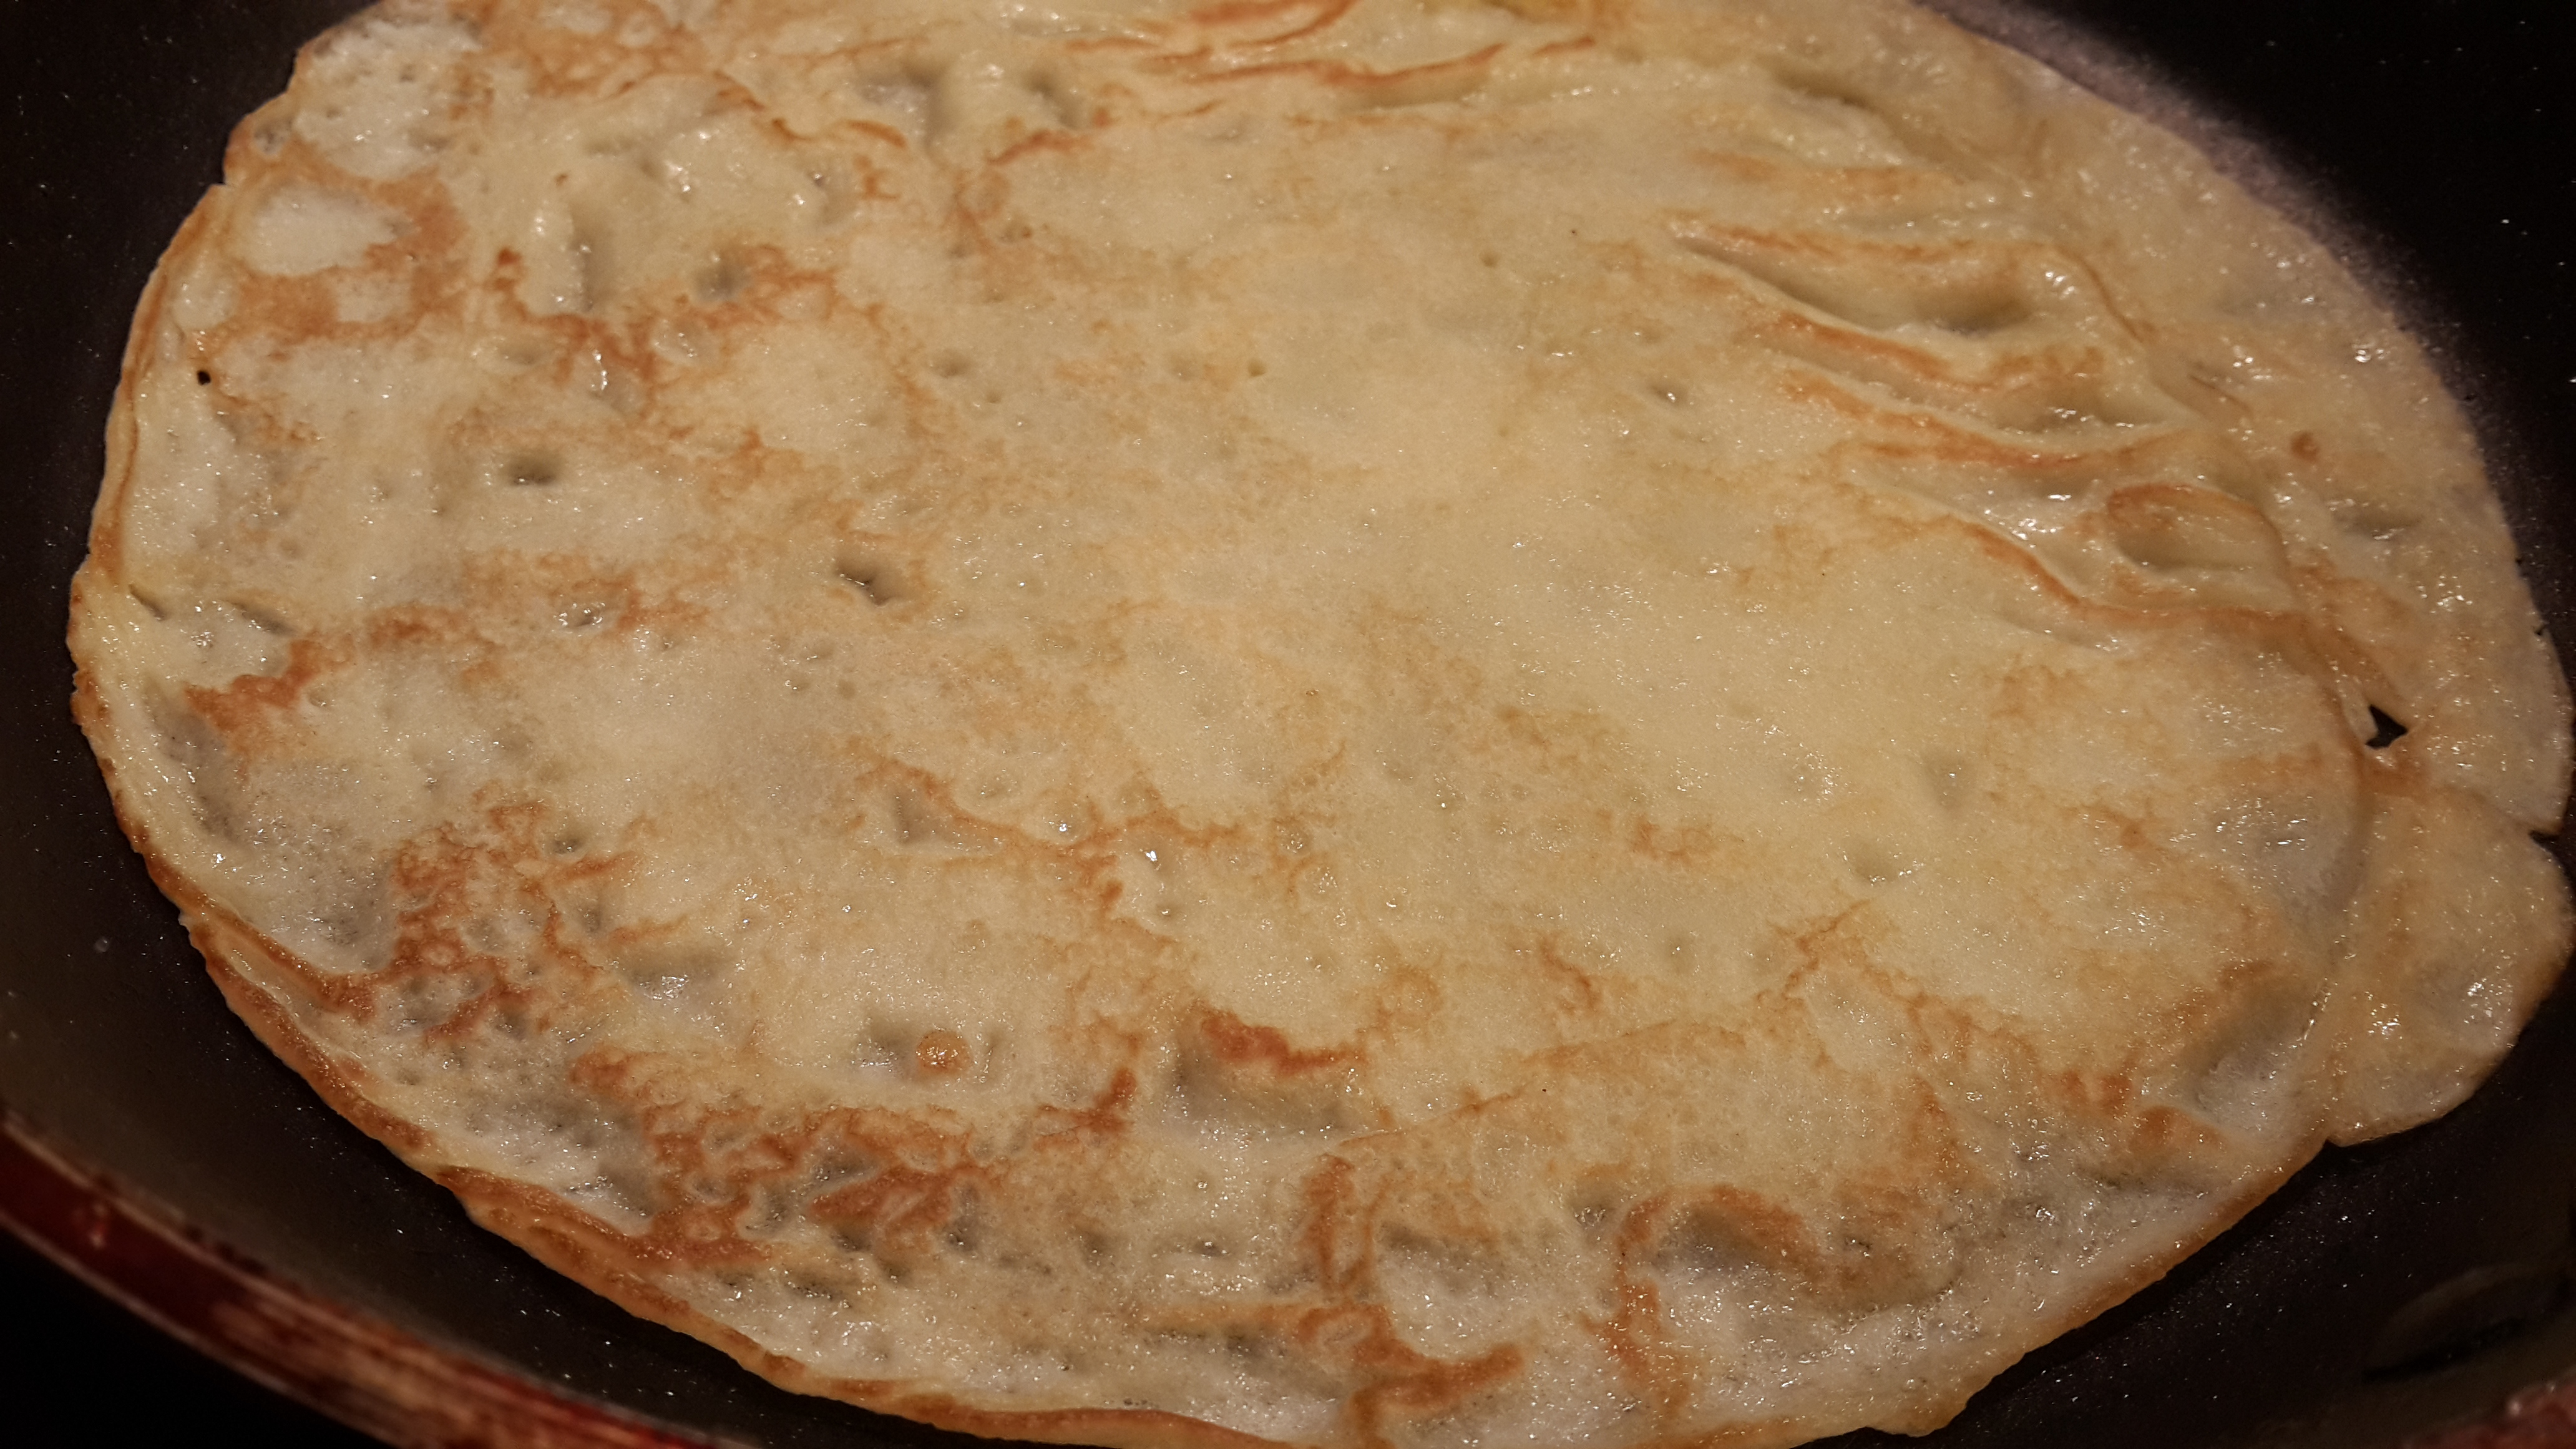
Here’s what I did, only for the picture…
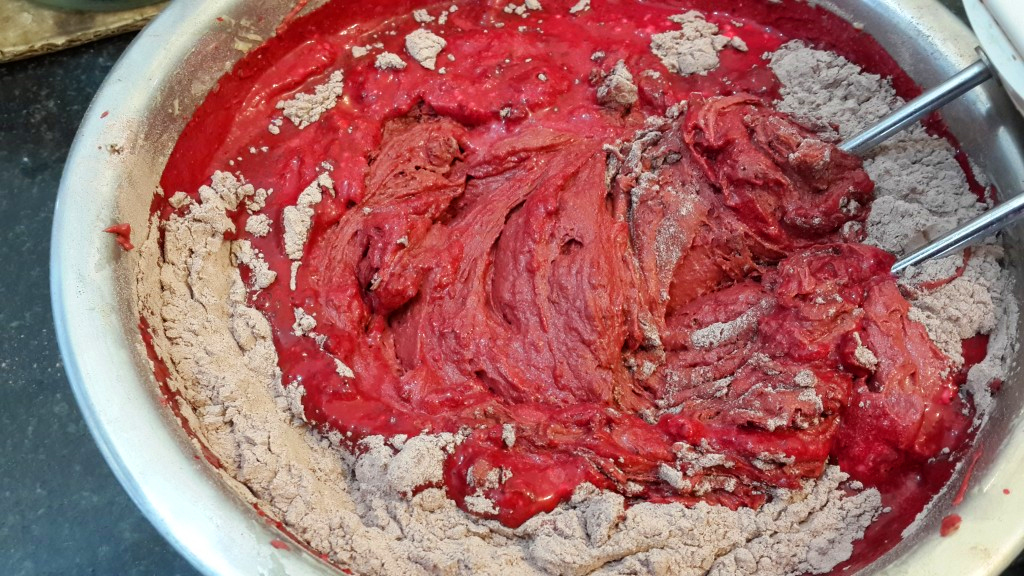
Frosted carrot cake

Or then, this …

Carrot cake with cream cheese frosting

Apple Pie

I believe in kicking off the winter with this crunchy-crusted, warm, moist, and totally droolable apple pie. And so should you!


“If you want to make an apple pie from scratch, you must first create the Universe.” – Eugene Field
The Fact: The term “as American as apple pie” traces back to 14th century England. The Pilgrims brought pie-making skills and apple seeds to America. As the popularity of apple pie spread, the phrase grew to symbolize American prosperity.
The Inspiration: Whether I plan it or not, winter, in my house, is born with the not-so-ceremoniously baked and eaten apple pie. It’s a thrill—the buying of the ingredients, the baking, of course, the lovely, warm apple and cinnamon smells that waft through my home. Like, I said, it almost christens the winter, my favourite season. The sequence played out this winter too, but this one was special—it was the first ever apple pie in my lovely new home. And like always, it was perfect!
  Just baked Apple Pie

The Ingredients

Serves one 9-inch pie; approximately 10 servings

Pie Crust

  • 2½ cups (350 grams) all-purpose flour
  • 2 tablespoon (30 grams) granulated white sugar
  • 1 cup (226 grams) chilled butter
  • 1 teaspoon salt
  • ¼ to ½ cup (60 – 120 ml) cold water

Apple Filling

  • 8 cups peeled, cored, chopped or sliced (¼ inch pieces) apples; remember to use an apple variety that is crisp (not powdery) and doesn’t lose shape easily. The apples should be sweet; preferably a variety that you’ve sampled before and are familiar with.
  • ½ cup (100 grams) granulated white sugar; you can also use a combination of white and brown sugar
  • 1 tablespoon lemon juice
  • 1 – 1½ teaspoon ground cinnamon
  • ¼ teaspoon ground nutmeg (optional)
  • ¼ teaspoon salt
  • 2 tablespoons (30 grams) butter
  • 1½ tablespoons corn starch or corn flour

The Method

Making the Pie Crust

  • Chop the butter into ½ inch pieces. Try to use your fingers as little as possible to prevent the heat from melting the butter.
  • Sift together the flour, sugar, and salt. Add the butter and lightly knead together until the mixture resembles coarse meal. Remember that the more your fingers touch the mixture, the faster the butter will melt, which is what you do not want. Alternately, you could use a food processor.

What this step does is it coats the flour molecules (or the glutenin and gliadin) with fat, preventing them from absorbing too much water in the next step. Water when in contact with wheat flour forms gluten, which makes dough elastic. But for preparations such as pies and tarts you do not want too much gluten to form because it makes the dough tough and gives it structure, which works for breads but not for soft, flaky crusts.

  • Sprinkle the cold water across the mixture and gently bring the dough together. Do not pour in the water. Stop when the dough just holds together when pinched. If necessary, add more water. Do not knead or process more than a minute.
  • Form a ball of the dough and divide into 2 portions. Lightly flatten each ball using your palms. To prevent the dough from sticking to your palms, sprinkle the dough with loose flour.
  • Cover each disk with plastic wrap and refrigerate for about one hour before using. If you do not cover the disk, it will harden and cracks will form, making it difficult for you to roll the pie.
  • After sufficient chilling, remove one portion of the dough from the fridge and place it on a lightly floured counter. Using a rolling pin, roll the pastry into a 12-inch circle. Remember to sprinkle the rolling pin and counter with loose flour to prevent the dough from sticking. As you roll, keep turning the pastry circle a little each time. This will allow you to roll out a uniform pie. Also, always roll from the centre of the pastry, outwards.
  • Gently transfer the rolled pastry circle to a 9 inch pie pan. You can do this easily by folding half of the pastry circle over the rolling pin and then moving the rolling pin to the pie pan and unfolding it. Brush off excess flour and trim the edges of the pastry to fit the pie pan. Cover with plastic wrap once more and chill in the refrigerator.
  • In the same way, roll out the second pastry disc. Cover with plastic wrap and place in the refrigerator.

Making the Apple Filling

  • In a large bowl combine the sliced or chopped apples, sugar, lemon juice, ground cinnamon, nutmeg, and salt. Gently toss the mixture so that all the apple pieces are lightly coated with the other ingredients.
  • Allow the mixture sit at room temperature for about 30 minutes or more to allow the juices to seep out. Now, place the mixture in a strainer and collect the juices separately. Allow the juices to drain for 30 minutes or until you have about 1/2 cup of juice.
  • Lightly boil and caramelize the collected juices with 2 tablespoons of butter in a saucepan. Heat for about 5 minutes or until the liquid has formed a lovely caramelized syrup and has reduced to about 1/3 cup. You can also use a microwave to form the syrup.

Putting together the Apple Pie

  • Remove the pastry crust (the one in the pie pan) from the refrigerator and allow it to soften at room temperature for about 15 minutes.
  • Transfer the drained apples slices from the strainer to a large bowl. Sprinkle the mixture with corn flour. Now, pour the syrup over the apples and toss the mixture to coat the apple pieces.
  • Transfer the apple mixture into the chilled pie crust, evenly.
  • Moisten the edges of the pie shell with a little water and then place the top crust over the apples. Gently press the edges together.
  • Tuck any excess pastry under the bottom crust and then crumple the edges using your fingers.
  • Using a sharp knife, make five- 2-inch slits from the centre of the pie outwards. This will allow steam to escape.
  • Cover the pie with plastic wrap and chill in the refrigerator while you preheat the oven.

Pre-baked Apple Pie

Baking the Pie

  • Preheat the oven to 425°F (220°C).
  • Cover the edges of the pie with a foil ring to prevent it from burning after about 30 minutes.
  • Place the oven rack at the lowest level. You could also place a baking sheet on the rack before preheating the oven to catch any apple juices. Note that if your oven tends to overheat, use a baking stone and raise the pie pan to prevent the bottom from burning.
  • Place the pie on the rack and bake for about 50 to 55 minutes.
  • Pull the pie out when juices start to bubble through the slits and the apples feel tender (not mushy) when a toothpick is inserted through one of the slits.

Just baked Apple Pie

Serving the Pie Remove the pie from the oven and place on a wire rack to cool for about 3-4 hours before cutting. Serve warm or at room temperature. It’s practically impossible to wait, but trust me, resist it; it’s totally worth it. The wait allows all the juices to seep pack into the filling, thus making for a divine, moist apple pie, with a crisp pie crust. You can store the pie at room temperature for 2 to 3 days. It might not survive, but if it does, refrigerate after Day 3. Have the pie for dessert, at tea time or just about every time you walk by the kitchen. You can serve it with vanilla ice cream or whipped cream, but the original, plain pie, is the best, in my opinion. Bon appétit!

A slice of Apple Pie

Red Velvet Cake

Some find a little bit of heaven in their red velvet cake; others think it’s overrated. My thoughts—I love red. I love cake. So, why not?


“You’re only human. You live once and life is wonderful, so eat the damn red velvet cupcake!” – Emma Stone
The Fact: The Red Velvet Cake was invented during the Great Depression when food was a rare commodity, let alone cake and food colouring agents. To up their sales, the food colouring company Adams Extract lured customers by creating the Adams Red Velvet Cake recipe. They also gave away free Red Velvet Cake recipes at grocery stores to sells the red extract. The ploy worked. The cake became an overnight hit.
The Inspiration: With Valentine’s Day just round the corner and every website and restaurant featuring their oh-so-glorious red velvet cake, I just had to give this advertised cake a try… especially since I’ve never made the cake before. So, irrespective of the grief I got from some of my friends about conforming to tradition and expectations and all the clichés surrounding this day, attempt it I did. The outcome, though not the ideal ‘red’, was a pleasant surprise and a lovely dessert for just about any day of the year.
20140216_184311

The Ingredients

Serves approximately 12 to 15 people
Cake
  • 2 ½ cups sifted cake flour
  • 2 tablespoons cocoa powder (regular or Dutch-processed)
  • ½  cup unsalted butter, at room temperature
  • 1 ½ cups granulated white sugar
  • 2 large or 3 small eggs
  • 1 cup buttermilk (if you don’t have buttermilk, you can make some in a few minutes; read here)
  • ½ teaspoon salt
  • 1 teaspoon pure vanilla extract
  • 2 tablespoons liquid red food colour
  • 1 teaspoon white vinegar
  • 1 teaspoon baking soda

Red Velvet Cake Ingredients

Cream Cheese Frosting
  • 2 cups cream cheese, room temperature
  • 1 teaspoon pure vanilla extract
  •  1 cup confectioners’, icing or caster sugar, sifted
  • 1 ½ cups chilled heavy whipping cream (or any cream that forms stiff peaks when whipped)

The Method

Making the cake

  • Preheat the oven to 350 degrees F (175 degrees C) with a rack in centre. Ready your baking pans (either one or two 9 inch pans) by spraying them with grease or lining them with butter. Preferably, also line the bottom of the pan with parchment paper.
  • In a mixing bowl, sift together the flour, salt, and cocoa powder.

Flour, cocoa powder, and salt whisked together

  • In a separate bowl, using a hand or electric mixer, beat the butter for about 2 minutes or until soft.

20140216_121352

  • Add the sugar and beat for about 2–3 minutes, until light and fluffy.

Blending together the butter and granulated sugar

  • Then, add the eggs, one by one. Beat well after each. Finally, add the vanilla extract and beat just until combined.
  • In a measuring cup, preferably a glass or stainless steel one, whisk the buttermilk with the red food colour. The red colour stains easily. Try to use glass or stainless steel equipment as far as possible to prevent staining.
  • Alternate the flour mixture, the buttermilk and the butter mixture and combine by whisking on low speed (to prevent you and your kitchen from bring splattered with the mixture). It’s a good idea to begin and end with the flour.

The batter coming together  The batter! 

  • In a small cup combine the vinegar and baking soda. The combination will fizz; before the effervescence dies down, quickly fold it into the cake batter.
  • No work quickly. Pour the batter into your pan (divide your batter evenly if using 2 pans). Smoothen out the top with a spatula and pop the pan(s) into the oven.
  • Bake in the preheated oven for approximately 30–40 minutes, or until a toothpick inserted in the centre comes out clean. Cool the cake(s) on a wire rack.
  • After the cake has cooled sufficiently, use a blunt knife and pry the cake away from the cake tin. If you’re not a fan of the frosting, you can eat it right away.

Red velvet cake without the frosting

  • If you’re going to frost it, refrigerate the cake after wrapping it in plastic or shrink wrap for at least an hour, if not overnight. A chilled cake is much easier to frost because it doesn’t crumble as easily.

Making the frosting

In the bowl, beat the cream cheese until smooth. Add the vanilla and confectioners’ sugar and beat until combined. Gradually add the heavy cream and whip until the frosting is rich and thick. If you don’t have heavy cream and it doesn’t form stiff peaks easily, beat the cream separately and then add it to the cream cheese. Taste the frosting and add sugar or cream as per your liking.

Assembling the cake

If you’ve baked two separate cakes, you can assemble them straight away, and build a two-layered cake, with one layer of frosting in between. Alternately, using a serrated knife, you can cut your cake into four layers, horizontally. You can also use twine, wrapped around the cake, and pulled together to cut the cake evenly across.

Place the top of the cake onto your serving plate (since this is the least even layer of all). Spread a layer of frosting over it. Place another cake layer over the frosted layer and add a layer of frosting to the second cake layer. In the same way, frost the remaining layers. You can serve the cake as is if you want the lovely red layer to stay on top, or then, you can go ahead and frost the outside and top of the entire cake stack. I don’t like too much frosting or decoration. I love the plain ‘ol cake, or then, with one layer of frosting. You can do it as you like it.

A slice of red velvet cake

Top the cake with anything you like. Some of my options are cocoa powder, chocolate shavings, red velvet cake crumbs (the easiest to do), strawberries, and so on.

I would eat this cake any random evening, but make sure you have someone to show it off to. The hard work’s got to be worth it! 🙂 Bon appétit!

A slice of red velvet cake

Goan Chouriço Chilli Fry

A must-try Goan delicacy if you’re headed to Goa, India, for a holiday!


“To retain respect for sausages and laws, one must not watch them in the making.” – Otto von Bismarck
The Fact: Sausages were called bangers during the Second World War because they contained so much water that they exploded when fried.
The Inspiration: This dish is born of a special sausage that is home to Goa, India, a tourist destination famous for the glorious sun, the myriad beaches, and the lip-smacking Konkani seafood. I’m not sure of the availability of this sausage outside the state, but I’m sure that getting hold of it would be nothing less than an Olympic feat.
Goan chouriço or chorizo are spicy, flavorful, deep red pork sausage links made from pork, vinegar, chili, garlic, ginger, cumin, turmeric and other spices that are stuffed into chitterlings (pigs intestines) and sold in dry or wet forms. Goan chouriço is a traditional food item that has built its way into the “authentic” Goan cuisine lineup, thanks to the 451 years of Portuguese rule.Fortunately, I live in a city that’s not too far from Goa. I also have friends and family visiting the place every second month. So the specialty product is not as much a “specialty” as it is an ordinary ingredient in my kitchen.This dish is my quick fix almost once every month. The recipe’s been handed down from my mother and mother in law, and their mothers, and so on. Besides being a quick fix, it’s also one of Ally’s favourites; him being a true “not-born-but-brought-up-in-Goa” kinda Goan.
Frozen Goan Chouriço

The Ingredients

Serves approximately 6 people
  • 1 packet (250 gms) of Goan chouriço
  • 3 – 4 medium-sized onions; sliced
  • 2 green chillies slit down the centre
  • 1 – 2 tablespoons oil
  • A pinch of salt
  • Optional: 1 large potato; cubed

The Method

  • Heat a skillet or a wok and drizzle with oil.
  • Drop the spit chillies into the oil and stir for a few seconds.
  • Toss in the sliced onions and allow them to cook until they are almost translucent.
  • While the onions are cooking, untwine and cut open the covering or sausage lining. Then, roughly chop up the sausages.
  • Add in the cubed potatoes once the onions are done. Fry them with the onions for about a minute or two.
  • Sprinkle some salt over the mixture. You won’t need any more salt or spice because the sausages are pre-seasoned.
  • Add in the chopped sausages and allow them to cook for about 15 – 20 minutes on medium heat.
  • You’ll notice the pork fat melting and a lot of oil collecting in your skillet. I usually scoop out the oil or soak it up using kitchen roll because it’s a little too much oil for my taste. Pork is a red meat and has a high fat content. If you’re health conscious, this isn’t really a dish for you, but if you have to try it, I suggest removing the oil for sure.
  • Serve the dish, hot, with rotis (Indian flat bread) or any bread of your choice.

The same dish when cooked along with rice forms a more substantial ‘Goan chouriço pulav’ meal.

I would recommend a quick jog or some form of workout the next day 🙂 Bon appétit!

Panna cotta

The quickest, sophisticated-looking, and by far, the easiest dessert recipe I’ve ever known…


“In the 1960s, you could eat anything you wanted, and there was no talk about fat and anything like that, and butter and cream were rife. Those were lovely days for gastronomy, I must say.” – Julia Child
The Fact: Panna Cotta is an Italian dessert that literally means “cooked cream”.
The Inspiration: Honest. I didn’t have the time or the ingredients for anything else. My in-laws were coming home for lunch. My main course was almost done. And I’d forgotten about dessert!!! So I held the refrigerator door open and stared at my options for a whole minute. My panna cotta ingredients practically called out to me, saying, “Use meeee” 🙂
So if you find yourself in a similar situation, you know what to do.

The Ingredients

Makes about 8 servings
  • 2 ½ cups heavy cream
  • 1 ½ cups whole milk
  • 2 tablespoons cold water
  • 1 tablespoon powdered, unflavoured gelatin
  • 5 tablespoons sugar (flat; not heaped)
  • 1 vanilla bean, split in half lengthwise, or 1 teaspoon vanilla extract
  • Optional: a few tablespoons of rum
  • Optional: a handful of strawberries or any fruit of equal measure

The Method

Making it

Pour the water into a bowl and sprinkle the gelatine over it. Stir and set aside. The gelatine will absorb the water, soften and swell up.

In a saucepan, combine the cream, milk, sugar and split vanilla bean (if using the vanilla bean; if not, incorporate the vanilla extract in the next step), and bring to a simmer over medium heat. Do NOT let it boil.

Remove the saucepan from the heat, and stir in the softened gelatine and the vanilla extract (if using extract; if using the vanilla bean, at this point scrape the vanilla seeds from the bean pod into the mixture, and discard the pod).

Whisk the mixture until it reaches room temperature. If you have a warm kitchen, whisk the mixture with the saucepan in an ice bath.

Check to see whether your mixture is smooth and that the sugar and gelatine have dissolved completely.

If you like a slightly rummy taste in your panna cotta, add in the rum now. You can taste the mixture to check whether you’d like a little more and adjust accordingly.

Setting it

Now to set the panna cotta… I like the quick and simple presentation where I set the panna cotta in whatever I’m going to serve it. I use wine or shot glasses. If not, you can lightly oil a few ramekins or any bowl with a neutral oil and then use them (the oil so that the set panna cotta comes out easily).

Pour the mixture into the preferred containers and chill at least 4 hours or overnight. If you’re keeping them longer than overnight, cover them with plastic wrap.

What I like to do almost always is add some fresh fruit (strawberries on this day) into the serving mould or serving glass and pour the panna cotta over it so that the fruit sets in the panna cotta itself. It’s the lazier and easier way out.

pannacotta2

Serving it

You can serve panna cotta with whatever you want—fresh fruit (my favourite), berry compote, chocolate shavings and even leftover cake crumbs—like I said, absolutely anything.

If using a mould, before serving, run a thin-bladed knife around the inside of the mould. Dip the mould briefly in a bowl of hot water, and then carefully invert onto the serving plate and tap slightly. If the panna cotta doesn’t unmould right away, return it to the hot water bath for another five seconds and repeat. If stressed for time, do it my way and serve it in whatever you’ve set it in, without unmoulding.

Lemon Pepper Chicken

Grilled chicken cooked with the combined fragrance and flavour of freshly ground black pepper and freshly squeezed lemon… hmmmm…


“The disparity between a restaurant’s price and food quality rises in direct proportion to the size of the pepper mill.” – Bryan Q. Miller
The Fact: It is believed that when the Goths defeated Rome in 410, they demanded a ransom of 3,000 pounds of pepper, along with other valuables such as silk.
The Inspiration: Although we live a hop, skip and jump away from my parents and my in-laws, a Sunday family meal with them does not take place that often. This Sunday was different.
We had a late and well-deserved, fun Saturday night and a mild hung-over Sunday morning; nothing that a hot cup of coffee and a quick shower couldn’t fix. On a day like this, when you’re expecting your in-laws for lunch, a quick meal, like this one, was just perfect. So that’s my inspiration for this addition—a quick, homely and simple recipe.

The Ingredients

Serves approximately 6 people
  • 1 kg chicken cut into roughly 8 – 10 pieces
  • 5 tablespoons barbeque sauce
  • 1 tablespoons soya sauce
  • 1 tablespoon oyster sauce (optional)
  • 1 medium or ½ large lemon
  • 3 teaspoons freshly ground black pepper
  • 1 teaspoon salt
  • 1 – 2 tablespoons of olive oil

The Method

  • Wash well and drain the chicken pieces. Dry the chicken pieces using a kitchen towel.
  • Mix all the above ingredients (except the olive oil) for the marinade.
  • Slit the chicken pieces so that the marinade permeates the meat.
  • Apply the marinade to each chicken pieces carefully, remembering to massage the marinade into the slits as well. Place chicken pieces in a baking dish and pour the remaining marinade over it.
  • Allow the chicken to sit covered on the counter or in the refrigerator for about 20 – 30 minutes. Refrigeration is preferred if your kitchen is warm and not at room temperature.
  • Ten minutes before your marination time’s up, preheat your oven to 375°F / 190°C.
  • Drizzle the dish with the olive oil and pop it into the oven for about 30 – 40 minutes.
  • Your chicken’s done when the meat seems to leave the bone easily and the meat doesn’t look pink and raw. You can prick it with a skewer or fork to check. Remove the chicken from the oven and serve while it’s hot.

Note: I used chicken on the bone; if you’re using boneless chicken, your meal should be done in 20 minutes.

You could serve the chicken with a salad on the side. I also added a lovely garlic-flavoured potato mash (mashed potato) with it. A light white wine will make for a great drink to go with the meal.

lemonpepperchicken2

A lovely Jacob’s Creek Chardonnay, some country music in the background, a few sways in the kitchen, a lovely sit-down meal, followed by a cosy nap! A perfect end to the weekend!

Chocolate & Sautéed Banana Crepes

Speaking of comfort foods, who’d have thought that decadent chocolate and a fruit wrapped inside a soft crêpe would be my new favourite dessert… breakfast item… comfort food…?


“In a big family the first child is kind of like the first crêpe. If it’s not perfect, that’s okay, there are a lot more coming along.” – Antonin Scalia
The Fact: Crêpes originated in Brittany, France and are considered as the country’s national dish. Crêpes can be compared to the African injera, the tortilla, the Indian dosa and the Mexican sope. 
The Inspiration: So, let’s be honest. I’d like to believe that I’m a serious health-conscious freak, but I’m really not. I have my days. It was one of these days that led a few friends and me to this quaint little patisserie, “Le Plaisir”, which had opened up close to our work place, one August afternoon. Since I wasn’t in the mood for a serious, heavy dessert, I thought about trying out their crêpes. Apart from the regular crêpes (considered as the French-styled pancakes) with whipped cream or maple syrup, I spotted a Nutella and Banana Crêpe. While the Nutella satisfied the dessert craving, the fruit led me to believe it was healthy, which it wasn’t of course! And so I ate… And fell in love… And the banana-chocolate combination became my new favorite duo… So much so that I recreated the dish, rather perfectly, I dare say, the very next day.So unoriginal… right? But like they say… “Love is blind” 🙂

The Ingredients

Makes 10 – 12 crêpes
  • 1 cup all-purpose flour, (spooned and leveled)
  • 3 tablespoon granulated sugar
  • ¼ teaspoon coarse salt
  • 1 ½ cups milk (for slightly healthier crêpes, use 3/4th cup milk with ½ cup water or buttermilk)
  • 2 large or 3 small eggs
  • 3 tablespoons butter, melted
  • ¼ teaspoon baking powder
  • 3 large bananas
  • Nutella or readymade chocolate sauce or a few bits of semisweet chocolate melted

Crepes ingredients

The Method

Making the crêpes

Whisk all the dry ingredients—the flour, sugar, salt and baking powder—in a bowl. Remember to add the baking powder only if you’re making the crêpes immediately. If not, add just before use.

In a separate bowl, whisk the eggs and then, add the milk to it. Use room temperature milk—not too hot or too cold. At this point, you could also add a quarter teaspoon of vanilla essence if you don’t like the egg smell.

Using your spatula, create a well in the middle of the dry ingredients and pour the egg mixture into it. Gently whisk the dry and wet ingredients together until the mixture appears smooth and without lumps. Add 2 tablespoons melted butter and whisk gently. Remember not to over-whisk the mixture or you’ll lose all the air from it, making your crêpes slightly tougher than the soft, fluffy ones.

crepe batter

It’s a good idea to check for lumps using the back of a spoon, before you proceed.

checking for lumps in the crepe batter

Allow the batter to sit for about 30 – 60 minutes, covered properly (make airtight), in the refrigerator. Note that if you’re making the batter in advance, you can store the batter in an airtight container for up to 1 day. But, when you do so, remember to add the baking powder about 5 minutes before you actually make the crêpes; not earlier.

After refrigeration, whisk the batter to get a smooth, slightly more fluid consistency.

crepe batter

Heat a non-stick pan over a medium flame and add a drizzle of the butter. Don’t let your pan smoke.

Now, add about 1/3 cup batter and swirl it around to completely cover the bottom of the pan or until it reaches the desired size. Cook for about 2 – 3 minutes, until the crêpe looks slightly transparent or until the underside of crêpe is golden brown. Then, using a spatula, loosen the edges slightly and flip the crêpe once, using your fingers.

just flipped crepe

Let the crêpe cook for another minute, then slide it into a plate. Remember, the key is to flip it only once and not more. Give it a try and you can’t go too wrong (and even if you do, you can still eat it).

Repeat the procedure until the batter lasts.

Making the topping/stuffing

With the pan still on the stove, quickly slice the bananas. Add the remaining spoon of sugar to the pan and just when it begins to melt/caramelise (don’t go too far or you’ll be left with hard caramel), toss in the bananas until they are lightly coated and golden brown. Take them off the pan.

Note: You can avoid this step altogether and use plain sliced bananas (without the caramel coating). That’s what I did since the caramel makes the dessert too sweet for my taste.

Serving the crêpes

You have various options here…

  1. Lightly brush the smooth side of the crêpe with some melted chocolate/Nutella/chocolate sauce. Line up some of the banana slices in the centre. Roll up the crêpe and serve.
  2. Lightly brush the smooth side of the crêpe with some melted chocolate/Nutella/chocolate sauce. Line up some of the banana slices in one quarter of the crêpe. Fold the crêpe into that quarter and serve.
  3. Fold a plain crêpe into a quarter and place it on a plate. Toss a few banana slices onto the crêpe. Drizzle some melted chocolate/Nutella/chocolate sauce over it and serve.

crepes and chocolate shavings

Bon appétit! I hope this comfort food gives you all the comfort, joy and heavenly bliss it gave me!

Pepper Chicken Noodles

Noodles. Pepper. Chicken. What more can I ask for on a pleasant, laid-back Sunday afternoon?


“Noodles? I can’t eat noodles; there’s too many of them. No matter how hungry I am, 1000 of anything is too many.” – Mitch Hedberg
 The Fact: Contrary to popular belief, Marco Polo did not discover pasta; was only the first to write about it.
The Inspiration: Ghostly silence until 11am (to allow you to stay under the covers); cheerful country music to wake you up; a mindless, laid-back, workless day; un-put-down-able Pepper Chicken Noodles for when the stomach growls; your favourite people for company… that’s what Sundays are made of! 
… and yes, also the fact that I hadn’t stocked up on my regular supplies for the week, and so, apart from two packets of Hakka noodles, 2 frozen chicken breasts, 1 carrot, 1 red pepper, and 1 yellow pepper, I pretty much had nothing to cook …

The Ingredients

Approximately 6 servings
  • 2 packets of vegetable or egg noodles of your choice (approx 300 – 350gms)
  • 150 gms boneless chicken
  • 2 green chillies (de-seed the chillies if you can’t tolerate spice)
  • A thumb-sized piece of fresh ginger
  • 1 large or 2 medium-small onion(s)
  • 2 medium-sized peppers (use different coloured peppers for a more colourful dish)
  • 1 large carrot
  • 2 soup cubes
  • 4 tablespoons Dark Soy sauce (I used Ching’s Secret)
  • 4 tablespoons All-In-One Stir-Fry sauce (I used Ching’s Secret; you can use any brand that’s easily available)
  • 2 tablespoons tomato ketchup
  • 2 tablespoons vinegar
  • Butter or olive oil (olive oil being the healthier option)
  • Salt to taste
  • Freshly ground black pepper

The Method

Boil the noodles as per instructions on the packet. Drain the noodles, run cold water through them to stop them from cooking further and then, drizzle some oil on them to prevent them from sticking. Set aside.

In the meantime, slit the chillies, finely chop the garlic, julienne the carrots and capsicums, slice (not chop) the onions, and dice the chicken into medium-sized bits.

Heat a wok with about 3 tablespoons of butter or olive oil (use olive oil as the healthier option). When the oil is hot, drop the chillies and chopped ginger into the oil. Without letting the ginger burn, quickly add in your onions.
Sauté the onions for about 2 – 3 minutes. When the onions appear translucent (don’t let them lose their crunch), toss in the carrots and stir for about 2 minutes. Then, toss in the capsicum briefly for about a minute.

Add 1 soup cube, half a teaspoon of salt and about 3/4th tablespoon of freshly ground pepper.

peppernoodles2

Stir the veggies and empty them into a plate.

Heat the wok again and add a sliver of butter or a drizzle of oil to it. When the butter/oil has heated, add the diced chicken and stir continuously till the pink of the chicken is no longer visible (about 1 – 2 minutes). Scoop out the chicken bits and set aside.

In the same wok, stir in all the sauces—the soy, stir-fry sauce, ketchup and vinegar. Toss in the noodles for a few seconds (do not stir to prevent the noodles from breaking or becoming a mash). Sprinkle the noodles with the second soup cube, salt to taste, and 1 tablespoon of freshly ground pepper. Feel free to add more pepper if you enjoy spice or then, tone down the pepper to your liking. Toss again for a few seconds. Add in the veggies and the chicken bits. Toss once more and voila, you’re done.

And since I don’t believe in reheating noodles (though I will if I absolutely have to), enjoy the dish while it’s hot! Add a glass of white wine or even a coke to your meal and maybe, the book you’re reading or a movie of your liking, and you’re pretty much set.

Bon appétit! Here’s hoping the door bell doesn’t ring 🙂 … at least not just yet…!

Roast Chicken

There’s nothing better than a piping hot, straight from the oven, moist, tender, gloriously golden-brown, aroma-filled roast chicken on a bed of roasted veggies!


“A hen is only an egg’s way of making another egg.” – Samuel Butler
The Fact: Gainesville, Georgia, in the United States, is the “Chicken Capital of the World”. There, eating the meat with a fork is considered illegal.
The Inspiration: I love chicken! My entire family will vouch for it. To me, chicken is an indulgence; an experience all by itself. I can eat it in any form and any combination, although, on some days, nothing can ever beat the straight from the oven, piping hot, moist, tender, gloriously golden-brown, aroma-filled, roast chicken served on a bed of roasted veggies.
I’ve been making and eating, actually, eating (thanks to my mum and mother in law) and making chicken all my life. But in my household, somehow, a majority of the time, we ended up combining chicken with some gravy and eating it with our staple, rice. I’m not complaining, like I said, I love the bird. But ever since I got married, experimentation has gotten so exciting, with my favorite guinea pig, Ally (my husband) and me for samplers. So trial and error is my thing now, and that’s exactly how I stumbled on to this glorious recipe. It’s something I created in my kitchen on Easter Sunday with whatever I could find in my kitchen. I do hope you enjoy this recipe!

The Ingredients

  • 1.5 – 2 kg chicken (whole; with skin) Switch the chicken with turkey for a beautiful Thanksgiving meal.
  • 2 medium-sized onions
  • 2 carrots
  • 2 tomatoes
  • 5 – 6 baby potatoes
  • 150 gms mushrooms
  • 1 big apple
  • 1 orange
  • 2 sticks celery
  • 1 bulb garlic
  • Olive oil or melted butter (use olive oil for a healthier meal)
  • 2 lemons
  • 1 small bunch fresh thyme, rosemary, bay or sage, or a mixture
  • Kosher or coarse salt
  • Freshly ground black pepper
  • 3 feet of twine

The Method

Buying your chicken

Since chicken is an easy-to-find ingredient in my locality, I simply run down to the local chicken shop or the supermarket and pick up any whole chicken, with the skin intact and the insides cleaned. I also look for a chicken with thighs that have that perfect swell to them. This usually means a higher fat content, which also means a juicier and a more moist chicken. The breasts are too lean for my taste; however, this is something that’s up to you—based on your liking and your health.

When it comes to picking the right size, simply weigh your chicken. I prefer a 1.5 – 2kg chicken, which suffices for about 4 – 6 people, and also leaves a little for when you get home late with a growling stomach.

Preparing your chicken

  • Before you begin, wash your chicken thoroughly—inside and out, and also under the skin. Then, drain the chicken.
  • Ensure that your chicken is kept at room temperature—either fresh or refrigerated, but kept out of the fridge for at least 30 minutes before cooking. This is important to prevent your chicken from cooking unevenly or drying out. If you cook cold chicken, the heat dries out the meat on the outside before the inside is done. Room temperature meat cooks more evenly and fewer juices leak out or evaporate during cooking.
  • Preheat your oven to 240°C/475°F.
  • Take a tray or baking dish that has enough space to hold your chicken along with all the vegetables. Also ensure that your tray is hollow enough to hold all the juices that ooze out while your chicken and veggies are cooking. If not, all the juices will spill over and you’ll have quite a task after your chicken’s done.
  • Break the garlic bulb into cloves. Peel about 10 – 12 cloves and leave the remaining cloves unpeeled. Roughly smash the peeled cloves. I used a mortar and pestle; you can smash it any way you like. Add the juice of 1 lemon and about 2 tbsp of melted butter to the mashed garlic. Season this concoction with salt and freshly ground pepper.
  • Dry your chicken with a kitchen towel. Don’t ignore this step. Then, using a fork or a skewer, prick the bird all over. This will help any marinade or seasoning to easily seep into the meat rather than stay on the surface. Place your chicken in the baking tray or dish.
  • Pour 3/4th of the garlic concoction all over the chicken and using your fingers, rub the marinade in; don’t forget to go under the skin and into the chicken cavity as well. The more the seasoning seeps in, the tastier your chicken will turn out. Leave your chicken to marinate for about 20 minutes.
  • Take all your veggies (along with the apple; not the orange), but don’t peel them (except the onions of course); I know I didn’t. Wash your veggies thoroughly under running water, along with a soft brush if required, and then, roughly chop them. Note that you can throw in any additional veggies you like or can skip the ones you don’t quite fancy.
  • Take the tray in which the chicken is resting, lift the chicken and pile in all the veggies (under the chicken), along with some of the unpeeled garlic cloves. Drizzle the remaining garlic concoction and about 2 tablespoons of olive oil (or melted butter) over the veggies. Then, place the chicken over the pile of veggies.
  • Prick the remaining lemon all over, using the tip of a sharp knife or pop it into the microwave for about 30 seconds. (This will bring out the lemony flavour). Place the lemon inside the chicken’s cavity, with the bunch of herbs.

Trussing your chicken

Trussing or tying up your chicken snugly is an important part of roasting chicken. While a lot of chefs prefer to leave this out completely, which is also alright, I prefer to truss the chicken for several reasons—it makes for better presentation and prettier photos, it makes the chicken more compact and helps it cook evenly (by retaining heat and moisture), and it also prevents the tips of the wings and legs from burning.

Place your bird with the breast upwards. Place the twine horizontally under the tail bone or the end of the cavity. Then, hold the legs together, cross both ends of the twine across the chicken and pull the twine tightly. Now, taking the twine ends upwards, towards the neck of the bird and away from you, cross the twine around the wings and completely across the neck as well, tie the twine beneath the neck. Honestly, you can truss the chicken in any way you prefer, as long as the wings and legs are held close to the body of the chicken.

Cooking your chicken

With the trussed chicken placed (breast upwards) on top of the vegetables in the roasting tray, cut your orange in half and squeeze some fresh orange juice over the chicken and the veggies. Pop the tray into the preheated oven. Turn the heat down immediately to 200°C/400°F and cook the chicken for 1.20 hours, which is the ideal time to cook chicken. A lot of chefs prefer to add the potatoes a little later, but on trying their method, I found my potatoes slightly undercooked. So I suggest tossing them in right away.

After about 35 – 45 minutes, check on your chicken. You will notice a lot of juices collected in the tray. Open your oven door and scoop up the juice, only to pour it right back over the chicken and the veggies. Keep doing this until the chick looks nice and moist. Don’t let too much of the heat escape while doing this, so hurry. If you notice that the veggies look dry, add a splash of water to the tray to prevent them from burning.

After 1.20 hours, remove your tray from the oven. Alternately, using a meat thermometer, check if the temperature of the inside of the bird has reached about 70°C/160°F. Remember that your chicken will continue to cook even after you remove it from the oven. Its temperature will gradually increase to 74°C/165°F, after which, it will start to cool. At this point, transfer the chicken to a board to rest for 15 – 20 minutes. Resting the bird allows the juices that were released to be absorbed back into the meat, which is the lovely flavor that you do not want to forego. To retain the heat, cover the bird with some tinfoil.

Making the gravy

Although I love serving the roast chicken just like this, as you can see in the picture, you could also keep the chicken aside and use the veggies to make a lovely gravy.

For the gravy, sauté all the veggies in some butter, along with about 1 tablespoon of flour. Preserve some of the veggies and mash the remaining, finally, passing the mash through a sieve. Bring this liquid to a boil while seasoning it with salt and pepper.

Carving your chicken

  • Remove any twine from the chicken. Using a carving knife, cut down between the leg and the breast of the chicken. Then, cut through the hip joint and bend the leg backwards until the hip joint pops out. Repeat on the other side.
  • Next, cut off the wings from both sides.
  • Next, cut through the drumstick-thigh joint on both pieces. You should end up with four portions. Now, angle the knife along the breastbone and carve one side off, then the other.
  • Place the carved portions on a serving platter. Pour some of the homemade gravy over the carved portions and serve hot.

To see how this is done, check out this link: http://www.wikihow.com/Carve-a-Chicken, or look it up on YouTube.

Note: Throwing the remaining carcass away is a sin. Using your fingers, pull all the meat off. Don’t forget to turn the carcass over and get all the juicy bits from underneath.

And while the fight for the ‘prized’ chicken leg continues at my Easter dinner, please tuck in. Bon appétit!