I believe in kicking off the winter with this crunchy-crusted, warm, moist, and totally droolable apple pie. And so should you!
“If you want to make an apple pie from scratch, you must first create the Universe.” – Eugene FieldThe Fact: The term “as American as apple pie” traces back to 14th century England. The Pilgrims brought pie-making skills and apple seeds to America. As the popularity of apple pie spread, the phrase grew to symbolize American prosperity. The Inspiration: Whether I plan it or not, winter, in my house, is born with the not-so-ceremoniously baked and eaten apple pie. It’s a thrill—the buying of the ingredients, the baking, of course, the lovely, warm apple and cinnamon smells that waft through my home. Like, I said, it almost christens the winter, my favourite season. The sequence played out this winter too, but this one was special—it was the first ever apple pie in my lovely new home. And like always, it was perfect!
The Ingredients
Serves one 9-inch pie; approximately 10 servingsPie Crust
- 2½ cups (350 grams) all-purpose flour
- 2 tablespoon (30 grams) granulated white sugar
- 1 cup (226 grams) chilled butter
- 1 teaspoon salt
- ¼ to ½ cup (60 – 120 ml) cold water
Apple Filling
- 8 cups peeled, cored, chopped or sliced (¼ inch pieces) apples; remember to use an apple variety that is crisp (not powdery) and doesn’t lose shape easily. The apples should be sweet; preferably a variety that you’ve sampled before and are familiar with.
- ½ cup (100 grams) granulated white sugar; you can also use a combination of white and brown sugar
- 1 tablespoon lemon juice
- 1 – 1½ teaspoon ground cinnamon
- ¼ teaspoon ground nutmeg (optional)
- ¼ teaspoon salt
- 2 tablespoons (30 grams) butter
- 1½ tablespoons corn starch or corn flour
The Method
Making the Pie Crust
- Chop the butter into ½ inch pieces. Try to use your fingers as little as possible to prevent the heat from melting the butter.
- Sift together the flour, sugar, and salt. Add the butter and lightly knead together until the mixture resembles coarse meal. Remember that the more your fingers touch the mixture, the faster the butter will melt, which is what you do not want. Alternately, you could use a food processor.
What this step does is it coats the flour molecules (or the glutenin and gliadin) with fat, preventing them from absorbing too much water in the next step. Water when in contact with wheat flour forms gluten, which makes dough elastic. But for preparations such as pies and tarts you do not want too much gluten to form because it makes the dough tough and gives it structure, which works for breads but not for soft, flaky crusts.
- Sprinkle the cold water across the mixture and gently bring the dough together. Do not pour in the water. Stop when the dough just holds together when pinched. If necessary, add more water. Do not knead or process more than a minute.
- Form a ball of the dough and divide into 2 portions. Lightly flatten each ball using your palms. To prevent the dough from sticking to your palms, sprinkle the dough with loose flour.
- Cover each disk with plastic wrap and refrigerate for about one hour before using. If you do not cover the disk, it will harden and cracks will form, making it difficult for you to roll the pie.
- After sufficient chilling, remove one portion of the dough from the fridge and place it on a lightly floured counter. Using a rolling pin, roll the pastry into a 12-inch circle. Remember to sprinkle the rolling pin and counter with loose flour to prevent the dough from sticking. As you roll, keep turning the pastry circle a little each time. This will allow you to roll out a uniform pie. Also, always roll from the centre of the pastry, outwards.
- Gently transfer the rolled pastry circle to a 9 inch pie pan. You can do this easily by folding half of the pastry circle over the rolling pin and then moving the rolling pin to the pie pan and unfolding it. Brush off excess flour and trim the edges of the pastry to fit the pie pan. Cover with plastic wrap once more and chill in the refrigerator.
- In the same way, roll out the second pastry disc. Cover with plastic wrap and place in the refrigerator.
Making the Apple Filling
- In a large bowl combine the sliced or chopped apples, sugar, lemon juice, ground cinnamon, nutmeg, and salt. Gently toss the mixture so that all the apple pieces are lightly coated with the other ingredients.
- Allow the mixture sit at room temperature for about 30 minutes or more to allow the juices to seep out. Now, place the mixture in a strainer and collect the juices separately. Allow the juices to drain for 30 minutes or until you have about 1/2 cup of juice.
- Lightly boil and caramelize the collected juices with 2 tablespoons of butter in a saucepan. Heat for about 5 minutes or until the liquid has formed a lovely caramelized syrup and has reduced to about 1/3 cup. You can also use a microwave to form the syrup.
Putting together the Apple Pie
- Remove the pastry crust (the one in the pie pan) from the refrigerator and allow it to soften at room temperature for about 15 minutes.
- Transfer the drained apples slices from the strainer to a large bowl. Sprinkle the mixture with corn flour. Now, pour the syrup over the apples and toss the mixture to coat the apple pieces.
- Transfer the apple mixture into the chilled pie crust, evenly.
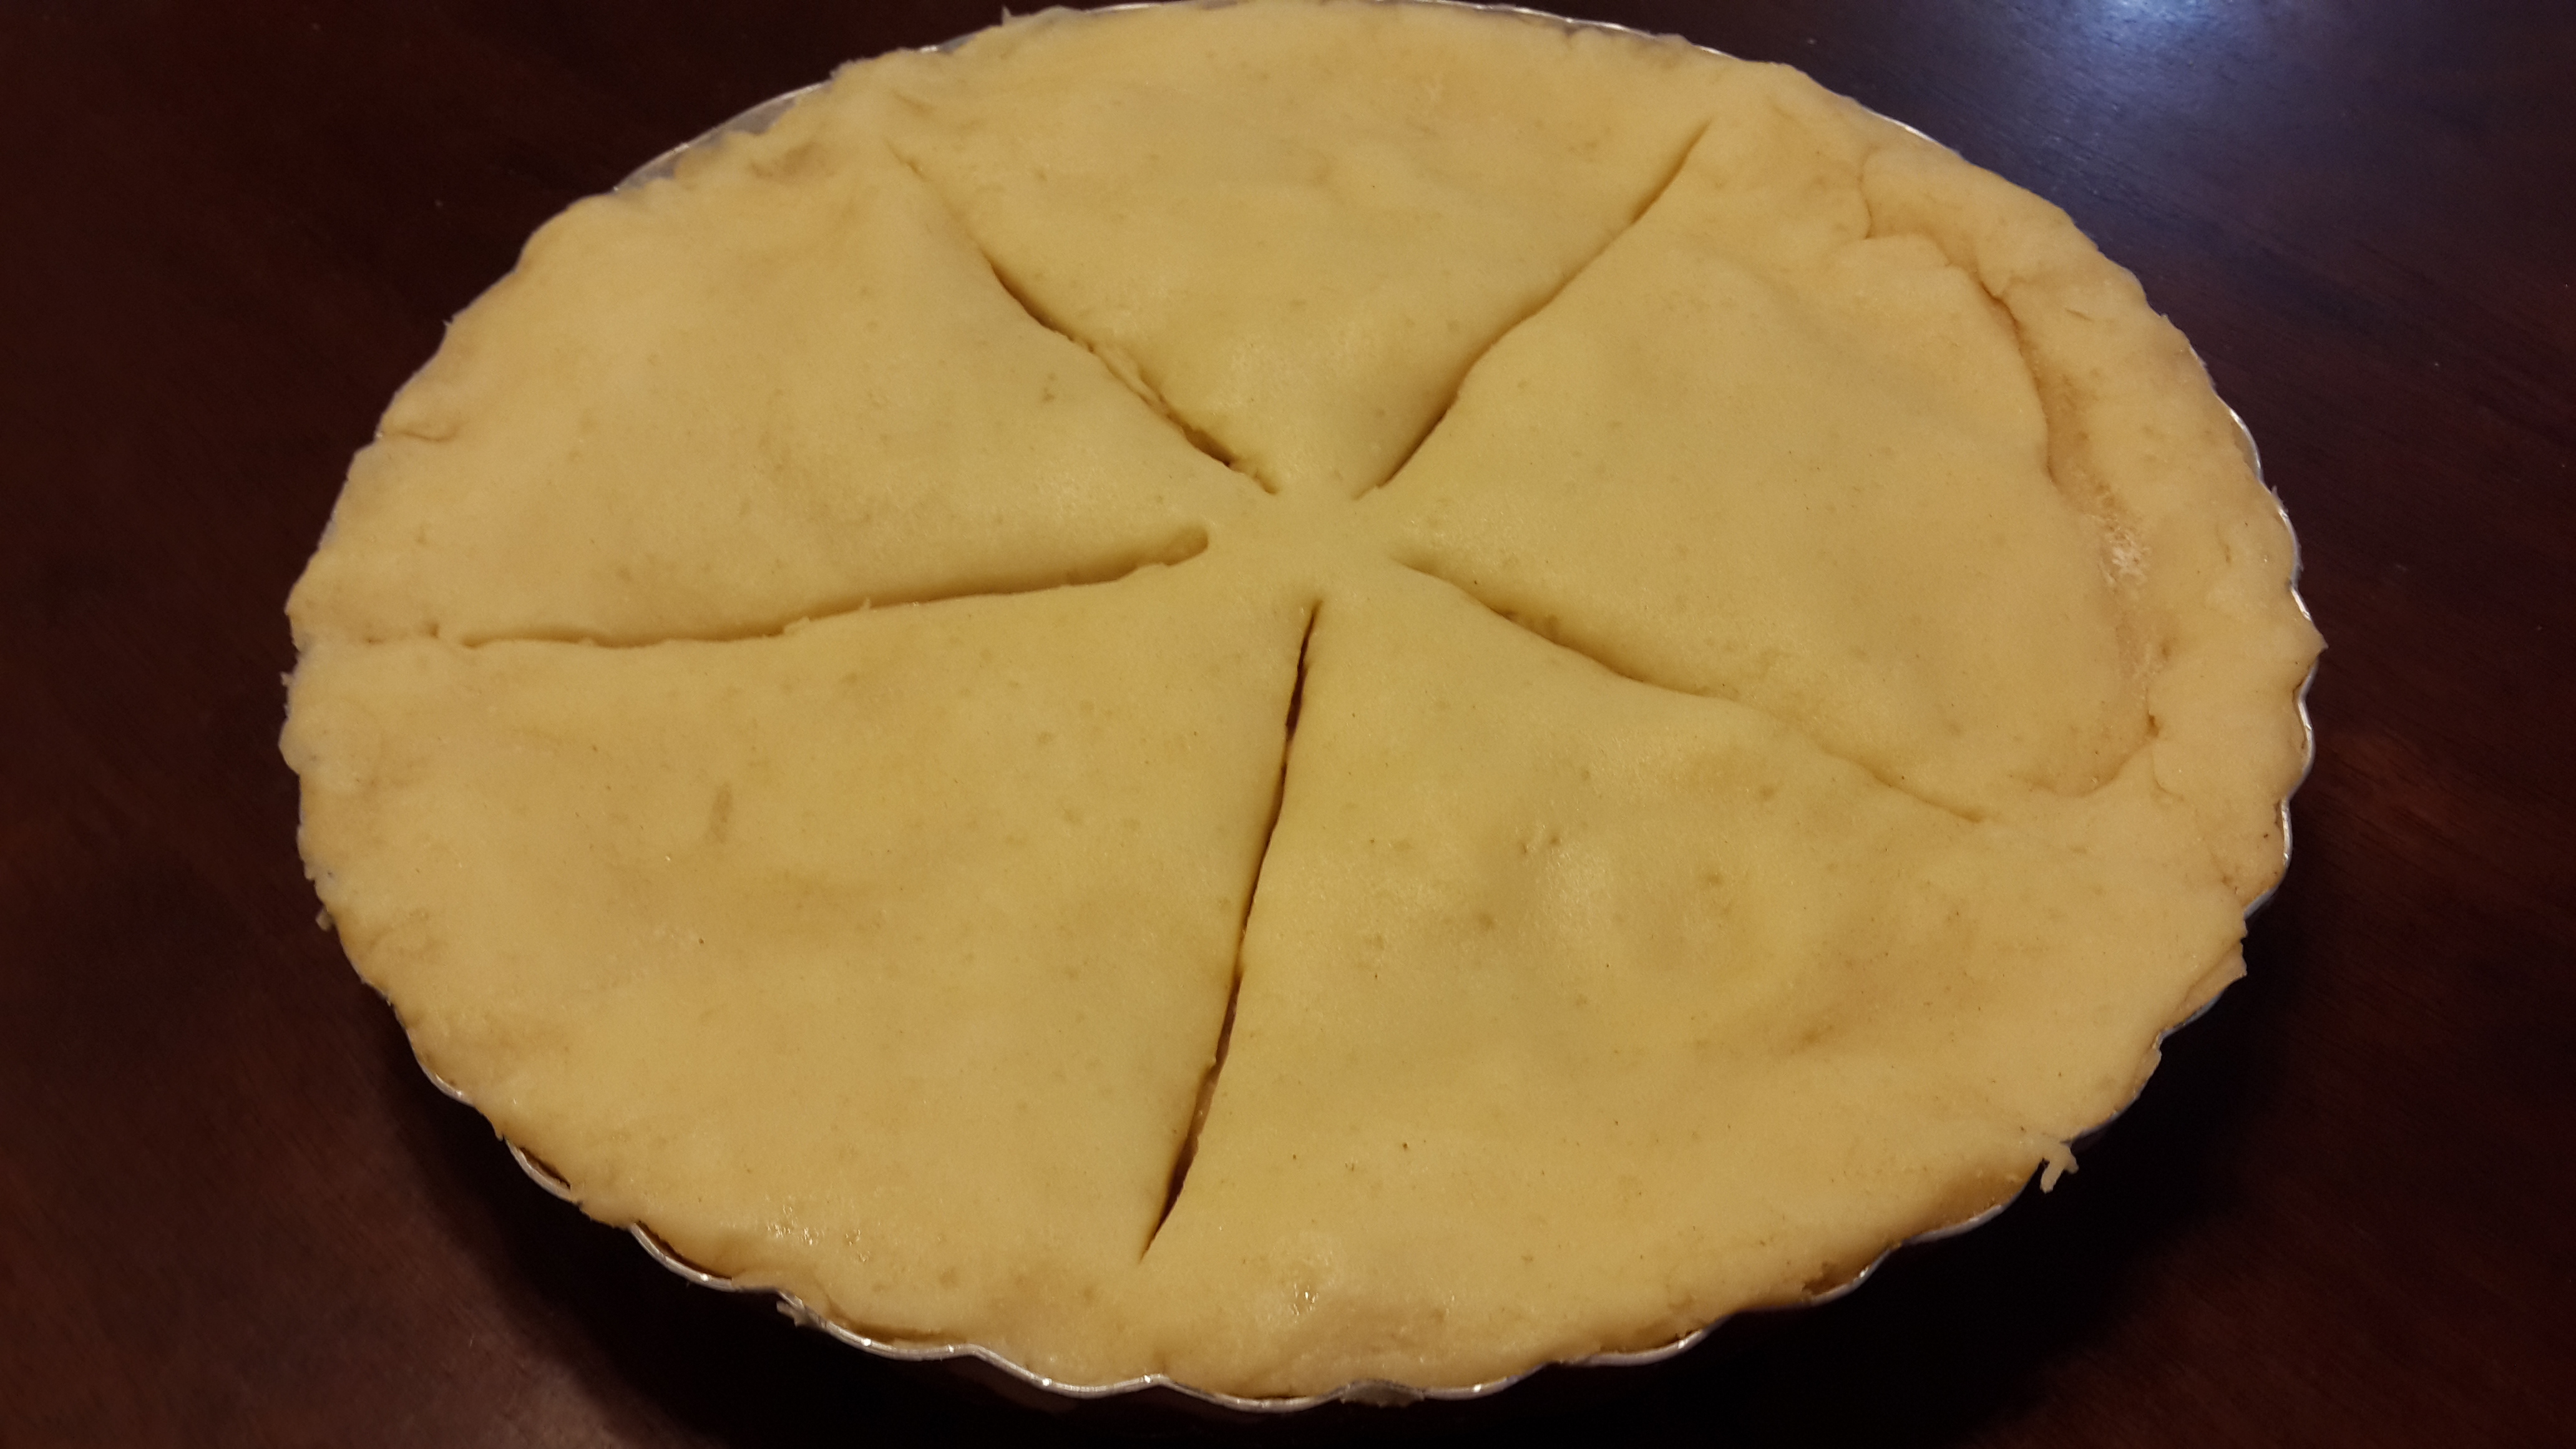
- Moisten the edges of the pie shell with a little water and then place the top crust over the apples. Gently press the edges together.
- Tuck any excess pastry under the bottom crust and then crumple the edges using your fingers.
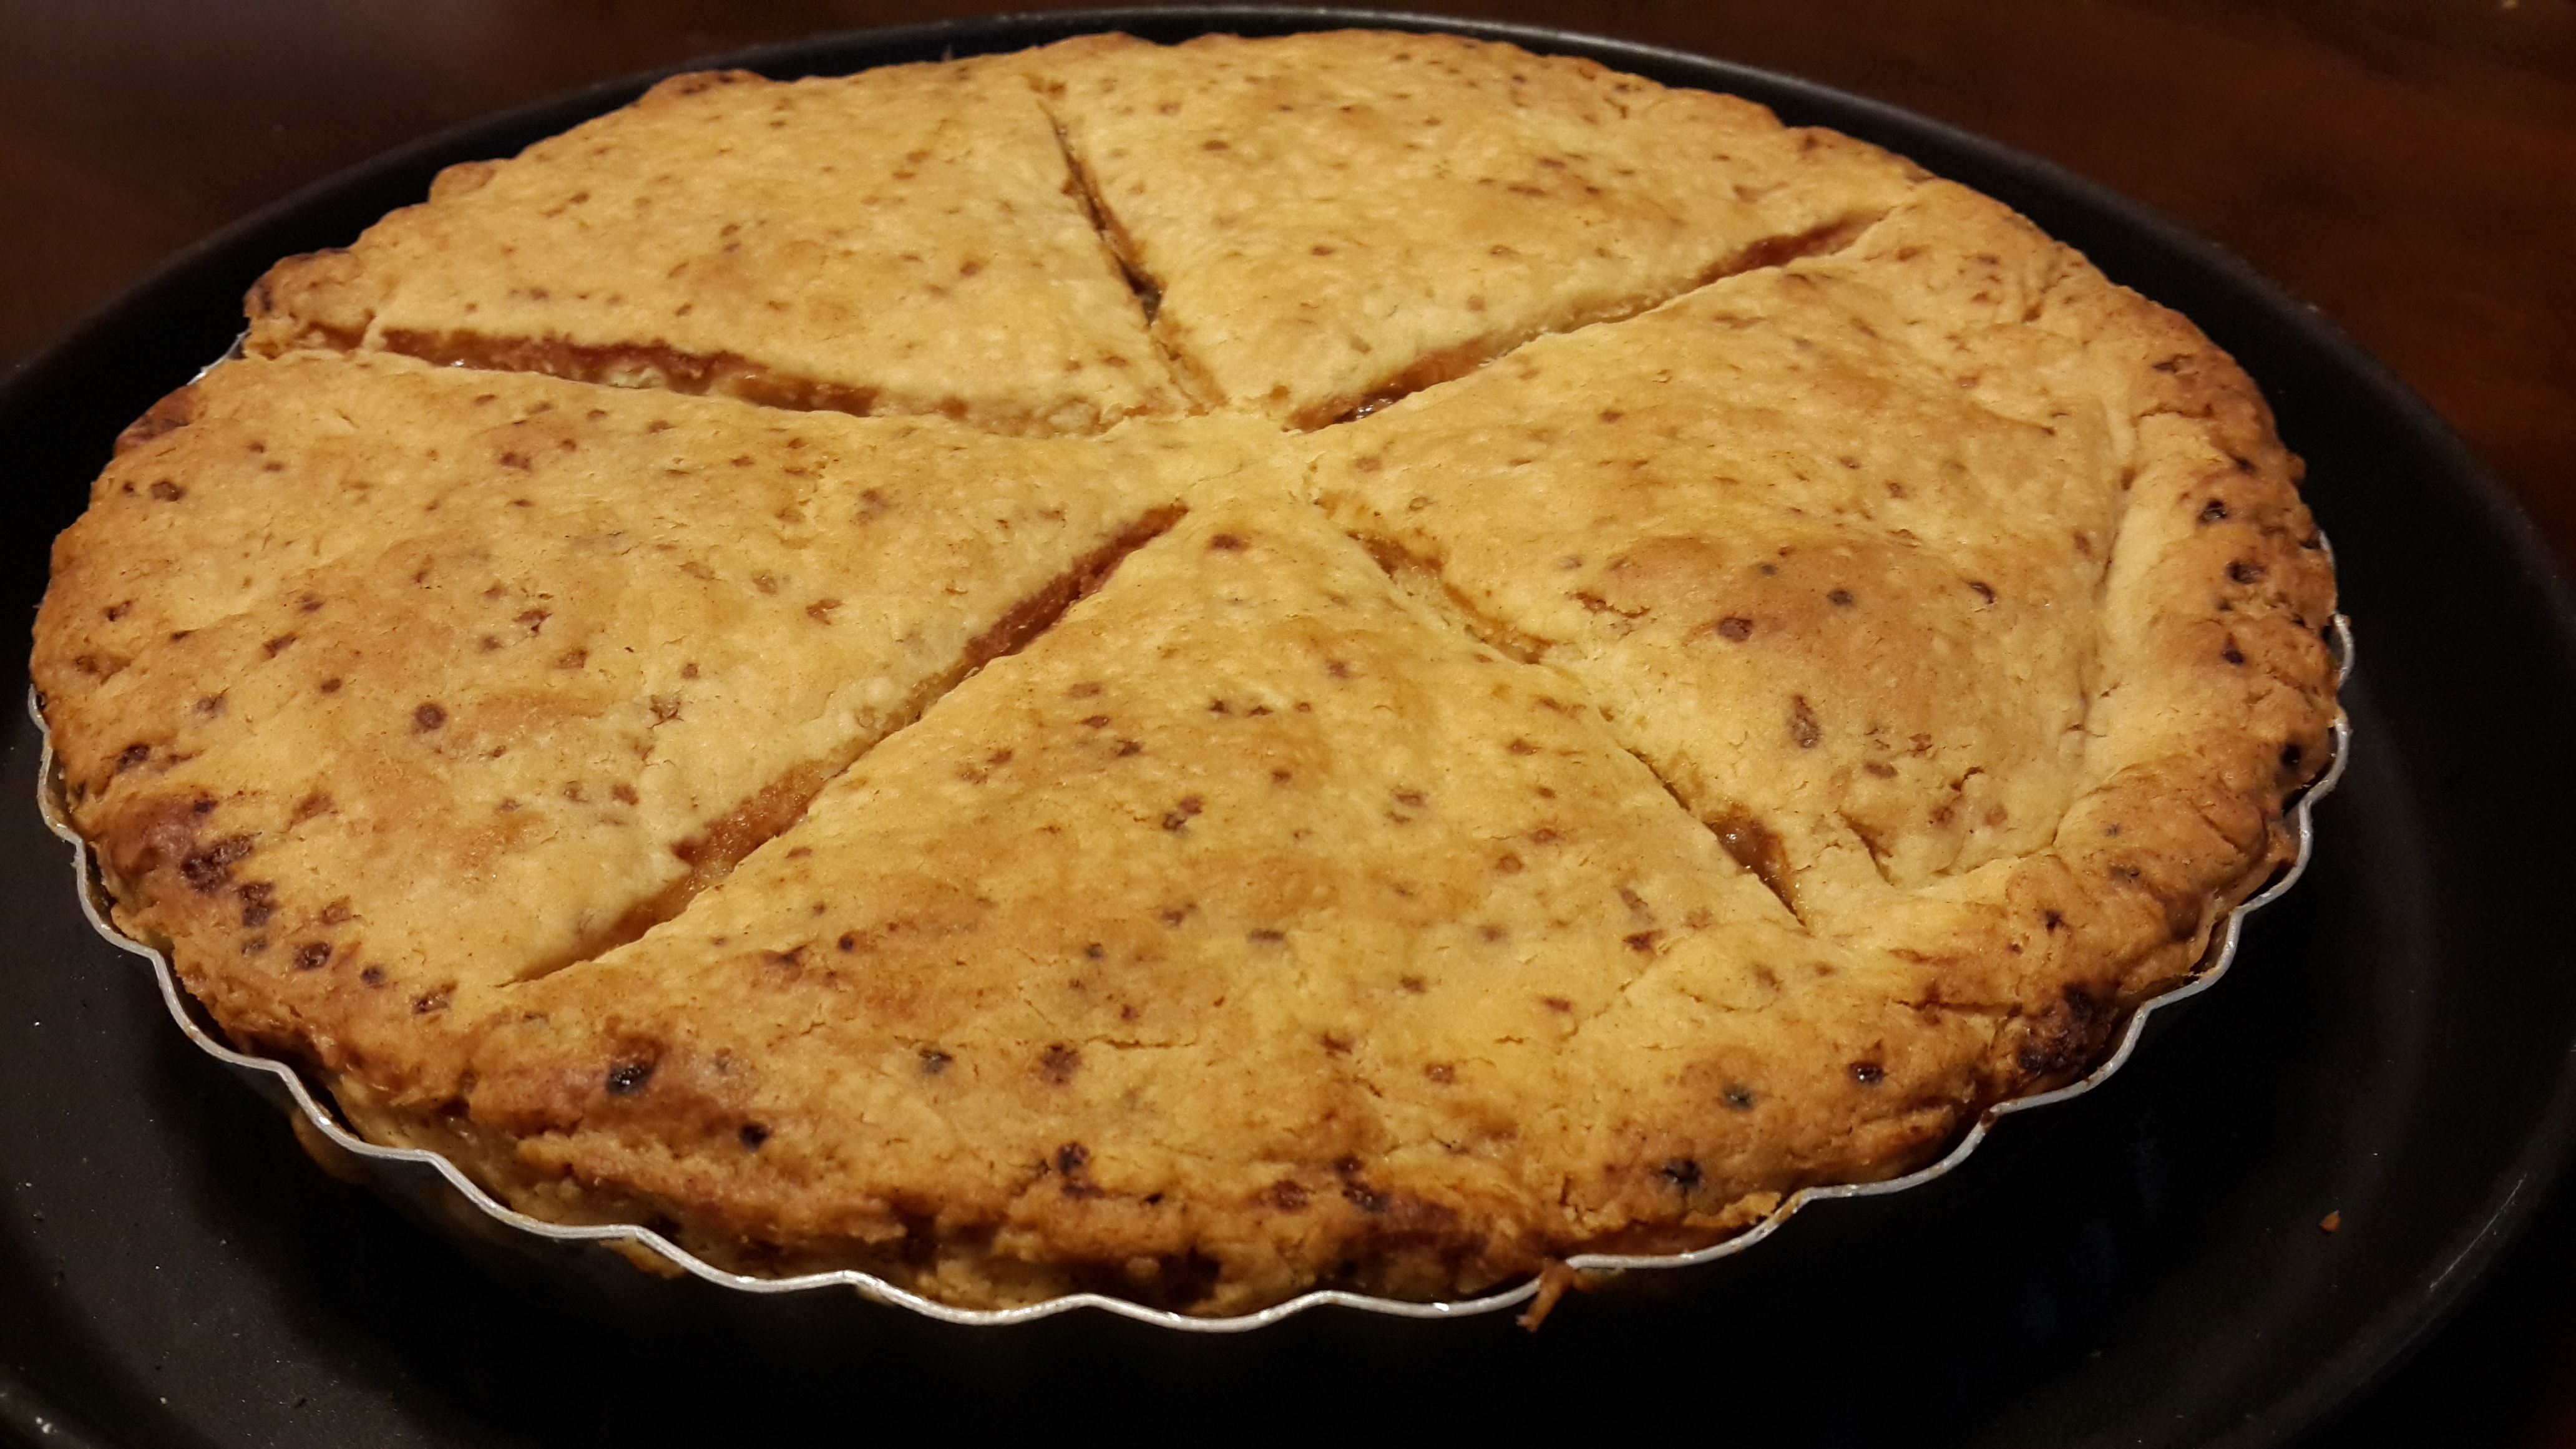
- Using a sharp knife, make five- 2-inch slits from the centre of the pie outwards. This will allow steam to escape.
- Cover the pie with plastic wrap and chill in the refrigerator while you preheat the oven.
Baking the Pie
- Preheat the oven to 425°F (220°C).
- Cover the edges of the pie with a foil ring to prevent it from burning after about 30 minutes.
- Place the oven rack at the lowest level. You could also place a baking sheet on the rack before preheating the oven to catch any apple juices. Note that if your oven tends to overheat, use a baking stone and raise the pie pan to prevent the bottom from burning.
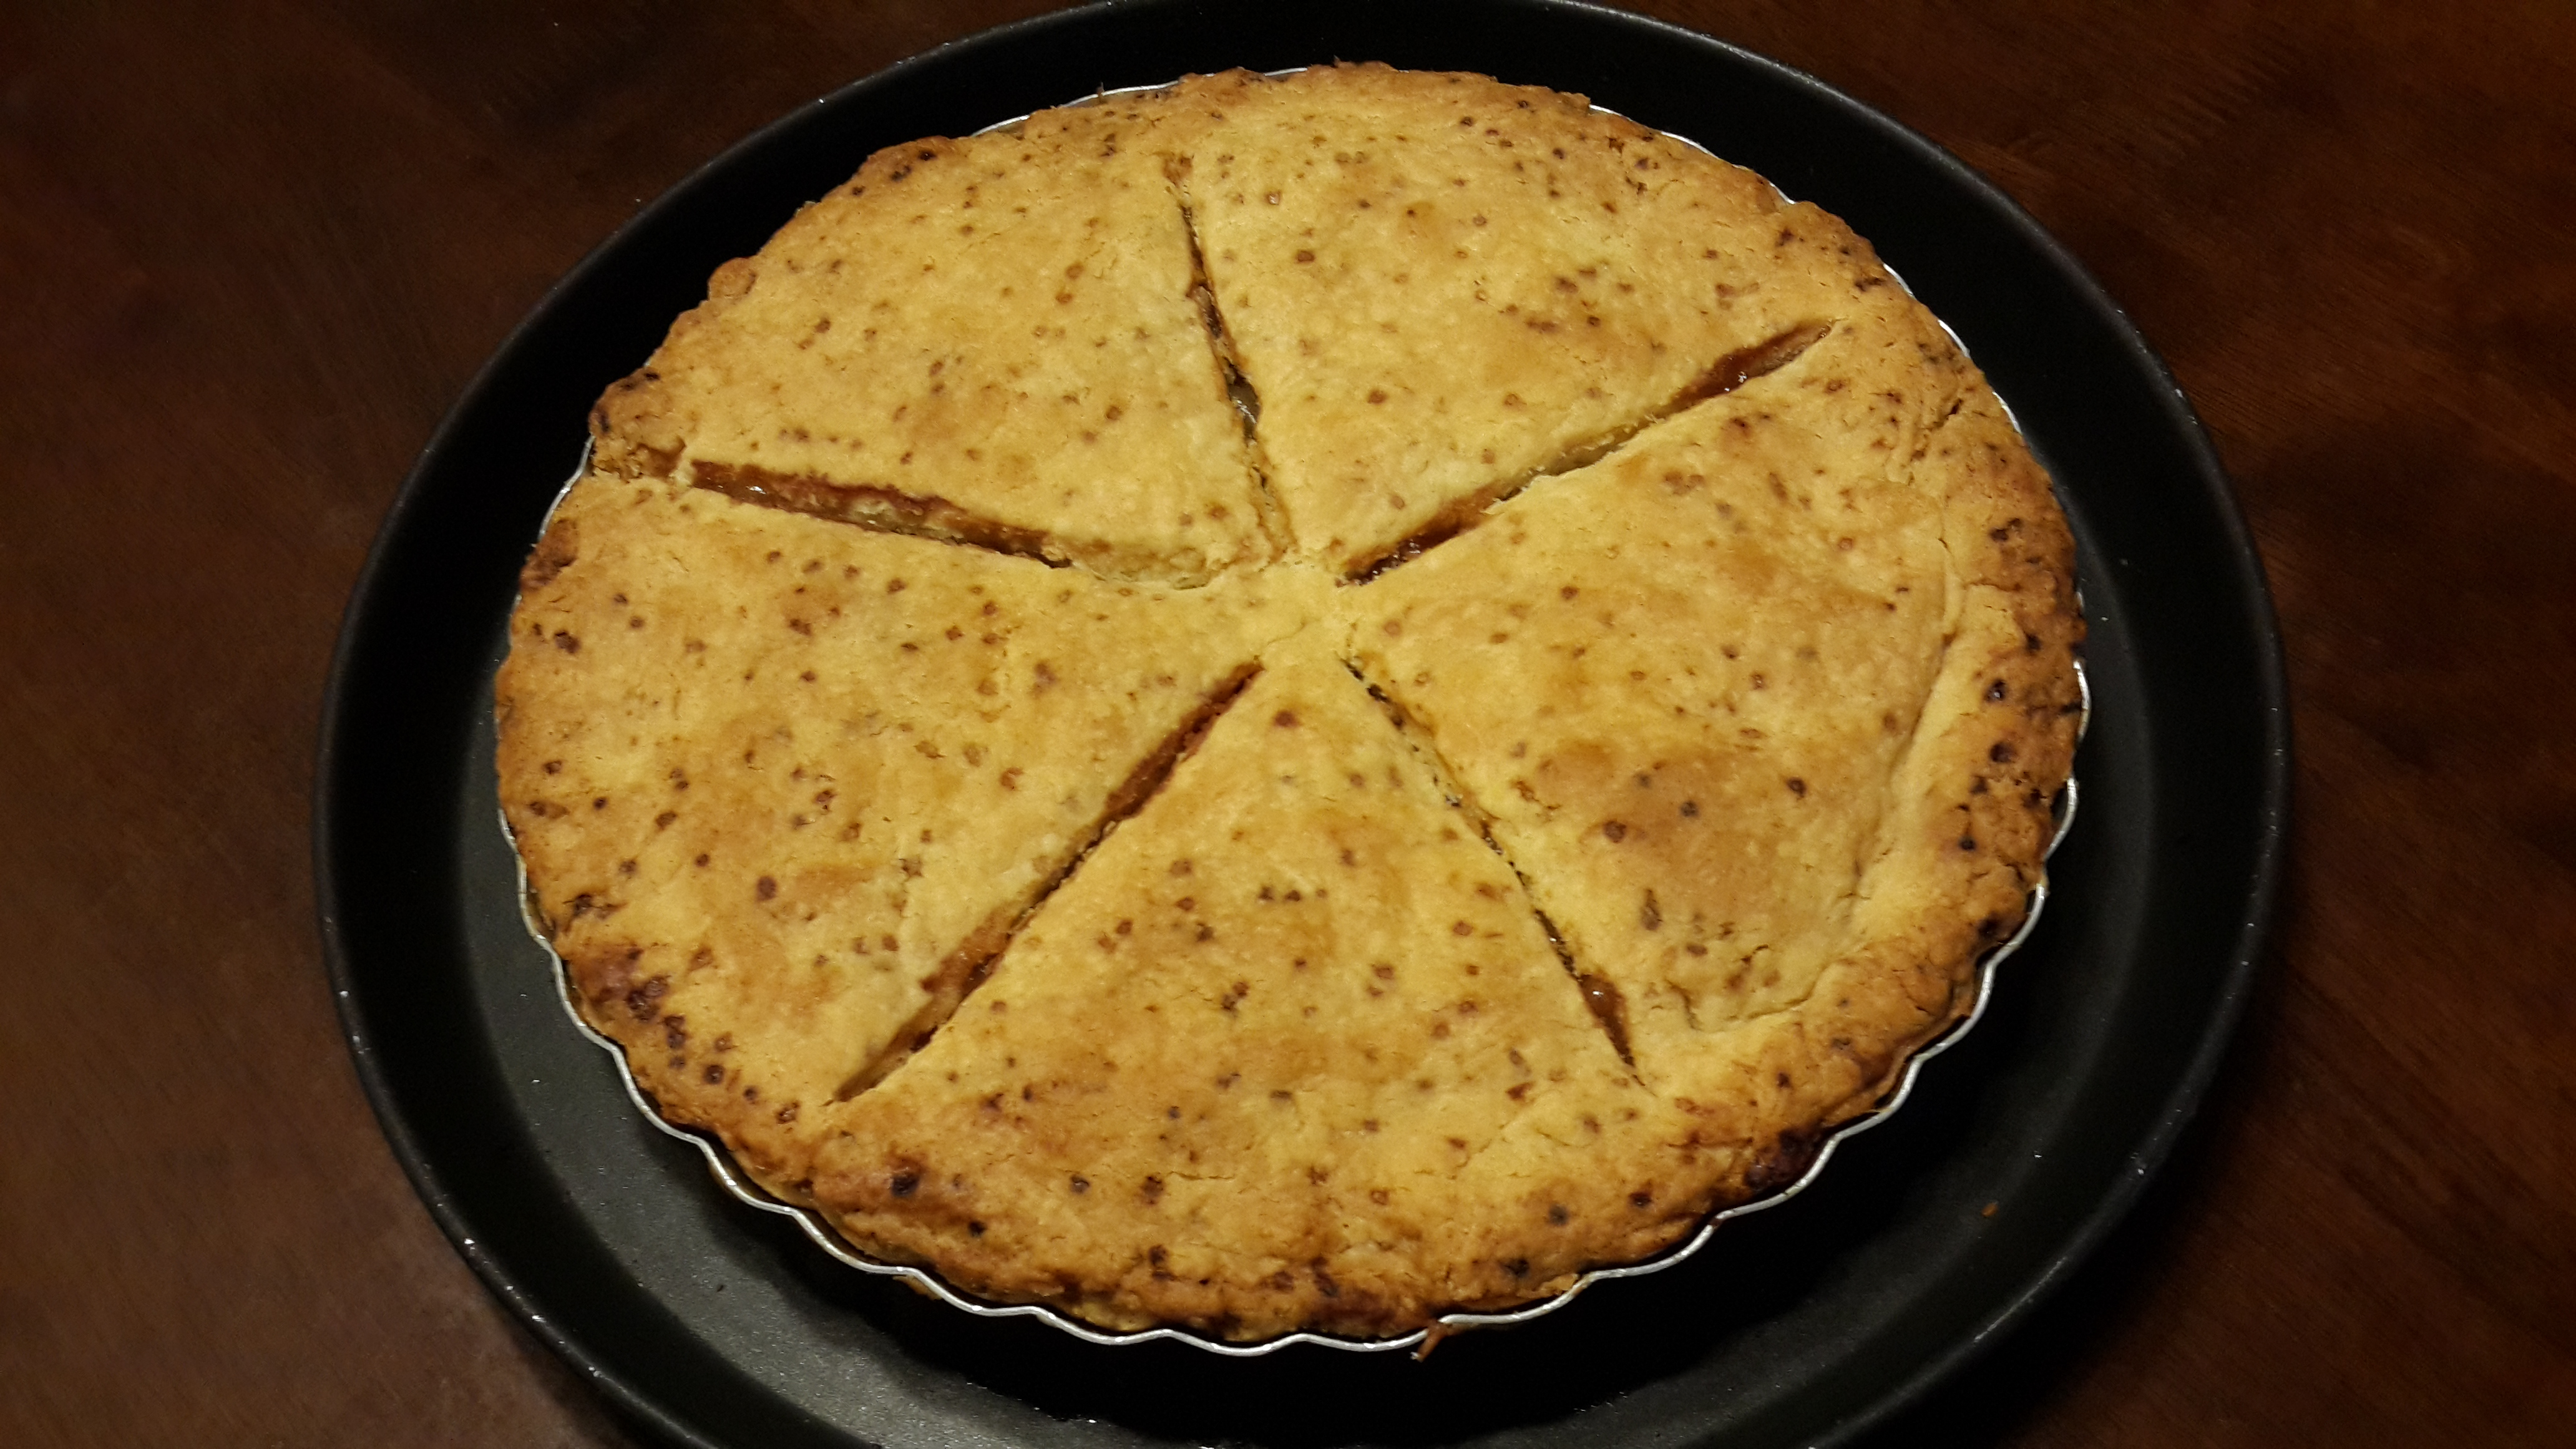
- Place the pie on the rack and bake for about 50 to 55 minutes.
- Pull the pie out when juices start to bubble through the slits and the apples feel tender (not mushy) when a toothpick is inserted through one of the slits.
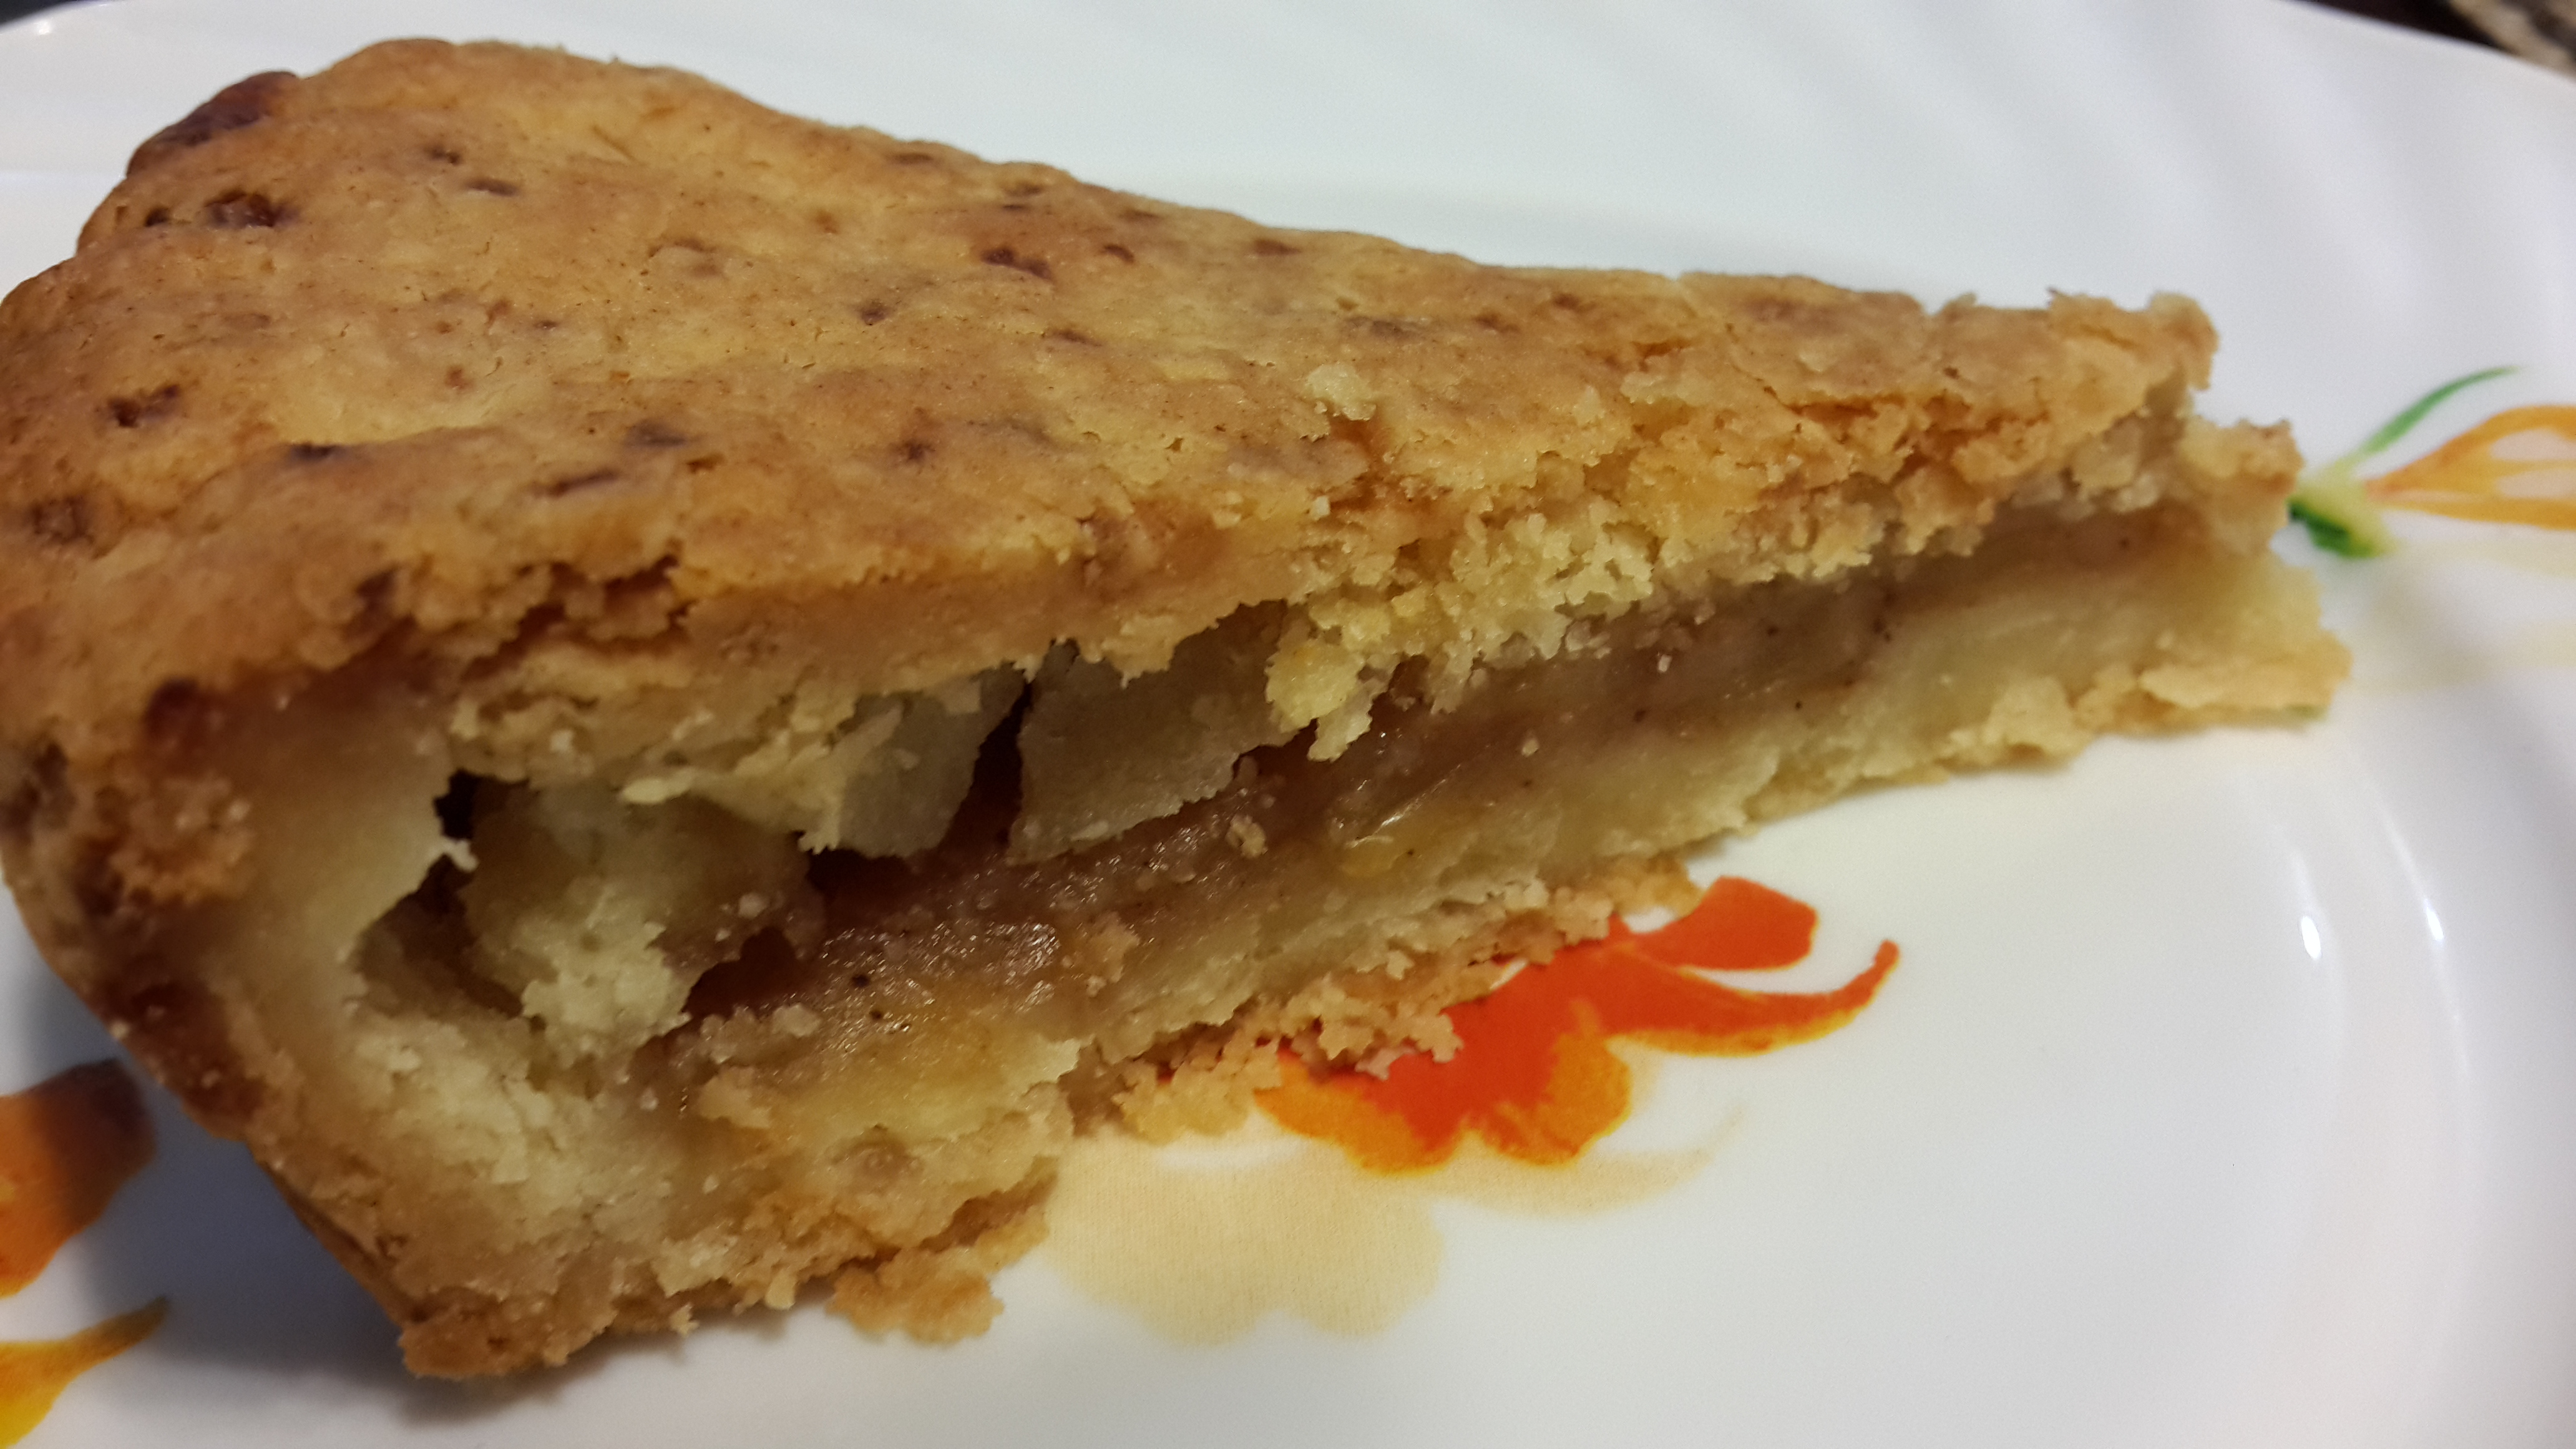
Serving the Pie Remove the pie from the oven and place on a wire rack to cool for about 3-4 hours before cutting. Serve warm or at room temperature. It’s practically impossible to wait, but trust me, resist it; it’s totally worth it. The wait allows all the juices to seep pack into the filling, thus making for a divine, moist apple pie, with a crisp pie crust. You can store the pie at room temperature for 2 to 3 days. It might not survive, but if it does, refrigerate after Day 3. Have the pie for dessert, at tea time or just about every time you walk by the kitchen. You can serve it with vanilla ice cream or whipped cream, but the original, plain pie, is the best, in my opinion. Bon appétit!
#ApplePie #ApplePieRecipe #HomemadeDessert #PieLovers #ClassicDesserts #EasyDesserts #RecipeOfTheDay #FoodLovers #BakingRecipes
![]()


Looks yummy Marsha. Looking forward to tasting some of the stuff you have made here. Keep it up.